Showing posts with label Parmigiano-Reggiano. Show all posts

Saturday, February 23, 2019

A Shaggy Dog Story

What’s cooking? Sugar Snap Peas and Pasta


When our sons were growing up, we had a dog, a perfectly divine golden retriever named Spike. A 100% B personality – no real drive to do anything but eat, sleep, and be petted, with the occasional walk around the neighborhood. Though I now believe the walk was mostly a means to an end, for the biscuit he got on the return home.

Spike never barked. He squealed a bit when excited and he whined when it was time for dinner, but barking was much too aggressive an act.

Then one day, he got out of our yard and wandered off. I walked the neighborhood calling his name, but to no avail. I felt sure he was nearby – he was such a homebody, he wouldn’t have wandered far – but I was mostly afraid he was hurt. Then on my second circuit of our block, I started looking into the backyards of the neighbors. And there he was, trapped behind a fence. He’d gotten in but couldn’t figure the way out. He could see me and hear me calling, but he just stood there wagging his tail – no barking.

And that’s how my brain is working these days. Not long ago, in conversation with a friend, I forgot the word “infrastructure.” I know it perfectly well – but it wouldn’t come to me. I could see it wagging its tail – a long word, four or five syllables, starting with an “i,” and it had two parts. But my brain wouldn’t bark. So I said to my friend, “You know, roads and bridges...”

 “You mean infrastructure?” she said.

“Yes!! Thank you.” And we went on with our conversation.

So it’s these sorts of occurrences that remind me that I’m getting older. On the other hand,...

A group of our friends here in Austin has decided to hold “game nights” once a month. Rummicube, Sorry, canasta, backgammon,... When everyone shows up, we are 14, so sometimes we break into smaller groups and have a couple of games going at a time. Last month, though, my hubby took a game of Trivial Pursuit, so we divided into 4 teams and all played.

What an eye-opener. Turns out, everyone suffers from what I’ll call the Spike Syndrome. For instance, on the question of who played King George in “The King’s Speech,” everyone could picture Colin Firth – some could even name other movies he’d been in. But – maddeningly and hilariously – no one could call out his name.

As the game came down to the wire, my team was on the verge of winning, but we had one last question to answer: “Which Roman numerals correspond to 1,453?” Now, look away and see if you can figure it out before you read on.

As it happens, I like Roman numerals – the complete geek. So as the others on my team began calling out random letters, I held my hands out as if to calm the waters and said, “Wait – I can do this.”

All eyes were on me as I started with “M is 1000, and L is 50, and III for 3, but how to write 400? It’s C (100) less than 500, but what stands for 500? ” Arrgggh. I was having a Spike moment – I could see it wagging its tail, but... And the clock was counting down...

With about 3 seconds to go, my brain finally barked: D! “D! So it’s MCDLIII!!!” And we all cheered because we could stop the game and go home. But I basked in the glow for at least a day, that my brain, fuzzy as it might be, still works.

* * *

So it’s dinnertime, and my prince inquires sweetly (because he’s never sure how I’m feeling about the subject), “What’s for dinner, Snookums?”

Now, even in the Kitchen Goddess’s kitchen, there are those days when I say, “I have no idea.”

That usually means pizza or some other food prepared by Other People. But sometimes, if I’m honest with myself (which I try to be), I don’t really want OP food. So I check the pantry to see what form of pasta or rice we have, and stare at the contents of the fridge until something comes to mind. On the most recent such day, I seized on a package of sugar snap peas.

I checked out epicurious and found a pasta dish that included pesto made from the sugar snap peas. Then I read into the comments, and quite of few of the reviewers had eschewed the recipe pesto and combined the processed peas with some that was either store-bought or already sitting in the fridge from another recipe.

I could feel my brain warming up – of course, the Kitchen Goddess has pesto in the fridge, maybe even a couple of varieties. As you know, the KG loves pesto. And using ready-made pesto clinched the deal, because that raised the fast-and-easy factor by a huge amount. So much so that I’d like to call this Easy-Peas-y Pasta, but am afraid the pun would cause at least a few of you to gag. Which would be bad.

So here it is, and, if you’re interested, it carries a 3-fork rating out of 4, from 16 reviewers, and 100% said they’d make it again. That number will soon move to 17, as the Kitchen Goddess rates it a full 4 forks.


Sugar Snap Peas and Pasta

Adapted from Gourmet, April 2005


Makes 4 main-course servings.

Ingredients
1 pound sugar snap peas, trimmed and strings discarded
1 pound penne pasta
1 cup pesto (use any you have in your fridge, or a good variety from your grocer)*
¼ cup heavy cream
½ cup finely grated Parmigiano-Reggiano, plus optional additional for garnish
Kosher salt and freshly ground black pepper

* Kitchen Goddess note: Most pesto recipes include nuts (often pine nuts or walnuts) and Parmigiano-Reggiano as thickeners. The cheese is also there for its umami flavor. In your choice of pesto, you should note whether it has Parmigiano already in the ingredients, and taste the pasta sauce before adding the cheese, as you may not want a full half cup. If you’re interested, the KG has a very nice recipe for pistou (that’s the French version) that contains no nuts. Click here for that recipe.

Directions
Before you begin, fill a medium-sized bowl half-full of ice and water, and set aside.

In a large pot of boiling salted water (about ¼ cup salt for 3 quarts water), cook the sugar snap peas for 2 minutes, then remove about half to the prepared bowl of ice water in order to stop the cooking. Continue cooking the remaining sugar snaps for another 2-2½ minutes, until tender, then use a slotted spoon or strainer to transfer them to the bowl of your food processor or blender.

Return the cooking water to a boil and cook the pasta until al dente.

While the pasta is cooking, remove the portion of sugar snap peas from the ice water bath, and cut them crosswise into ½-inch pieces. Set them aside until the pasta is done.

To the sugar snaps in your food processor or blender, add the pesto and process until not quite smooth. Add the cream and process briefly, just to mix.

When the pasta is done, drain it, reserving ½ cup of the cooking water, and return the pasta to the empty cooking pot. Over low heat, toss the hot pasta with the sugar snap sauce and, if necessary, add enough of the ½ cup of saved cooking water to thin the sauce to desired consistency. (I added only a tablespoon or two.) Add the sliced sugar snaps and the grated Parmigiano-Reggiano, and stir gently to combine. Season with salt and pepper to taste, and serve with fruit or a green salad.


Wednesday, May 31, 2017

Bright Ideas
What’s cooking? Creamy Corn Pasta with Basil and Mint


As much as I honor the brave men and women who’ve given their lives for our country, Memorial Day inevitably reminds me of the end of the school year. At least, that’s when it ended when I was in school. We had no spring break, so no need to extend the year to recoup those days.

By the time I got through college, I figured I was done with school. (I wasn’t, but I thought I was.) Then I started work. On Wall Street. In research. I knew nothing, about corporate America or the securities business. Which worried me. Then I realized that, in research, what you do is learn. And in the process of learning about the stock market and the economy and financial instruments, I also learned how much I enjoy learning.

This awareness would come as a surprise to most of my college professors. But I was young when they knew me, and my frontal cortex – that place where judgment and higher level thinking take place – was still in the framing stage.

I still enjoy learning, and in that regard, I’ve recently become addicted to podcasts, downloadable audio files that you can play on your phone or tablet or computer. They don’t provide in-depth knowledge on any topic, but I’m not looking for any advanced degrees, so the “interesting tidbits” approach works fine for me. I subscribe to the ones I like best, so the updates come to me wirelessly and automatically, and I listen to them on my car stereo system through a Bluetooth connection with my phone. Twenty-first century magic. How cool is that?

Here’s my list:

This American Life – Journalistic non-fiction stories, ranging from thought-provoking to humorous
Freakonomics Radio – Discussion of socioeconomic issues for a general audience
Serious Eats – Conversations on food and life with food world professionals
The Sporkful – Passionate discussions about ridiculous food minutiae
Radiolab – Broad-based documentaries weaving stories and science and philosophy
Science Friday – News and stories about science
TED Radio Hour – New ways to think, based on talks from the world-renowned TED stage
The Splendid Table – James Beard Award- winning program on culinary culture and lifestyle
From Scratch – Interviews about the entrepreneurial life with pioneers in business and the arts
Wait Wait... Don’t Tell Me! – Humorous panel game show based on current events

So, foodwise, what have I learned? Now, if your eyes are glazing over and you’re wondering if I’m ever going to get to a recipe, the answer is yes. So you can skip down to it now, or maybe you’d like to learn something, too, today...

1. Would you even guess that canned tomatoes are better for us than fresh, locally harvested heirloom varieties? (Amazing, yes? The Kitchen Goddess is having a bit of trouble with this one. She believes the science, but still plans to marinate herself in fresh NJ tomatoes this summer.) Lycopene, the heart-healthy, cancer-fighting nutrient that gives tomatoes (and watermelon and bell peppers) their red color – needs to be heated for best absorption by our bodies. With that in mind, investigative journalist/health writer Jo Robinson says the best product in the grocery store – for lycopene – is tomato paste.

2. Also from Robinson, some vegetables lose their nutrients faster than others. She calls them the “Eat Me First” foods – on the assumption that you shop only once a week and purchase your supply of veggies in one shopping trip. (Ha! The KG has been trying – without success – to do that for ... a lot of years.) So here they are: artichokes, asparagus, broccoli, kale, leeks, lettuce, and spinach. For the most nutrients, you want to eat those foods in the first two days after purchase. For broccoli and kale, in particular, less cooking is best. Robinson says the optimum way to cook vegetables for nutrition is microwave steaming, as short a time as possible. Cooked carrots on the other hand, give you twice as much beta-carotene as raw ones.


[Here’s a tiny Kitchen Goddess recommendation: When you buy broccoli, cook only the flowering head. Use a peeler to remove the tough outer skin from the thick stems (which are almost sweet), and cut them into batons to use for dipping into your favorite crudité dressing. Like this...]


3. Acidic foods – wine/beer, vinegar, and lemon juice, in particular – are a great way to balance the richness or saltiness of a dish. So if you have a soup or sauce that’s too rich, it’s not a surprise that adding a squeeze of lemon or a teaspoon of vinegar or wine will help. But what if a soup is too salty? Same advice: add some lemon or vinegar. Rebalancing the tastes will enhance all the flavors in the dish.

4. You like scrambled eggs for breakfast? You’ll have the lightest, fluffiest eggs if you add salt to the eggs, then let them sit 15 minutes before cooking them. The KG scoffed at this one until she tried it. Yessirree. Try it yourself.


5. If you’re into making pasta, try making it with egg yolks only – no whites – for a more tender pasta. That’s a recommendation of pasta wizard Missy Roberts, the chef/owner of Lilia in Brooklyn. But even if you’re cooking the dried stuff, she says:
(a) Salt the water. About 2 teaspoons of salt per quart of water (it should taste like the ocean) is the most important factor in cooking the pasta. No oil in the water. If you’re concerned about the pasta sticking together, just stir it frequently.
(b) Be sure to add some of the pasta water to the sauce; pasta water contains starch that helps bind the sauce to the pasta.
(c) Finish cooking the pasta in the sauce – i.e., give the pasta dough an opportunity to absorb the sauce in its final minutes of cooking.
(d) Finally, in serving pasta, add only as much sauce to the bowl as can be handled by the pasta – it should never be swimming in sauce.

* * *

Sooooo.... speaking of pasta. Here’s a perfect dinner for one of those nights when you really aren’t up for much effort. Which describes – even for the Kitchen Goddess – a lot of nights.

I found this recipe last summer in the height of corn season, but I didn’t get around to it until just recently. I’d seen corn on the cob in my grocery store, but it was surely not from any place local. So you want to keep this dish in mind when the fresh stuff actually makes an appearance in July. But for now – when you really want to feel like summer – most of this corn is going to get pulverized, so who really cares if you use fresh or frozen?

Orecchiette on left, farfalle on right.
You’ll be amazed to find no milk or cream in the dish, but the heart of the sauce is nothing more than corn and scallions cooked to complete tenderness, then buzzed smooth in a blender. Layer on the toasty flavors of brown butter and caramelized corn, then tang it up with basil and mint and lemon. Toss in some salty,umami-filled Parmigiano-Reggiano, and you will not be able to stop eating it. The New York Times’s Melissa Clark, who originated the recipe, uses orecchiette (the little ear-shaped pasta), but the Kitchen Goddess prefers farfalle (bow-tie pasta). Use whatever you like, but choose a shape that’s got plenty of surface to hang onto that sauce.

And if you needed an added incentive, I should tell you that it cooks in 30 minutes. That doesn’t count the time it takes you to get your s*** together – assembling the ingredients and that little bit of chopping. But not a lot of time, really.


Creamy Corn Pasta with Basil and Mint

Adapted from Melissa Clark in The New York Times.

Serves 4.

Ingredients
I augmented my scallion greens with fresh chives.
Kosher salt
12 ounces dry pasta (orecchiette or farfalle or your choice)
1 tablespoon olive oil, plus more for drizzling
1 bunch scallions (about 8), trimmed and thinly sliced (separate the white parts from the green)
2 cups corn kernels (frozen or from two large ears)
½ teaspoon freshly ground black pepper, plus more for serving
3-4 tablespoons unsalted butter
½ cup grated Parmigiano-Reggiano cheese
⅓ cup combination basil and mint, torn or in a chiffonade*, plus extra for garnish
½ teaspoon Aleppo pepper, or ¼ teaspoon red pepper flakes, to taste
Juice and zest of one lemon

*[Kitchen Goddess note: Chiffonade is a slicing technique for fresh herbs: stack the leaves 8-10 at a time, then roll the stack up like a cigar, and slice them thinly. It produces a lovely, fluffy pile of thin ribbons. If you need photos, go here.]


Directions
Bring a large pot of water to a boil, and stir in salt (2 teaspoons per quart of water). Add the pasta and cook until it is 1-2 minutes away from being al dente. Reserve 2 cups of the pasta water, and drain the pasta.

While the pasta is cooking, heat the oil in a large skillet and add the scallion whites with a pinch of salt. Saute the scallions for 3-4 minutes, stirring, until soft, then add ½ cup of the pasta water and all but ¼ cup of the corn. Bring the mixture to a simmer and cook 5 minutes, until the corn is tender.

Transfer the mixture to a blender, along with another ½ cup of pasta water and purée 1-2 minutes on high, until the mixture is smooth. If it seems too thick to pour easily, add more pasta water. Add ¼ teaspoon of salt and ¼ teaspoon of black pepper, and blend briefly to combine.


In the same skillet you used to simmer the corn, melt the butter over medium heat and add the reserved ¼ cup of corn. Cook, stirring, until the corn is tender, which will take about 2 minutes. You want the butter and the corn both to brown, but be aware that the corn will pop some as it caramelizes, so use a long wooden spoon to stir the corn, and stand back from the skillet.

When the corn and butter have browned slightly, reduce the heat and add in the puréed corn sauce. Stir to combine and cook on low heat until the mixture is evenly heated.

Add in the pasta and raise the heat to medium. Add more pasta water if the mixture seems too thick, and cook another minute. Add the scallion greens (about ¼ cup – and you can augment with fresh chives if your scallion greens aren’t up to par), the Parmesan, the basil/mint, the Aleppo pepper (or chili flakes), and ¼ teaspoon each of salt and pepper.

Stir to combine well and sprinkle over the lemon juice. Stir again – lightly – and adjust seasoning to taste. Serve immediately, garnishing with extra herbs, scallions, and the lemon zest. If you have a good olive oil handy, you can drizzle a little over the top.


Saturday, March 11, 2017

The Season of Waiting
What’s cooking? Butter-Steamed Broccoli with Panko and Parmesan Cheese


It’s that middling time of year. When spring is so near you can almost taste it, except that the wind chill keeps freezing your taste buds. But the hardest thing about this time of year is finding something fresh to cook.

There’s lots in the stores, don’t get me wrong. But I’ve pretty much had my fill of broccoli and broccolini and cauliflower, and butternut and acorn squash, which is what’s still most abundant in the fresh produce aisle. Fresh asparagus will make an appearance soon – that would be fresh, local asparagus, from someplace on this continent. But not just yet.

Do I sound whiney? I’m sure that’s right. And not like me. For the truth is that I’ve had the flu – in spite of having gotten a flu shot this year – and even if I’d felt like cooking or eating, my prince has refused to let me near anything he’s planning to put in his mouth.

So we’ve had lots of takeout, and a few meals that involved boiling liquid – to adequately eliminate any germs. But at some point, you know, the Kitchen Goddess must cook. Sharks gotta swim.

I’m not alone in this lament, by the way. Just last week, the very talented Sam Sifton (NY Times food writer) posted a piece in the Sunday NYT Magazine, wherein he said, “These are hard days for cooking.... Early March can leave cooks adrift in home and restaurant kitchens alike, unsure of themselves, desirous of inspiration.” So misery does indeed love company.

And that’s where this very tasty broccoli recipe comes in. I know, I said I was tired of broccoli; mostly, I meant I was tired of the same old preparations.

Often, when trying to figure out what to do with veggies, my thoughts run to steam/boil/grill/roast and then slather with butter. But that seemed sort of inadequate. So when I uncovered this recipe in my slush pile of good ideas, I cheered. For starters, this technique of cooking the broccoli in a bath of water and butter over high heat is truly magical. A new arrow in the Kitchen Goddess’s quiver, as it were. The broccoli absorbs both the water and the butter, which completely changes the flavor of the food. Add the nuttiness of shaved parmesan cheese, plus a nice crunch delivered by toasted, peppered panko, and you have what is both a very good and a very easy dish. Not exactly springlike, but then, it’s not exactly spring. (If you want to hint at the coming of spring, grate some lemon zest into the panko or squeeze a bit of lemon into the skillet with the broccoli.) Thankfully, it is actually possible to get very attractive fresh broccoli in the stores.

I served this excellent preparation with grilled – by the prince – chicken thighs and rice (another dish from boiling water). Not an awe-inspiring meal, but way better than takeout.


Butter-Steamed Broccoli with Panko and Parmesan Cheese

Adapted from David Tanis in The New York Times.

Serves 4.

¾ cup panko bread crumbs
1 tablespoon extra-virgin olive oil
¾ teaspoon coarsely ground black pepper
salt
1 large head broccoli (about 1 pound)
1 clove garlic, sliced thin
1 cup water
4 tablespoons unsalted butter
2 ounces Parmigiano-Reggiano, shaved
Optional: ½ lemon (zest grated into the bread crumbs, or juice squeezed into the water bath for broccoli)

Preheat the oven to 400º.

In a medium bowl, toss the panko crumbs with the olive oil. Place the crumbs on a rimmed baking pan and put the pan in the oven for 10-12 minutes, or until the crumbs take on a golden color. Stir the crumbs once or twice as they cook, to encourage even browning. When the panko crumbs have reached a color you like, remove them from the oven and scrape them into a bowl to cool. Stir in the pepper and salt to taste.


In the meantime, separate the broccoli into spears 3-4 inches long, slicing the thickest ones to make stems no thicker than ½ inch. If the base of the broccoli is a long, thick stem, use a peeler to remove the tough outer skin, and slice the stem into batons (sticks, like French fries) no more than ½ inch thick.


Melt the butter in a large skillet over medium heat. Add the broccoli, garlic, and water, and season with salt to taste. Stir well and turn the heat to medium-high, then cover the skillet with a tight-fitting lid. Cook the broccoli over medium-high heat for 5 minutes, at which point it should be firm-tender and still green. (Some of the stems will brown lightly from the butter in the bottom of the pan.)

Transfer the broccoli to a warm serving platter and sprinkle it with the toasted panko crumbs. The broccoli should have absorbed all the butter and water; if not, pour any remaining liquid over the broccoli in the serving dish. Shave large, thin slices of Parmigiano-Reggiano on top, and serve.


Thursday, December 22, 2016

Party On! Three Easy and Elegant Hors d’Oeuvres from the Kitchen Goddess
What’s cooking? Spiced Plum Soup, Parmesan Gougères, and Salmon Rillettes


And after the gift buying and the gift wrapping comes the gift exchanging. Which is when someone either comes to your house or you go to theirs. Now I’ll admit that it doesn’t have to go that way – I’ve been known to drop my gifts off on someone’s front porch – but it’s a lot more fun to gather together this time of year, exchange wishes for all good things, and congratulate ourselves on having made it to a new page on the calendar.

This sort of hosting doesn’t necessarily mean giving people a meal, but you want to have something to go with that glass of wine or champagne. Those people shouldn’t be heading back out onto the road without something to muffle the alcohol. So the Kitchen Goddess has three treats you can make – ahead of time! – and have your friends and relatives thinking that you, too, must have Kitchen Royalty in your blood.

Spiced Plum Soup – Note the absence of a temperature descriptor in the name of this item. That’s because you can serve it hot or cold. Either way, it’s elegant and equally delicious. And you can make it days ahead. You only want to give your guests a small serving, as this soup also has alcohol in it. In fact, it starts with a full bottle of red wine, but the alcohol from that cooks away; the smidge of alcohol from the Cointreau (or other orange liqueur) does not. This soup looks and tastes more holiday-spirited than any other item in my repertoire. Sophisticated, simple, and sublime. It’s the little black dress of holiday hors d’oeuvres.

Gougères are traditional cheese puffs, usually made with either Emmenthal, Comté or Gruyère cheese. The great French chef, Daniel Boulud, makes his with Parmiggiano-Reggiano, which I think gives you license to use whichever cheese you prefer. And you there in the back of the room, shaking your head that you’ve never made French pastries and don’t intend to start now? Get a grip – these are easy to do. The Kitchen Goddess would not steer you wrong. You can make these delicacies and freeze them raw or cooked, so you’ll always want some in your freezer. The Kitchen Goddess served them in lieu of rolls at Thanksgiving – so chic. They’re unbelievably light and airy – barely crunchy on the outside, mildly eggy on the inside. Your guests will devour these little luxuries, so have plenty on hand.

✸ Classically speaking, Rillettes is a preparation similar to pâté and originally made from pork confit. Then some genius adapted the process to seafood, and everything about the presentation changed. So why is this luxurious spread called rillettes? I don’t know. Poached salmon puréed with creme fraiche and perked up with some tangy, herby, lemony flavors, it’s divine, and simplicity itself to prepare. Creamy and light, it works equally well on crackers, crostini, or piped into endive leaves.


Kitchen Goddess note: If those ideas don’t float your boat, take a look at a couple of past Kitchen Goddess hits that can be made ahead and are also sure to please.

✸ Those leftover bits of cheese hiding in your deli drawer? Put them to work in a batch of Fromage Fort – an anything-goes cheese spread that just needs about 20 minutes to come to room temperature.


✸ Any kind of pesto is great to have on hand, and they all freeze really well. But for the festive season, the Kitchen Goddess likes Artichoke Pesto, which will also last at least several days in the fridge. Of course, you’ll have to keep yourself from noshing on it, but that’s the risk you take...


Spiced Plum Soup


Adapted from The Silver Palate Basics Cookbook.

Serves 8-10 as a first course; 25-30 as 2-3-ounce “tastes.”

4 16-ounce cans of plums in syrup
1 750-milliliter bottle of Pinot Noir
1 teaspoon cinnamon
½ teaspoon grated nutmeg
½ teaspoon ground cloves
2 tablespoons sugar
¼ cup triple sec (Cointreau or other orange-flavored liqueur)
grated zest of 2 lemons
Garnish: crème fraîche, light sour cream, Greek yogurt, or some combination thereof; mint sprigs

Directions
Drain the plums, reserving the liquid. Use your fingers to remove the pits, then transfer the pitted plums to a medium saucepan and add back the canned syrup.

Stir in the wine, spices, and sugar, and bring the mixture to a boil. Simmer the mixture, uncovered and stirring occasionally, for 30 minutes.

Transfer the soup to a blender and purée 1-2 minutes, until quite smooth. If you worry that any bits of plum remain unblended, strain the mixture through a sieve.

Add the liqueur and lemon zest and stir well. Refrigerate – if serving cold. Serve with a dollop of crème fraîche, light sour cream, Greek yogurt, or some combination thereof, and a sprig of mint (if you have it).

Serving suggestions: To up the elegance factor, the Kitchen Goddess likes to serve this soup as a first course in balloon wine glasses. When it’s an hors d’oeuvre, she passes it in 2-ounce shot glasses on a tray.


Kitchen Goddess note: And now... It’s not hard to make gougères. Maybe you’ll be nervous the first time. The KG was – the first time. The second time? Piece of cake... er, pastry. But it takes the KG a long time to explain because she really wants you to be successful at it. So be patient, read this recipe all the way through, and give it a try.


Parmesan Gougères

Adapted from Daniel Boulud’s Cooking in New York City.

Makes 6-7 dozen.

1 stick (8 tablespoons) unsalted butter, cut into eighths, then each of those into quarters
1 cup cold water
½ teaspoon kosher salt
¼ teaspoon sugar
1½ cups (195 grams) all-purpose flour, sifted
6 large eggs
1 cup freshly grated Parmegiano-Reggiano
⅛ teaspoon grated nutmeg
⅛ teaspoon paprika
dash of kosher salt and freshly ground pepper
2-3 tablespoons milk

special equipment: wooden spoon, pastry brush, baker’s parchment

Directions
Preheat the oven to 400º. Move a rack to the center of the oven. Cut parchment paper to fit two half-sheet rimmed baking pans.

In a medium saucepan, melt the butter and stir in the water, salt, and sugar. Bring the mixture to a boil. Once it boils, immediately remove the mixture from the heat and add the flour all at once, beating vigorously with a wooden spoon until smooth. Return the pan over high heat and continue stirring vigorously for about 2 minutes as the dough cooks. (This 2 minutes is the hardest part; try to find someone who will relieve you in the vigorous stirring after one minute.) After 2 minutes, the dough should come together in a smooth mass and the bottom of the pot will be coated with a thin crust.

Transfer the dough to a standing mixer with a paddle attachment. Beat at medium-low speed, adding the eggs one at a time (!), and beating well after each is added. Stir in the grated Parmegiano-Reggiano, nutmeg, and paprika, and add a dash of kosher salt and freshly ground pepper.

Kitchen Goddess note: For any pastry, the most important element is the ratio of flour to moisture. I find that the trickiness factor is almost eliminated if (1) you can find a scale and get the exact amount of flour measured, and (2) use large eggs – not medium, not extra-large. And for this pastry dough, it’s important to be sure that each egg is fully incorporated into the batter before adding the next one. At first, the batter will tend to separate and look curdled as each egg is added. Relax and keep beating – it’ll come back together.

You have three choices for forming the gougères: (1) If you have a pastry bag and are accomplished at using it, pipe the dough into ¾ round mounds, using a ½-inch round tip. (2) If you want to pipe it but don’t have a pastry bag, spoon the dough into a zip-lock baggie with a half-inch corner cut. Or (3), go the Kitchen Goddess way – because piping is not a KG talent – using 2 spoons. Use the first spoon to dig out a blob of dough about the size of a walnut; take the second spoon to roll the blob gently onto the baking sheet (covered with parchment, of course!). In all cases, your aim is to get little ball-shaped mounds about ¾ inch in diameter, set 2 inches apart. Then with wet fingertips, lightly smooth away any points on the tops of the mounds. Before putting the pans in the oven, brush the tops with milk and sprinkle on additional grated cheese.

Bake in the center of the oven at 400º for 15 minutes, then reduce the temperature to 375º and bake another 20 minutes. The little puffs will get over-brown if given the chance, so until you know how your oven performs, keep an eye out for the last 5 minutes. The gougères are done when they are puffed and golden brown. Transfer the finished puffs to a rack to cool slightly. Serve warm.

Yes, these are small sheet pans. The KG uses them because they allow her to bake her gougères a dozen at a time and thereby keep a constant supply of warm puffs emerging from the kitchen.

Storing Gougères

The best way to store gougères is to form the raw mounds on a baking sheet and stick the sheet into the freezer. Once the dough is frozen solid, lift the mounds off the sheet and pack them airtight in plastic bags. And there’s no need to thaw them before baking; just add an extra couple of minutes in the oven.

If you have leftovers, lay them out on a baking sheet; cover the sheet with plastic wrap and freeze until the gougères are firm. Store the frozen gougères in sturdy plastic bags, where they’ll keep  for several months. Reheat them at 350º on a parchment-lined baking sheet for 6-8 minutes.


Salmon Rillettes


Adapted from Gourmet magazine, December 2004.

Makes about 1½ cups.

1 cup dry white wine
2 cups water
1 celery stalk, thinly sliced
1 small onion, thinly sliced
1 leek, rinsed well and thinly sliced
1 teaspoon whole peppercorns
1 bay leaf
1 lemon, sliced
6 ounces king salmon filet
2 ounces crème fraîche (can substitute sour cream, light sour cream, or a crème fraîche/sour cream combo)
2 tablespoons minced fresh chives
3 tablespoons extra virgin olive oil
1 mounded teaspoon capers, drained
1 teaspoon fresh lemon juice
1 teaspoon Dijon mustard
salt and freshly ground pepper

Directions
Combine the wine and water in a deep skillet with a lid. Add the celery, onion, leek, peppercorns, bay leaf, and lemon. Simmer, uncovered, for 25 minutes.


Add the salmon, cover the pot, remove it from the heat and let it stand for 10-15 minutes.


Remove the salmon from the marinade and chill it in the refrigerator. Discard the marinade.

Transfer the salmon and remaining ingredients to the bowl of a food processor and process until smooth. Chill for at least 30 minutes before serving. Serve with a basket of crostini or crackers, or pipe into trimmed endive leaves with a garnish of dill sprig.


Crostini

And in case you are curious as to how the KG makes her crostini, here you go:

Slice a baguette of French bread in pieces about ⅜ inch wide. (The Kitchen Goddess likes to slice hers at an angle to the loaf, but that’s just for show. No one – least of all her husband, who is frequently tasked with the slicing – knows why.) Place them on a large, rimmed sheet pan, and run them under the broiler for about 1 minute. Turn them over and run them under the broiler for about 30 seconds. Take a large clove of raw garlic and rub it lightly across the surface of the half-cooked side, then lightly brush olive oil across that side as well. Return the crostini to the broiler for 25-30 seconds, depending on how dark you like them to be. Let them cool, then store in large zip-lock plastic bags. They should keep for at least a week.

Happy holidays, everyone!


Sunday, January 17, 2016

Battling the Post-Holiday Blues
What’s cooking? Parmesan Crisps and Roast Chicken Provençal


January is such a dismal month. Cold, gray days, and the bills for all that Christmas frivolity have replaced the jolly cards that only a few weeks ago were appearing in your mailbox. On the other hand, the days are getting longer (yes!), and the Kitchen Goddess is here to perk up your cooking.

If you’re like me, all that holiday entertaining has severely depleted the pantry. And since global warming doesn’t all happen at once, you’ll want to be prepared in the event of... WEATHER. (I don’t want to tempt the fates by mentioning the s-word.) So here are a handful of items you’ll want to be sure are on hand as we move into winter:

1. Fresh ginger – Freeze it whole or grate it and freeze it in teaspoon-sized knobs. The Kitchen Goddess likes it in Roasted Sesame Green Beans, Sweet Potato Ginger Soufflé, and Chestnut Ginger Soup, and she often tosses candied ginger into scones, sugar cookies, and muffins. Ginger is also a time-tested aid to congestion, so if you or a loved one has a cold, try making tea with honey and lemon and ginger.

Cut into 1/2-inch cubes
2. Parmigiano rind – That tough cheese rind you used to throw away? Never again. Just add a piece into any chicken soup or vegetable soup, and you’ll be amazed at the improvement in flavor. And – here’s a flash – it makes a great nibbler for your next dinner party. Would the Kitchen Goddess kid you? Take that tough-as-nails piece of rind, cut it into cubes about ½ inch square and microwave the little bits 30-45 seconds. Crispy, chewy, salty, cheesy. Also amazing. You’re welcome.

After microwaving


Parmesan crisps - ready for snacking


3. Parsley – For something so cheap, parsley adds impressive zip to soups, salads, and fish or chicken. And you can make it last longer than you’d ever have imagined. Cut an inch off the stems, then let the bunch swim around in cold water for 15-20 minutes. Dry it in a salad spinner, wrap it in a paper towel, and store it in a plastic ziplock bag with all possible air pushed out. It’ll last a couple of weeks. When I’m adding it to soup, I put some in early with the other herbs for the flavor, but I always add a bit more at the very end, to contribute color and that little extra zing.

herbes de Provence
4. Your spice cabinet – It’s that time of year to assess your inventory of dried herbs and spices. Specifically, do the smell test. Properly stored (in a cool, dark, and dry environment – not next to your stove), herbs and spices will last a year – two at most. Open each jar, and first take a look, as spices that are fresh will still have their original color. Take a toothpick and stir them up a bit; if the scent isn’t fresh and clear, replace them (and remember to date the new jars). If you’re routinely tossing big jars of herbs and spices, try buying smaller quantities. Penzey’s (my favorite source) sells ¼-cup jars of almost everything, so I buy large jars of dried thyme and dill and cumin because I use them so often, but small jars of odd fellows like turmeric and white pepper. And I’ve learned that it’s even better – for that one recipe you make that uses Chinese Five Spice Powder – to check the bulk aisle of your grocery. For today’s recipe, in fact, I turned to the bulk aisle for herbes de Provence. In all my years of cooking, I’d never come across a recipe that called for it. Of course, this one recipe is so perfectly perfect that I may take to buying large jars of the stuff.

5. Mirepoix – Onions, Carrots, Celery. The basics for 1001 soups, so you always want to have them at hand. To keep carrots fresh, I cut off any greenery and put the carrots in air-tight zip-lock plastic bags. For celery, I trim an inch or so off the top and bag them as well. (If I only have smaller bags, I just cut the celery in half before bagging it.) If the veggies seem limp when you go to use them, try cutting an inch off the ends and soaking them in cold water for 20-30 minutes. Most of the time, that will improve the crispness. Keep onions in a cool, dry place (not in the fridge) and away from light. Not in plastic bags and not near your potatoes. Potatoes need the same kind of storage conditions, but don’t keep potatoes and onions near each other – both give off gasses that increase the rate of spoilage in the other.

Crowdsourcing a Recipe


I love The New York Times. I’ve been reading it since 1969. And while I occasionally submit to the online version, I’m much happier with the physical paper spread out in front of me at my kitchen island. There, I can quickly scan the news of the world and the opinions of some of my favorite columnists and op-editors. And there are no brighter moments in my professional history than those days when I could open up the paper and see my own work splashed across a page.

These days, I wait most eagerly for the Wednesday paper and its Food section. Not long ago, in a year-end review, the food editors put together a list of the most popular recipes of 2015, based on the number of Times readers who saved it to an online recipe box. Now, the Kitchen Goddess is generally skeptical of crowdsourced information – except in the realm of recipes. And if NYT readers saved this recipe more than any other from the whole year, well, I had to give it a try.

Oh, my. It was the perfect dish for our family’s Christmas Eve dinner: ridiculously simple to prepare (one small bowl, and a single rimmed baking sheet) and a wondrous marriage of flavors for a winter night. The shallots and garlic were transformed by the roasting into sweet delicacies; even the lemon, after its warm bath in chicken juices and vermouth, was entirely edible. And the chicken went so quickly I didn’t even get a second piece. I can hardly wait to serve it at a dinner party.

The pan juices are not to be ignored, so you’ll want either crusty French bread or rice or noodles as accompaniment. All else you need is a simple green salad.


Roast Chicken Provençal


Adapted from Sam Sifton in The New York Times.

Serves 4.

INGREDIENTS:
3 tablespoons olive oil
¾ cup all-purpose flour
4 chicken legs or 8 bone-in, skin-on chicken thighs
2 teaspoons kosher salt
1 teaspoon freshly ground black pepper
1 lemon, quartered lengthwise
8-10 medium-large cloves garlic, peeled
4 to 6 medium-sized shallots, peeled
2 tablespoons herbes de Provence
⅓ cup dry vermouth
Garnish: 4-6 sprigs of fresh thyme

PREPARATION:
Preheat oven to 400º. Pour the olive oil into a large roasting pan (I used a rimmed half-sheet pan), and use your fingers to spread it evenly around the pan.

Put the flour into a small shallow bowl. Salt and pepper the chicken pieces all over, and dredge them in the flour, shaking each piece lightly so as to remove any excess flour. As you flour each piece, place it in the roasting pan, skin side up.


Cut the shallots in half lengthwise, and scatter them among the chicken parts along with the garlic and the lemon quarters. Sprinkle the herbes de Provence over all and add the vermouth.

Put the pan into the oven for 50-60 minutes, stopping halfway through to baste the chicken with any pan juices. The skin will be very crisp when done.

Serve in the roasting pan or a large platter. If you use a separate platter, be sure to warm the platter with hot water before use. Garnish with sprigs of fresh thyme.

Serve with rice or noodles or warmed French bread, and a simple green salad.

Bon appetit!


Wednesday, November 18, 2015

Cooking Cousins
What’s cooking? Parmigiano-Roasted Broccoli and Cauliflower


I’ve always been grateful that we lived near enough to my husband’s sister that her three sons and my two got to spend most holidays – and many other occasions – with each other. I grew up down the street from my Texas cousins, and that connection to the wider world that you get with cousins – that sense of membership in a family that extends far beyond the people in your own house – seems to me to be invaluable.

The food world has lots of cousins that get along pretty well, too. Cauliflower and broccoli are on my mind today, mostly because that’s what I had in my fridge yesterday when I set out to make dinner. I’d just come across a piece about roasted cauliflower in Bon Appétit, and it set off a lightbulb in my head. The Kitchen Goddess is always grateful for lightbulb moments, particularly as they come fewer and farther between these days.

Broccoli and cauliflower are the original Cabbage Patch Kids. Different cultivars of the same species – cousins, if you will, in the actual cabbage family – the “tree” vegetables also share their heritage with brussels sprouts, kale, and collard greens. The chief distinguishing feature between broccoli and cauliflower is that broccoli produces flower buds. I know, you might think color is the main difference, but you can find cauliflower in green or orange or purple, in addition to the standard white, and broccoli comes in green or purple.

And here’s today’s useless fact: Broccoli was introduced to the U.S. by Italian immigrants, and wasn’t commonly found here until the 1920s. Those Italians get credit for all the good food stuff.

Both veggies react remarkably well to roasting. The main problem tends to be in getting those florets a consistent size so that at the end of roasting, they’re not soft on the outside and hard on the inside, or some soft and some not-so-much. The Kitchen Goddess has a solution. At the Culinary Institute, they say, “Looks the same, cooks the same.” Taking her cue from the CIA, the KG realized that if she sliced both the broccoli and the cauliflower into pieces that were the same thickness, the size of the florets would cease to matter. So that’s what she did, and it worked like a charm.

Top the concoction off with a hefty sprinkle of Parmigiano-Reggiano, and you have a dish that’s both tasty and easy. The combination of meaty, caramelized veggie slices and some roasty-toasty onions is just what you need on a chilly fall evening.


Parmesan-Roasted Broccoli and Cauliflower


Adapted from Bon Appétit, February 2013

Serves 4.

1 small head cauliflower
1 head broccoli
1 medium onion, halved and sliced
4 sprigs thyme
4 garlic cloves, unpeeled
3 tablespoons olive oil
Kosher salt and freshly ground black pepper
½ cup grated Parmigiano-Reggiano

Preheat oven to 425°.

Cut the largest florets from the cauliflower and broccoli heads and slice the florets lengthwise in ½-inch thicknesses. Slice the remainder of the heads also into ½-inch thicknesses. In a large mixing bowl, toss the cauliflower and broccoli slices, the onion slices and the garlic with the thyme and oil.


Spread the vegetables out on a large rimmed baking sheet, and season with salt and pepper. Sprinkle with Parmigiano-Reggiano. Roast, tossing occasionally, until fork-tender and lightly browned, 25-30 minutes. Serve immediately.

Sunday, December 14, 2014

A Holiday Giveaway!! Season’s Greetings from the Kitchen Goddess
What’s cooking? Italian Veggie Gratin


In the spirit of holiday cheer, my friends at Hamilton Beach have offered another giveaway to Spoon & Ink readers: a Stack & Snap™ 10-Cup Food Processor. They sent me one for testing, and I used it to make an Italian-inspired vegetable gratin. But more on that later. First let’s talk about how you can get your own Stack & Snap – free!

Win a Hamilton Beach Stack & Snap 10-Cup Food Processor!
If you’d like to participate in the drawing for one of these handy time-saving, work-saving machines, all you have to do is leave a comment – either at the bottom of this post or on the Spoon & Ink Facebook page. Just be sure to sign it, and you’ll be entered to win. I’ll be drawing a name and announcing it in a post on Monday, December 22. So leave your comment before then.


The Kitchen Goddess is not one to insist on all the latest appliances. But a food processor is something that even the non-serious cooks among you should have. In fact, many of my favorite recipes would be complete non-starters in the absence of a food processor: Arugula Pesto, Fromage Fort, Greek Almond Cookies, and 3 of the 4 veggie sides I posted about for Thanksgiving (Asparagus Flan, Sweet Potato-Ginger Soufflé, and Watercress Purée). Moreover, the Stack & Snap Processor is so reasonably priced that, even if you don’t win the drawing, it’s easy to fit one into your budget.

The Machine

The Kitchen Goddess was totally in her element with this road test. First, I tried out the processor’s most basic feature: the chopping blade. It nicely pulverized the almonds for a meringue in a recipe I’ll tell you about another day.


So I moved on to the slicing/shredding blade. For convenience, it's a single blade, with "Slice" clearly marked on one side and "Shred" on the other. I wanted to use both features in a single recipe, so I looked around my kitchen and found onions, zucchini, crimini mushrooms, and a package of those adorable grape tomatoes. I took inspiration from a zucchini gratin posted by the great Ina Garten, whose recipes are known to be easy and straightforward, and I tweaked it in so many ways that it no longer looks like Ina’s at all, though it’s still easy and straightforward.

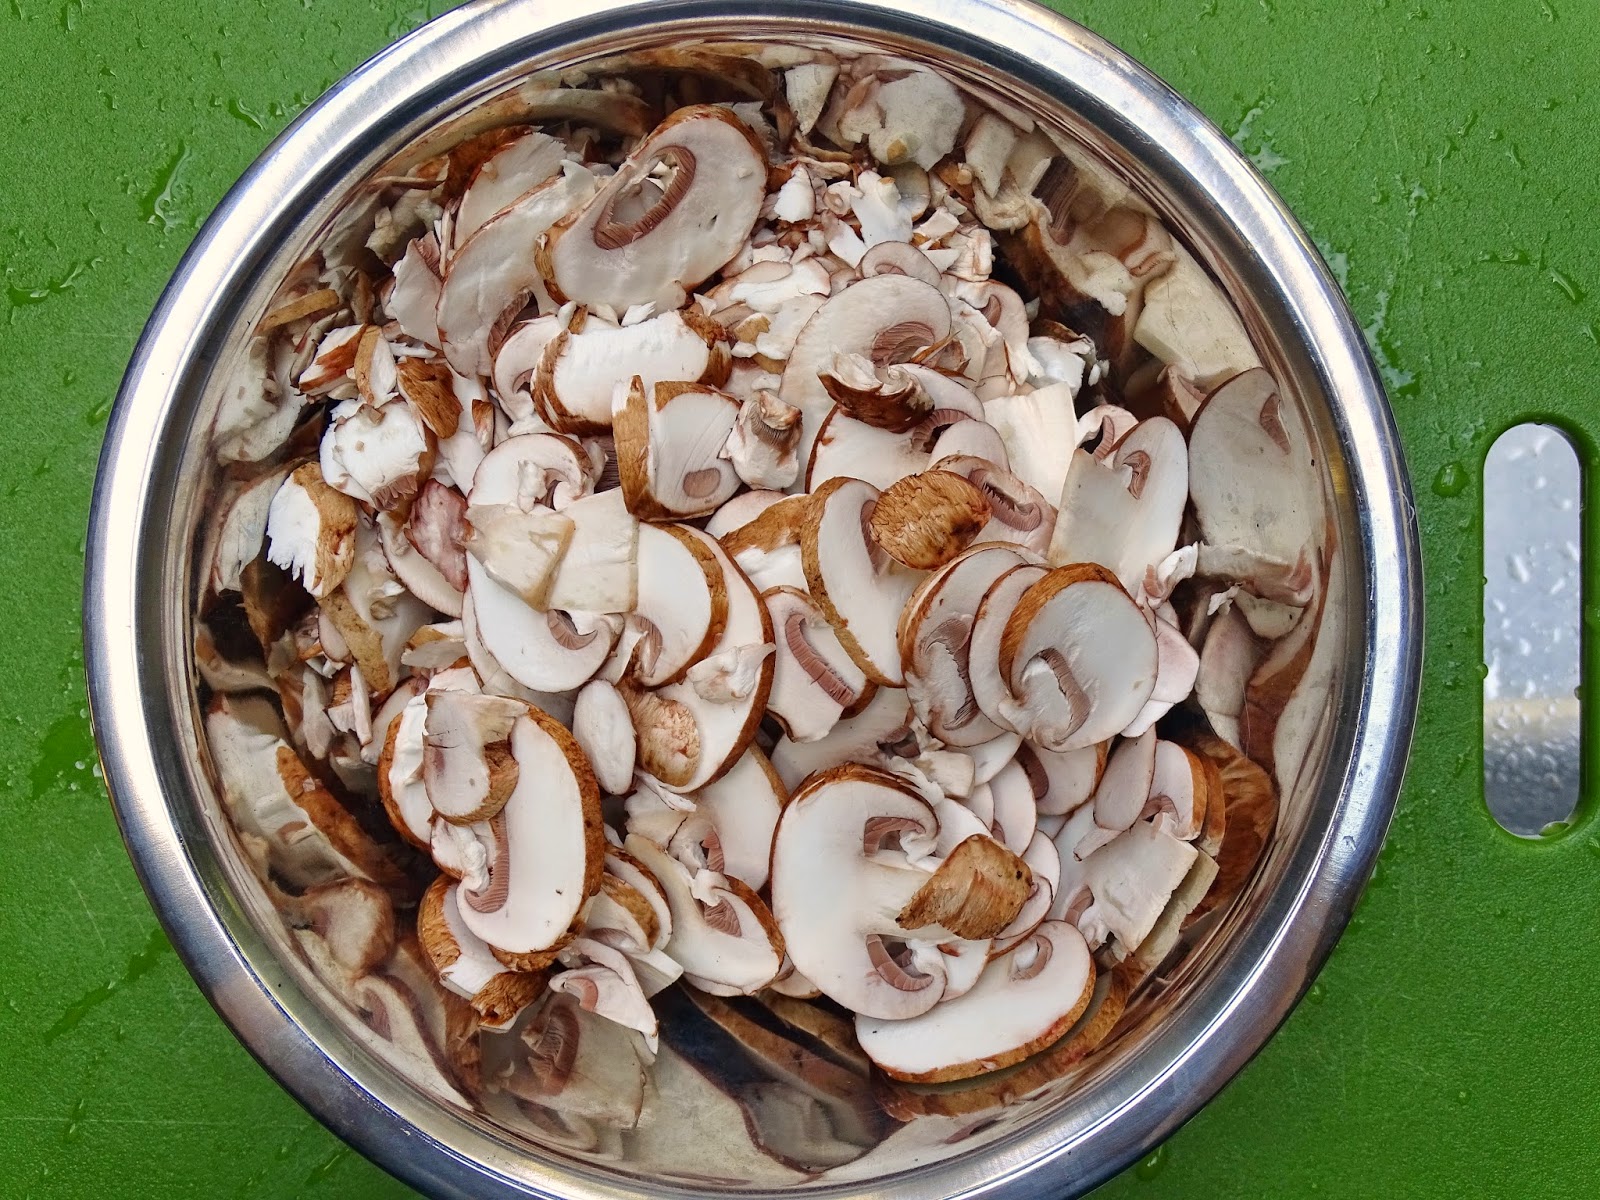
The Stack & Snap performed beautifully, except on the mushrooms, which – frankly – don’t really stand up to any food processor. (Not that it didn’t slice them but it’s too hard to control the position of a mushroom in the feeder tube, so more than a few came out looking like tiny frisbees. I sliced the rest of the mushrooms with my mandoline.) But my Stack & Snap sliced through the onions, the squash, and even the tomatoes like a hot knife through butter. (It’s a Southernism. Forgive me.)


The shredding side of the slicing/shredding disk made short work of a chunk of Parmigiano-Reggiano, and in no time flat, I had the mise en place for my gratin. Which, by the way, is completely delicious and redolent of Italy.


Italian Veggie Gratin


Serves 6.

6 tablespoons unsalted butter, separated
2 large onions (12-13 ounces total), halved and thinly sliced
8 ounces crimini mushrooms, thinly sliced
5 small zucchini (about 1¾ pounds), thinly sliced
10 ounces grape tomatoes, thinly sliced
1½ teaspoons kosher salt
½ teaspoon freshly ground black pepper
4 ounces fresh goat cheese
2½ ounces Parmigiano-Reggiano cheese, grated
1½ cups fresh bread crumbs (or panko or a combination)

Preheat oven to 400º and lightly grease a 2-quart gratin dish (about 12 x 9 x 2 inches).

Melt 4 tablespoons of the butter in a large sauté pan or skillet over medium-low heat and add the onions. Sauté the onions for 20 minutes, stirring occasionally. The onions should cook but not brown, so if they begin to brown, turn the heat down.

While the onions are cooking, take a small skillet (preferably non-stick) and heat another tablespoon of the butter on medium-high. When the butter is hot, add the mushrooms and sauté, stirring, for about 5 minutes. Remove the pan from the heat and set aside.

Once the onions have cooked, add the zucchini, stir, and cook covered for 8-10 more minutes, until the zucchini are tender. Stir in the tomatoes, the reserved cooked mushrooms, and the salt and pepper. Crumble the goat cheese over the mixture and stir it in. Cover and cook another 5 minutes.


Remove the vegetable mixture to the prepared gratin dish. In a small bowl, stir together the Parmigiano-Reggiano and the bread crumbs. Melt the remaining tablespoon of butter and stir it into the cheese/bread crumbs, mixing enough to get the bread crumbs well moistened with the butter. Sprinkle the mix over the vegetables and bake at 400º for 20 minutes or until the top bubbles and browns.


Don’t forget to sign up for the drawing to win your own Stack & Snap Food Processor!