Friday, August 16, 2013
The Most Fun You Can Have with a Chicken
What’s cooking? Beer-Butt Chicken
The thing I miss most about spending the summer in New Jersey is outdoor cooking. Condo/apartment living means no grilling. And since I usually hand off that job to my husband, it also means I do all the cooking. Not so terrible, really, but I do miss that grilled flavor. So periodically, I persuade my son and daughter-in-law to let us come out and grill at their house.
The last time I did that, I’d had a hankering for beer-butt chicken. If you don’t already know about beer-butt chicken, LISTEN UP. Because it’s the best way I know of to get a moist, flavorful grilled chicken with almost no work. You hear that, folks? Almost no work. The vertical roasting position gives you an even covering of crispy skin, while the beer bastes the meat from the inside to infuse the entire bird with flavor. And the Kitchen Goddess has outdone herself on the spice rub.
Sunday, August 11, 2013
It’s a Cherry Jubilee
What’s cooking? Sour Cherry Frozen Yogurt and Cherry Sorbet
No, no, not Cherries Jubilee – that’s the hot dessert. This is about cold dessert – two of them – and both with cherries.
As you may have guessed based on recent posts, I’m pretty obsessed with frozen desserts this summer. First came the Minted Honeydew Sorbet in June, then the Peach Frozen Yogurt and the Apricot Sorbet in July. Now it’s August, and cherries are everywhere.
Frankly, there’s nothing more fun to do with fresh, juicy fruit before it disappears from the market. I know, you can preserve it – and I will – but sorbets and frozen yogurts and ice creams present the fruit with much less sugar and offer a taste that’s much closer to the fruit itself. Whether or not you are entertaining, these are great, light desserts. But if you are entertaining, they have a number of excellent points in their favor:
■ They can be made ahead of time.
■ They add great color to the table.
■ With the addition of nuts or chocolates or cookies or brownies to the plate, you have a dessert that appears complex – multiple textures and flavors – with little effort.
■ On a relative basis with other desserts, they’re low fat and low cal.
In addition to the frozen dessert thing, I’ve been struck this season with a mania for cherries. I’ve discovered sour cherries at the farmers’ market, and Bing cherries and Ranier cherries at most grocery stores right now. I had to make two batches of the Sour Cherry Frozen Yogurt, as my husband inhaled the first batch before I remembered to get a photo of it. And, by the way, you can make the frozen yogurt with Bing cherries if you can’t find the sour ones.
Kitchen Goddess note: For either of these recipes, you will want a cherry pitter. Even with this little instrument, pitting cherries is a bit tedious. But if you catch your husband (or a friend or son/daughter) in a weak moment, with the promise of a delicious frozen treat to come, you may be able to avoid the pitting yourself. It turns out that pitting cherries is an activity that can be done while watching golf on television.
Sour Cherry Frozen Yogurt
Makes about 3 cups.
1 pound fresh sour cherries, pitted (measured unpitted)
¾ cup sugar
1 piece fresh ginger, peeled, about 2 inches long
1 cup plain Greek yogurt (your choice: fat-free, 2%, or whole milk)
In a non-reactive saucepan, stir together the pitted cherries, the sugar, and the ginger. Cover and bring the mixture to a boil. Lower the heat and let the mixture simmer for 5 minutes, stirring occasionally to encourage the juices to flow. Remove from heat and let the cherries cool to room temperature.
Once the mixture has cooled, throw away the ginger. Purée the cherries and juices in a blender until smooth (2-3 minutes). Chill the purée well, then process according to your ice cream machine instructions.
Kitchen Goddess note: Sour cherries have a refreshingly tart taste that balances well with creamy yogurt. I’ve made it with 2% yogurt and with fat-free yogurt; the tastes and textures are the same, but the fat-free yogurt gets frozen a bit more solidly, and so can be difficult to scoop. However, if you simply leave it out for 10-12 minutes, it will soften enough to serve.
I’ve not tried this sorbet with Ranier cherries, which are slightly sweeter and have a more delicate flavor than the Bings. But the color is so luscious with the Bing cherries, I may not bother with trying.
Cherry Sorbet
Makes about 1 quart.
2 pounds Bing cherries
1 cup water
¾ cup sugar
1 teaspoon lemon juice (fresh!)
1 large strip lemon zest (½ inch by 2 inches)
1 tablespoon Domaine de Canton ginger liqueur (other options: 1 tablespoon kirsch or ⅛ teaspoon almond extract)
Place pitted cherries, water, sugar, lemon juice, and lemon zest into a non-reactive saucepan over medium heat and stir until the sugar is dissolved. Cook at low simmer 10-15 minutes, until the cherries are very soft. Remove from heat and let the cherries cool to room temperature.
Once the mixture has cooled, throw away the zest strip and add the ginger liqueur (or whatever other flavoring you want). Purée the cherries and juices in a blender until smooth (2-3 minutes). Chill the purée well, then process according to your ice cream machine instructions.
Tuesday, August 6, 2013
Stepping Out of My Comfort Zone
What’s cooking? Pizza!
| Pizzaiolo Neil (center), with helpers Mike (L) and Max (R) |
I once read that if you want to share a great experience with your child, you should make it be one in which neither of you is an expert. That way, you are on equal footing and can enjoy the learning process together. Which is the argument I used to convince my husband to take a pizza-making class with me.
I can’t remember how I found the class. Must have been some late-night web-wandering. And while I will confess to a tiny case of nerves, I figured I probably wouldn’t do worse than my hubby. Or would I?
We walked into Pizza a Casa at 11:45 on Saturday. It’s a tiny shop, holding sinks and shelves stacked with containers of olive oil and canned tomatoes and various spices on one wall, and photos of satisfied customers on the other. Definitely a New York pizza shop vibe. But instead of a walk-up counter and a handful of small formica-topped tables, down the center of the room sat a wide table with a raised shelf in the middle and six stations with stools along each side. Our classroom.
Ever the Teacher’s Pet personality, I gravitated to a station near the ovens, where the teacher would stand. “Always sit at the front of the room,” I used to tell my children. “It never hurts for the teacher to know you were in class.” Of course, we weren’t getting graded, but some habits die hard. And these days, my brain needs not to miss what’s said, or be distracted by the other students. It was also the best way to get good photos.
Math is precise. There’s always one right answer. The area of a triangle is always ½ bh (base times height). Parallel lines never intersect. But a blob of dough should rise “until it has doubled in size.” With no way to measure the blob, that instruction has always confounded me.
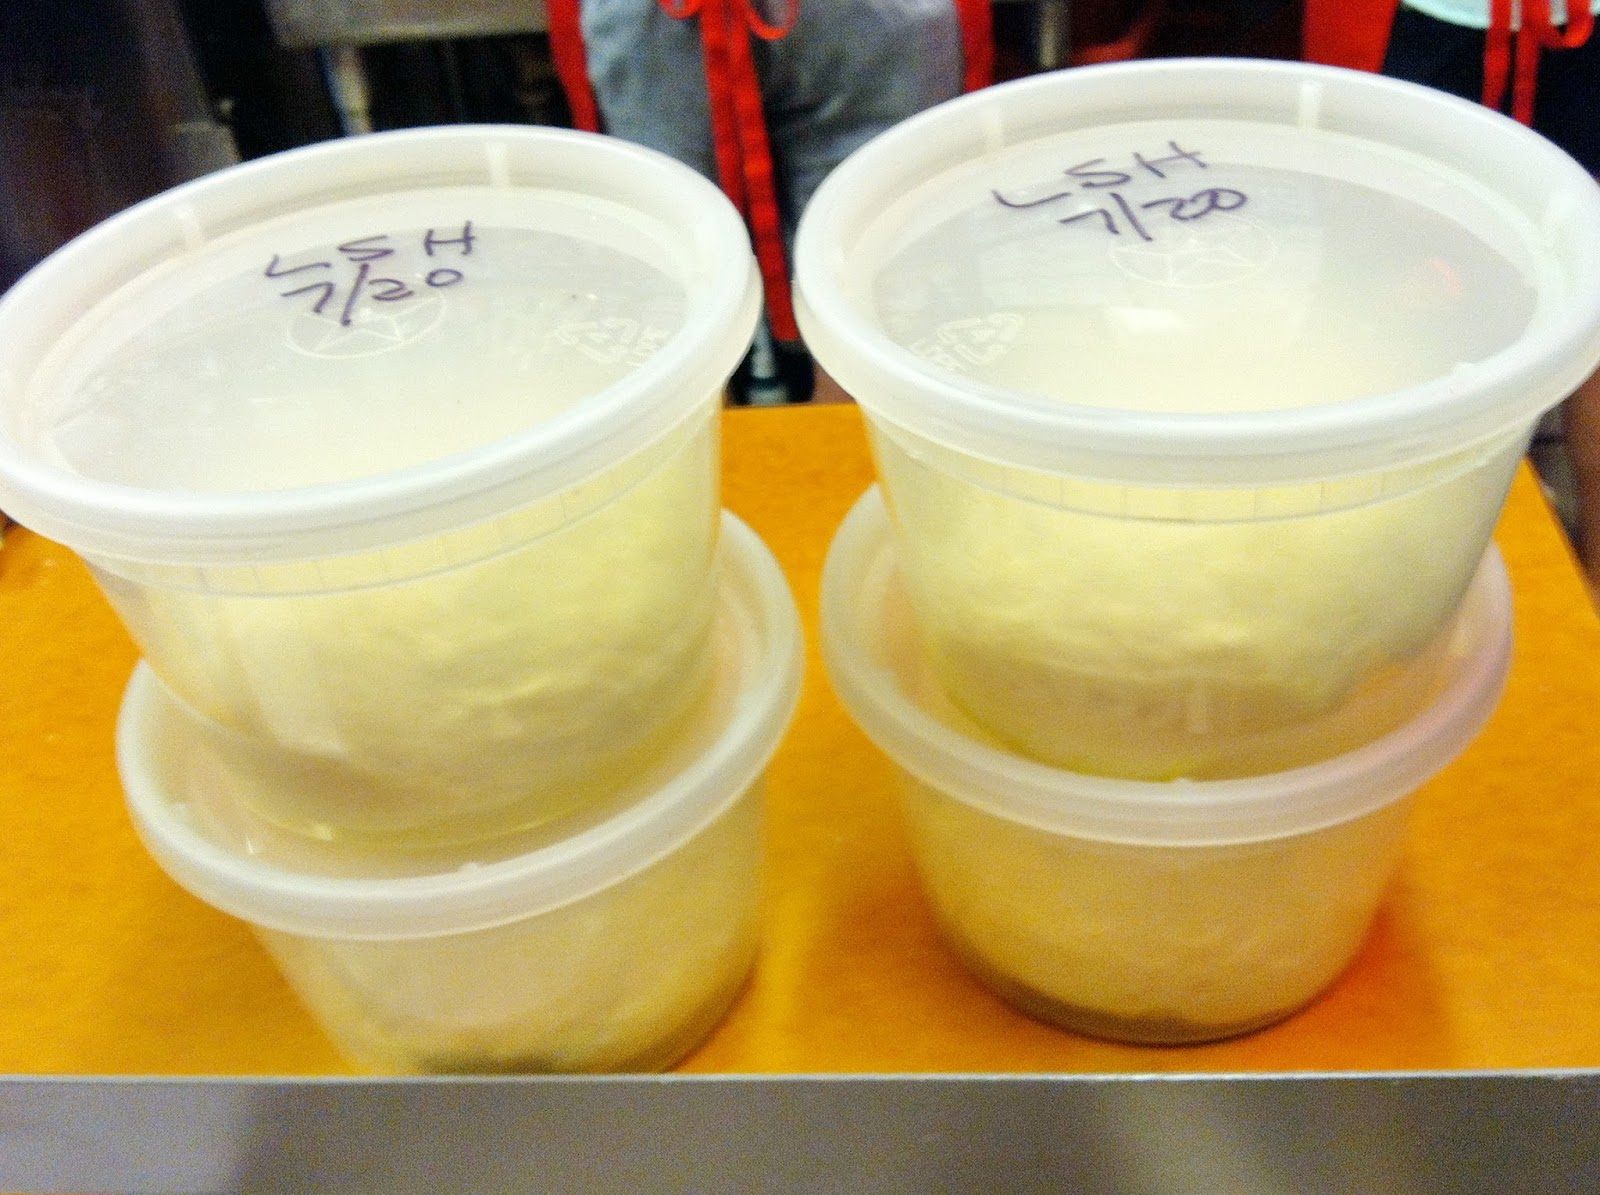
Pizza a Casa has now saved me. We started by mixing the yeast with warm water and sugar, both of which would speed the proofing process. At the same time, our teacher, Pizzaiolo Neil, explained that we’d be making a blob of dough that would weigh about 32 ounces (2 pounds). We’d cut the blob into quarters (8 ounces each), which, by chance, are about the size of an 8-ounce cup. In that case, if we put each quarter into a 16-ounce plastic covered container, the dough will have doubled in size once it fills the container. A miracle! How simple and precise is that? I could breathe deeply, relax my shoulders, and smile.
![]() |
| Step 1: Mix the dough into a large ball and knead it. |
![]() |
| Step 2: Cut the large ball into 4 small balls. |
![]() |
| Step 3: Let the dough rise. |
| Step 4: Stretch the dough and add toppings. Here, pears and gorgonzola, to be followed with balsamic vinegar. Yum! |
We learned several techniques helpful in turning the dough from a blob into a nice, flat 12-inch circle, starting with “soft bongo” pats to reach a 6-8-inch mound, then the “gravity drop” for stretching the dough, and finally the “DJ” stretch, to extend the shape to a circle or what passes for a circle in pizza class. (Neil was adamant that circle-ness is less important than not overhandling the dough.)
| Swoon time: This one is thinly sliced potato (steeped in olive oil and herbs), pecorino, rosemary, and olive oil. |
The folks at Pizza a Casa were kind enough to allow me to include their recipe for dough here. But if you’re ever in Manhattan on a Saturday or Sunday with time on your hands – it’s a 4-hour class – get thee to the lower East Side and learn to make pizza. (You’ll actually need to reserve a spot, which is easy at their website, www.pizzaschool.com.) Or you can get their iPad app, DIYPizzaPie, which apparently covers most of what goes on in the class – except, of course, for the tastings. But for all these techniques – the mixing, the kneading, the stretching, and that ever-important move where you slip it into the oven – there’s really nothing like watching it happen to help you make a great pizza. Mangia!
![]() |
| Salad pizza: mozzarella, ricotta (with added butter), pignoli nuts, and arugula (added after baking). |
Makes enough for four 12-inch pies.
20 ounces (3½ cups) unbleached all-purpose flour (plus more for dusting/stretching)
12 ounces water, warm (110º) – not hot
1 packet active dry yeast (or 2¼ teaspoons, if from a jar)
⅛ teaspoon sugar
1 tablespoon salt (fine grind, as in finishing salt)
1 tablespoon extra virgin olive oil (cooking oil quality – not the expensive stuff)
semolina flour (not corn meal)
Preheat oven to its maximum setting (usually 500-550º). Preheat for 1 hour if you’ll be using a baking stone, 30 minutes if you’re using a pizza screen, pizza pan, or baking sheet.
Stir the yeast into the warm water along with the sugar. Set aside. (Yeast should “proof” for 10-15 minutes.)
In the meantime, in a large mixing bowl, stir together the flour, salt and oil. Add the proofed yeast and stir until the dough is “shaggy,” which means well mixed and not overly sticky.
Turn the dough out onto a lightly floured surface, sprinkle a bit of flour on top, and knead 4-5 minutes, until the dough is smooth and elastic. Kitchen Goddess note: Kneading, pizza-style, means lean into the dough with your palm, press it down, press it forward, fold it over, and repeat. Or you can use a mixer with a dough hook, also for 4-5 minutes. When you’re done, the dough should be just slightly tacky – if it’s still sticky, dust it with flour and knead that in.
Divide your dough into four smooth balls, pinching together and smoothing any gaps in the surface. Set the dough aside in your 16-ounce containers and let it rest at least 45 minutes in an area whose temperature is 75-80º. (Or you can do a “cold rise” in the fridge for 1-2 days.)
To stretch the dough, lay it out on a surface dusted with flour, and begin by patting the dough – like playing bongos, moving from the center out – until it’s at least 8 inches wide. At that point,
you can pick it up by the edge (about the last two inches) and rotate the disk while letting the weight of the dough help to stretch itself. Don’t panic if your dough develops a hole – just pinch it together and flatten the spot.
Before adding toppings, move your crust to a pizza peel (that thin paddle used by pizzaiolos everywhere to slip the pie onto the stone) that’s been dusted with semolina. Add toppings and cook 6-10 minutes (depending on your oven), but you should begin checking after 5 minutes. We were cautioned not to overload our pizzas, as having too many ingredients – wet ones, especially – will change the way the crust bakes.
| Amazing dessert pizza: sliced banana, chopped peanuts, and Nutella (applied after the baking). |
Wednesday, July 31, 2013
Keeping My Cool
What’s cooking? Apricot Sorbet and Peach Frozen Yogurt
Normally, the idea that a giant hotel will, in 6 months time, be blocking part of the view from our condo would be enough to send a person into a deep funk.
The news was worrisome, mostly because it threatened our view of the Statue of Liberty. But in life, I try not to worry about events over which I have no control. I’m not sure it’s saved me any gray hairs, but it certainly reduces the number of things I worry about. So I’ve determined to make whatever lemonade I can out of this little lemon.
Mostly, it’s been really fun this summer watching the crews of construction workers pouring and smoothing foundations, installing windows, framing out rooms, and so on. Last week, when the weather was ghastly and I didn’t want to go out, the ever-changing panorama of workmen and cranes and those elevators that go on the outside of the building was a lot more fun than daytime TV.
The heat outside also encouraged me to generate more cool inside – with sorbets and frozen yogurts. With any fruit I can get my mitts on. OMG. Each flavor seems better than the last. So if you don’t have an ice cream maker, I heartily recommend one. Try one of these, all adapted from David Lebovitz’s The Perfect Scoop.
But first, a couple of the Kitchen Goddess’s notes about sorbets/frozen yogurts:
1. These recipes call for cooking the fruit in a non-reactive saucepan. Generally, that means anodized aluminum, glass (e.g., Pyrex), enamel-coated cast iron (e.g., Le Creuset), or stainless steel. Highly acidic foods – most fruits (including tomatoes), wine, and vinegars – react badly with aluminum and untreated cast iron, causing a metallic taste to leach into the food, changes in the color of the food, and pits/discoloration in the pan itself. Aren’t you glad you asked? You can use a copper pan, but only if you’re cooking fruit WITH sugar. Me, I just go with the stainless steel pans.
2. My friends at America’s Test Kitchen recommend “super-chilling” your dessert base by freezing a small amount (~½ cup) of it, then remixing it into the larger part before transferring it to your ice cream machine. That seems to be effective in producing a less granular dessert.
Makes about 1 quart.
2 pounds really ripe apricots, pits removed
1 cup water
1 cup sugar
1 tablespoon Domaine de Canton ginger liqueur
Kitchen Goddess note: The ginger liqueur was my own idea. Or you can just add a piece of fresh ginger to the stovetop mixture. But if you get the ginger liqueur, your life will never be the same. Lebovitz added almond extract instead, which doesn’t sound nearly as exciting.
Chop the pitted apricots into eighths. (Don’t obsess on precise eighths – it’s all just going into a stew.) Bring the apricots and water over medium heat in a non-reactive pan, covered, until cooked through (about 10 minutes). Stir occasionally. When the fruit is completely softened, remove it from the heat and stir in the sugar. Let cool to room temperature.
Purée the mixture in a blender until smooth, about 3 minutes. Add the ginger liqueur. Chill thoroughly, then process in your ice cream maker according to the manufacturer’s instructions.
Makes about 1 quart.
1½ pounds ripe peaches (about 5 large peaches)
½ cup water
¾ cup sugar
1 cup Greek yogurt (whole-milk, 2%, or fat-free – I used fat-free which makes the sorbet a bit harder to scoop straight out of the fridge, so I let it thaw 12-15 minutes first)
1 teaspoon fresh lemon juice
Peel and pit the peaches, then cut them into chunks. Put them with the water into a non-reactive saucepan and cook over medium heat – low simmer – until soft (they’ll start to look like canned peaches), about 12 minutes. Turn off the heat and stir in the sugar. Refrigerate until well chilled.
Purée the chilled fruit in a blender with the lemon juice and the yogurt. Depending on your preference, you may want to leave the purée slightly chunky; smooth or slightly chunky won’t matter to the flavor.
Process in your ice cream machine according to manufacturer’s directions.
Kitchen Goddess note: In a moment of what can only be described as inspiration, the Kitchen Goddess spooned on some of that fabulous Blueberry Syrup from an earlier post. OMG.
P.S. It turns out we’ll still have the best parts of our view, including Lady Liberty.
The news was worrisome, mostly because it threatened our view of the Statue of Liberty. But in life, I try not to worry about events over which I have no control. I’m not sure it’s saved me any gray hairs, but it certainly reduces the number of things I worry about. So I’ve determined to make whatever lemonade I can out of this little lemon.
Mostly, it’s been really fun this summer watching the crews of construction workers pouring and smoothing foundations, installing windows, framing out rooms, and so on. Last week, when the weather was ghastly and I didn’t want to go out, the ever-changing panorama of workmen and cranes and those elevators that go on the outside of the building was a lot more fun than daytime TV.
The heat outside also encouraged me to generate more cool inside – with sorbets and frozen yogurts. With any fruit I can get my mitts on. OMG. Each flavor seems better than the last. So if you don’t have an ice cream maker, I heartily recommend one. Try one of these, all adapted from David Lebovitz’s The Perfect Scoop.
But first, a couple of the Kitchen Goddess’s notes about sorbets/frozen yogurts:
1. These recipes call for cooking the fruit in a non-reactive saucepan. Generally, that means anodized aluminum, glass (e.g., Pyrex), enamel-coated cast iron (e.g., Le Creuset), or stainless steel. Highly acidic foods – most fruits (including tomatoes), wine, and vinegars – react badly with aluminum and untreated cast iron, causing a metallic taste to leach into the food, changes in the color of the food, and pits/discoloration in the pan itself. Aren’t you glad you asked? You can use a copper pan, but only if you’re cooking fruit WITH sugar. Me, I just go with the stainless steel pans.
2. My friends at America’s Test Kitchen recommend “super-chilling” your dessert base by freezing a small amount (~½ cup) of it, then remixing it into the larger part before transferring it to your ice cream machine. That seems to be effective in producing a less granular dessert.
Apricot Sorbet
Makes about 1 quart.
2 pounds really ripe apricots, pits removed
1 cup water
1 cup sugar
1 tablespoon Domaine de Canton ginger liqueur
Kitchen Goddess note: The ginger liqueur was my own idea. Or you can just add a piece of fresh ginger to the stovetop mixture. But if you get the ginger liqueur, your life will never be the same. Lebovitz added almond extract instead, which doesn’t sound nearly as exciting.
Chop the pitted apricots into eighths. (Don’t obsess on precise eighths – it’s all just going into a stew.) Bring the apricots and water over medium heat in a non-reactive pan, covered, until cooked through (about 10 minutes). Stir occasionally. When the fruit is completely softened, remove it from the heat and stir in the sugar. Let cool to room temperature.
Purée the mixture in a blender until smooth, about 3 minutes. Add the ginger liqueur. Chill thoroughly, then process in your ice cream maker according to the manufacturer’s instructions.
* * *
Peach Frozen Yogurt
Makes about 1 quart.
1½ pounds ripe peaches (about 5 large peaches)
½ cup water
¾ cup sugar
1 cup Greek yogurt (whole-milk, 2%, or fat-free – I used fat-free which makes the sorbet a bit harder to scoop straight out of the fridge, so I let it thaw 12-15 minutes first)
1 teaspoon fresh lemon juice
Peel and pit the peaches, then cut them into chunks. Put them with the water into a non-reactive saucepan and cook over medium heat – low simmer – until soft (they’ll start to look like canned peaches), about 12 minutes. Turn off the heat and stir in the sugar. Refrigerate until well chilled.
Purée the chilled fruit in a blender with the lemon juice and the yogurt. Depending on your preference, you may want to leave the purée slightly chunky; smooth or slightly chunky won’t matter to the flavor.
Process in your ice cream machine according to manufacturer’s directions.
Kitchen Goddess note: In a moment of what can only be described as inspiration, the Kitchen Goddess spooned on some of that fabulous Blueberry Syrup from an earlier post. OMG.
P.S. It turns out we’ll still have the best parts of our view, including Lady Liberty.
Thursday, July 18, 2013
Surviving Summer in a Small Kitchen
What’s cooking? Roasted Garlic and Honey-Lemon Salad Dressing
As much as I love cooking, I still don’t want to spend all my time in the kitchen. Especially in the summer when I’m consigned to an area that’s about 9 feet by 4 feet of walking around space. I know, it’s a perfectly good size for an apartment kitchen; it’s just really small compared to the kitchens I’ve been cooking in for the last 33 years.
So when I lose my mind at the farmers’ market, as I did last Sunday – okay, most Sundays – I have to find ways to clear fridge space as well as work space, and minimize the time I spend on meals for the rest of the week.
❶ I start with the beets. A bunch of beets with its leafy tops takes up a ridiculous amount of space in the fridge. Turn the oven on to 400º. Cut the stems off the beets and stick them (the stems) in a couple of inches of water in the sink. Put the beets themselves into a covered casserole dish (no need to wash them) and bake in the oven for 45 minutes.
When they’re done, let the beets cool until you can handle them, then gently rub the skins off with your fingers. (The Kitchen Goddess uses rubber gloves because God forbid she should get beet juice under her nails.) Store them in the fridge for up to 3-4 days until you find time to make a beet salad.
![]() |
| Beets -- roasted, peeled, ready for whatever |
❷ As long as I’ve got the oven on, I grab a head of garlic – which you can do even if you don’t buy beets – for roasting. Roasted garlic is so fabulous that the Kitchen Goddess wonders what she ever did before she discovered it. It can take the place of chopped garlic in a salad dressing or a pasta dish or to enhance the flavor in a dish you might not ordinarily add it to. It has none of that pungency nor the burn of raw garlic, and baking it ahead of use brings out its sweet and savory characteristics. I recently experimented with it in a mushroom risotto, which disappeared like *poof!* when I served it to my family. It’s excellent in mashed potatoes and even on its own as a spread with bruschetta.
For the Roasted Garlic:
![]() |
| Garlic before roasting |
■ Slice enough of the top off the head to expose most of the individual cloves. The Kitchen Goddess goes a little overboard here and trims the tops off even the cloves lower down on the side of the head; you should go as far as you want.
■ Set the bulb in an ovenproof dish. You may want to trim the base of the bulb just enough to let it sit flat.
■ Drizzle a tablespoon of olive oil over the garlic, and sprinkle on a pinch of kosher salt.
![]() |
| Garlic after roasting |
■ If you’re not planning to use it immediately, store the roasted garlic in an airtight container in the fridge, where it will keep for a couple of weeks.
❸ Back to the beet greens. Once they’ve soaked the dirt off, spin them dry and lay them between layers of paper towels. Stack the layers and maneuver the lot into a gallon-size zip-lock bag. Squeeze as much air out of the bag as you can and store in the refrigerator until ready for cooking.
❹ Now for those giant heads of lettuce. Follow the same procedure as for the beet greens (or turnip greens or collards, etc.): wash/soak them in a sinkful of cold water to get the dirt off, spin them dry, then layer them with paper towels and – gently – jam the lot into another zip-lock bag. Once you’ve squeezed the air out, they’re like those vacuum-sealed bags you can buy to store your blankets or whatever – they consume a fraction of the space for a head of lettuce, and they don’t even have to be in a vegetable drawer.
The best part about dealing with the lettuce like this is that you can make a salad at a moment’s notice. Moreover, the lettuce stays fresh this way for about TWO WEEKS (you heard me), as long as you remember to squeeze the air out again each time you remove some.
![]() |
| Two heads of lettuce, fresh from the farmers' market. |
Now that you’re completely organized, you can make a salad. Summer salads are the best because of the wealth of fresh ingredients available. My favorites start with a bowlful of torn lettuce leaves, and add at least 2 – or as many as you like – of the following (in no particular order):
Avocado (cubed or sliced)
Berries: blueberries, strawberries, raspberries, blackberries
Peas: sugar snap peas, snow peas, or English peas
Corn: no cooking needed, just cut it right off the cob
Cucumber (cubed or sliced)
Peach (½-inch dice)
Radishes, thinly sliced
Then add your favorite not-too-complex dressing, which might even be a bottled dressing. I will confess here to a fondness for Newman’s Own Caesar Dressing. Here’s a great one, from one of my previous posts, with the addition of one of those roasted garlic cloves:
Honey-Lemon Salad Dressing
3 tablespoons fresh lemon juice
3 tablespoons honey
½ teaspoon salt
1 clove roasted garlic (optional)
½ cup olive oil
fresh ground pepper
Whisk together the honey, lemon juice, and salt. Mash the garlic into it. Add the olive oil in a stream, whisking constantly as you pour. Add the pepper and adjust the seasoning to taste.
Happy summer!
Tuesday, July 9, 2013
Save the Greens
What’s cooking? Beet Greens with Bacon and Tomato
I lost my mind at the framers’ market yesterday. It was the first day for peaches, the first for field-ripened tomatoes (or so they said, tho they looked suspiciously like the hothouse variety), and the first for sweet corn. High season has hit for the blueberries, and as I entered the marketplace, a woman passed by me with the most gorgeous beet greens sticking artfully out of her shopping bag. I vowed right then to get some for myself.
So after snagging a bunch of beets along with the peaches, tomatoes and blueberries, and my usual allotment of lettuce and mushrooms and zucchini and fresh fish, I was heading toward the car when I ran into my friend Claudia. She mentioned how nice it was to have sour cherries available for her cherry pies. What the heck, I said to myself – maybe I should make a cherry pie, too. (More on that in my next post.)
Wednesday, June 26, 2013
Just Getting Out of Town Could Kill Me
What's cooking? Minted Honeydew Sorbet
Once again, I’ve made the trip north for the summer. Closed up the house, stopped the newspapers, forwarded the mail, and turned the thermostats up to 82º. Threw out strange leftover bits of sauces I once thought surely I’d use, a few cheeses that were already rock-hard and one or two that appeared to be turning into early life forms. Ironed two sets of sheets and half a dozen shirts I won’t wear until September, and spent more hours than I should have watching the finals of the trials to choose the U.S. teams for the world bridge championship. Then I made minted honeydew sorbet, after which I stayed up half the night packing.
Why the sorbet? you ask. Because I had this lovely, ripe honeydew melon in my kitchen, and I just couldn’t see carrying it on the plane north. Throwing it away was not an option, and I couldn’t offer it to my neighbors at that hour. I’ve never tried freezing melon, but by the time you’ve cut it up into small enough pieces for that, you’ve done most of what you need for the sorbet, and I do love sorbet.
Saturday, June 15, 2013
Who’s Always in Your Corner? Dad
What’s cooking? Grilled Apricots with Raspberry-Rhubarb Compote
I don’t know why I picked this image – neither my father nor my husband have ever been much in the DIY department. Maybe it was the cookie cutter. One of my favorite photos captured my husband – in his capacity as Santa’s helper – puzzling over the directions to one of those big plastic playhouses, while my father sat in a nearby chair offering helpful hints.
But both of these men in my life excelled at fatherhood. Not models of perfection, of course, but good, decent souls who would do just about anything for their children, and the kids knew it. When I failed to graduate from college in the standard four years, my dad said nothing but “Do what you have to to finish.” For my brother, who gave us all a few gray hairs, my dad made it to every court appearance or police station necessary. And with my own sons – why is it always the boys who end up at the police station? – when Officer Bob called late at night, my hubby would retrieve them, of course, then talk to them at length about why they’d done whatever stupid idiot crazy thing they’d done that landed them in the hands of the police.
Thursday, June 6, 2013
The Season of Salads
What’s cooking? Herbed Buttermilk Ranch Dressing and more
I love my husband, but I sure do have a great time in the kitchen when he’s gone. I get to try all kinds of weird foods, play in the kitchen late at night, and if I don’t feel like cooking, I might open up a can of Campbell’s Pork and Beans for dinner. Straight out of the can. Mmm-mm. Feels just like my single days in New York.
So tonight, I’m trying a fried tofu recipe from Melissa Clark in last Wednesday’s NY Times. I’m not sure I’m going to like it, but I’ll let you know. The tofu was only $1.48 at my grocery store, so if it’s too strange, I’m out less than a buck fifty.
I’ve been experimenting with condiments this week – mustard and mayo. I know, the grocery stores stock lots of perfectly good mustards and one good mayo (Hellman’s, what else?) on their shelves. But aren’t you ever a bit curious to see what the homemade stuff tastes like?
Thursday, May 30, 2013
Be Not Afraid
What's cooking? A couple of sorbets and Almond Phyllo Crisps
In my stroll through the Sunday New York Times last week, I came across a piece about the migration of “Lean In” from book title (by Facebook’s Sheryl Sandberg) to cultural virus – in effect, the phrase of the week, or maybe even the month if Sandberg is lucky.
Columnists and editorial writers have seized on the phrase to talk about women in math and science classes, women in the executive suite, women in the boardroom. A lot of talk about pushing harder, seizing opportunities, taking risks. Excuse me, ladies, but to echo the 1970s, “Been there, done that.”
Subscribe to:
Posts (Atom)