

One of the great joys of summertime for me is taking my son’s family to the pool where my hubby plays golf. My own children never much cared for this pool because it wasn’t in our town so their friends weren’t there. But my 2½-year-old granddaughter and my 5-month-old grandson haven’t reached that stage yet, so they are perfectly happy to join me. And as the pool closes after this weekend, I’m madly jamming in as many visits there as possible. I think both grandkids may be waterlogged by the end of the season.
In addition to marking the end of what we think of as summer – never mind that it’s got another 3 weeks to its run – Labor Day offers one final shot at a National Grilling Day. One last nationwide salute to outdoor cooking and eating.
A couple of notes about the recipes. The meat is from a recent write-up by Melissa Clark in The New York Times. The garlic, thyme, and basil of the marinade bring a delightfully herby flavor to the steak, which is already juicy and reasonably tender as a cut – as long as you slice it on the diagonal. (More about this later.) And because the long, ribbons of skirt steak offer more surface than interior, they cook quickly. If they seem unwieldy to work with, you can just cut them in half or thirds.
The tomatoes are from an old favorite of mine out of the original Silver Palate Cookbook. This time, I wanted to make use of the crisp, peppery arugula I got at the farmers’ market, instead of spinach, which was in the original preparation. I also substituted corn for the pine nuts in the original, and I loved the sweetness and crunch they brought to the dish.
As for the peach frozen yogurt, I must admit to being a mintaholic – I can never get enough of the stuff. I was in line to buy lettuce from my organic farmstand, and was almost knocked over by the fragrance of a big bunch of mint. So I bought it, and decided to combine it with the peaches in the frozen yogurt. But if you are not a mint freak, you won’t lose anything by eliminating it from the recipe.
The Menu
Grilled Skirt Steak with Spicy Pesto Marinade
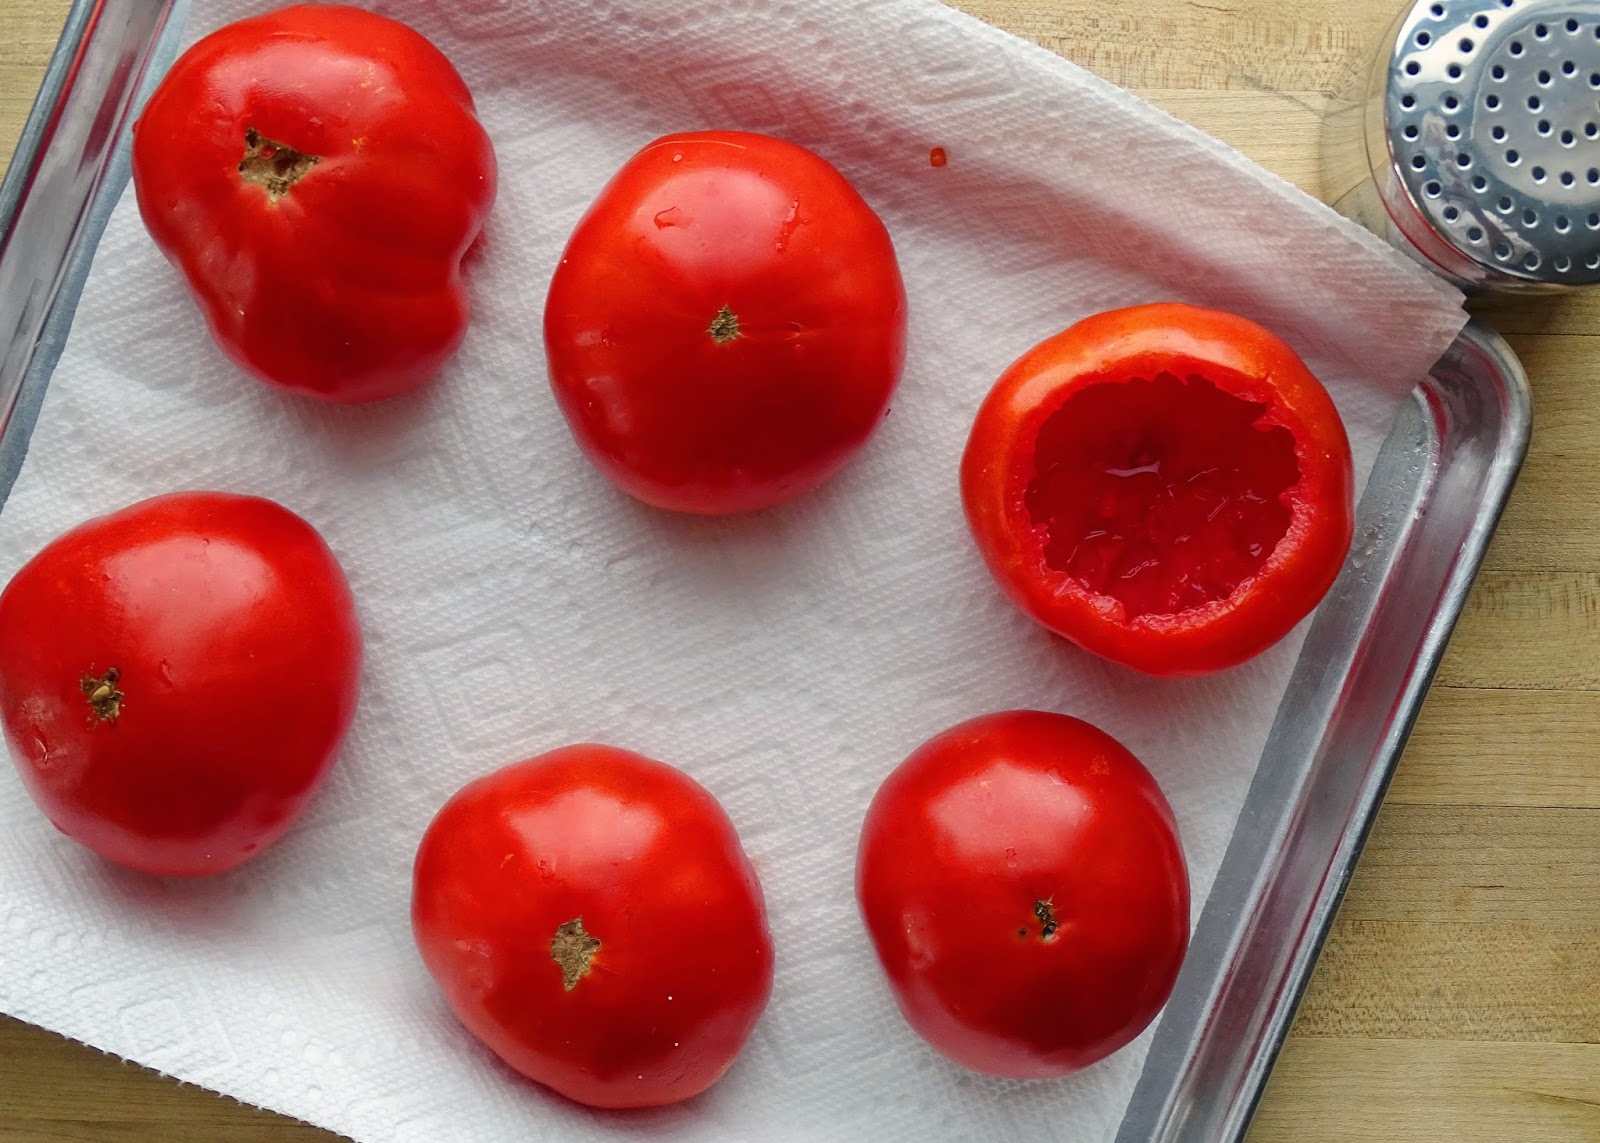
Tomatoes Stuffed with Arugula, Corn, and Ricotta
Watermelon and Feta Salad with Honey-Lemon Vinaigrette
Minted Peach Frozen Yogurt
It’s all easy to make, and while the tomatoes take a bit of time, you can assemble them in the morning and refrigerate them until a half-hour before it’s time to eat. On the night before, make the frozen yogurt mixture and the salad dressing, and marinate the beef. Assemble the salad while the tomatoes are baking and the beef is on the grill. In fact, I’ve laid out the entire cooking schedule for you, right after the recipes.
The Recipes

Grilled Skirt Steak with Spicy Pesto Marinade
Adapted from Melissa Clark in The New York TimesServes 6.
1 cup fresh basil leaves, packed
3 scallions (white and green parts), thinly sliced
2 tablespoons fresh lemon thyme leaves (if no lemon thyme, use regular thyme)
2 large garlic cloves, coarsely chopped
2 tablespoons pickled peppers (peperoncini or jalapeño – seeds removed), coarsely chopped
2½ teaspoons kosher salt
finely grated zest of 1 lemon (2 lemons if using regular thyme)
juice of half a lemon (1-1½ tablespoons)
¼ cup extra-virgin olive oil
2½ pounds skirt steak
In a food processor or blender, combine the basil leaves, scallions, thyme, garlic, peppers, salt, zest, and lemon juice. Pulse until the mixture is grainy. Add the olive oil and blend – stopping occasionally to scrape down the sides – until the mixture is thick and pasty, 30 seconds to a minute.
Blot the meat with paper towels and put it in a gallon-sized Ziploc bag. Pour in the marinade, close the bag securely, and massage until the marinade is well distributed. Alternatively, put the meat in a large dish, spoon the marinade over it, and cover with cellophane wrap. In either case, refrigerate the meat and marinade at least 30 minutes – preferably overnight.
Turn on the grill, and when you’re ready to cook, pat the excess marinade off the meat with a paper towel. (The marinade will already have done its work, and the meat will cook best if it’s relatively dry.) Grill at medium-high for 3-5 minutes per side – the meat should look lightly charred, and it’s best served rare to medium-rare. Let it stand 5 minutes before slicing.

Kitchen Goddess note: The structure of this cut of meat is such that it will be much more tender – and prettier – if you slice it against the grain, at about a 45-degree angle. So DON’T overcook it, and DO slice it against the grain.
* * *

Tomatoes Stuffed with Arugula, Corn, and Ricotta
Inspired by The Silver Palate CookbookServes 6.
6 ripe tomatoes
salt for draining tomatoes
3 tablespoons olive oil
1 cup finely diced yellow onions
about 10 ounces fresh arugula, rinsed well and coarsely chopped
salt and freshly ground pepper, to taste
grated nutmeg, to taste
1 cup ricotta cheese (whole milk or part-skim)
2 large egg yolks
kernels cut from 1 ear of corn (about 1 cup)
½ cup Italian parsley, chopped
¼ cup grated Parmigiano-Reggiano cheese, plus additional cheese to top tomatoes
Core the tomatoes and scrape out seeds and ribs using a small spoon. Be careful not to pierce the sides of the tomatoes. Salt the insides and turn them upside down to drain onto paper towels for 30 minutes.
Place the arugula with a tablespoon of water into a separate, dry skillet over medium heat., and stir it around until it wilts, then cover it and cook – stirring occasionally – for about 5 minutes or until tender. Turn it out onto a cutting board and chop fine.

Add the arugula to the onions and season to taste with salt, pepper, and nutmeg. (I started with ¾ teaspoon of kosher salt, about 10 grinds of fresh black pepper, and ½ teaspoon freshly grated nutmeg, but you should start slow and adjust to your own liking.) Cook over low heat, stirring occasionally, for 7-8 minutes. Be careful not to scorch it.
In a medium bowl, beat the ricotta with the egg yolks until smooth, and stir in the arugula/onion mixture, the corn, ¼ cup of the cheese, and the parsley. Mix well, and adjust salt/pepper to taste.
Preheat the oven to 350º. With a paper towel, gently blot the insides of the tomatoes dry, and spoon an equal amount of the filling into each. Sprinkle additional cheese on top.

Arrange the tomatoes in a shallow baking dish. If you don’t plan to bake the tomatoes immediately, cover them with Saran Wrap and refrigerate them. When ready, set the dish in the upper third of the oven and bake about 30 minutes or until the tops are lightly browned and bubbly. Serve immediately.
* * *
 |
| Oops -- forgot to mention I added slivered Italian olives. Tasty but not necessary. |
Watermelon and Feta Salad with Honey-Lemon Vinaigrette
Serves 6.
For the salad:
5-6 cups watermelon, cut in 1-inch cubes
3-4 ounces fresh feta cheese
Bibb lettuce/arugula/watercress/spinach – take your pick
Scatter the watermelon on top of the greens, or toss them together. Crumble the feta on top. Dress with Honey-Lemon Vinaigrette and serve.
For the vinaigrette:
3 tablespoons fresh lemon juice
3 tablespoons honey
½ teaspoon salt
1 clove roasted garlic (optional)
½ cup olive oil
fresh ground pepper
Whisk together the honey, lemon juice, and salt until the salt dissolves. Mash the garlic into it. Add the olive oil in a stream, whisking constantly as you pour. Add the pepper and adjust the seasoning to taste.
* * *

Minted Peach Frozen Yogurt
Inspired by David Lebovitz in The Perfect ScoopMakes 1 quart.
1½ pounds ripe peaches (about 5 large), peeled, pitted, and cut into chunks
½ cup water
¾ cup sugar
2 sprigs mint
½ cup Greek yogurt (2% fat)
½ cup half-and-half
½ teaspoon freshly squeezed lemon juice
In a medium, nonreactive (e.g., glass or stainless steel) saucepan, simmer the peaches in the water, covered but stirring occasionally, until cooked through, 10-12 minutes.
Remove the peaches from the heat and stir in the sugar until it dissolves. Add the mint sprigs, cover the pan, and let sit for 10 minutes. Remove the mint and chill the peach mixture in the refrigerator for at least an hour.
When the peaches are cool, purée them with the remaining ingredients in a blender until well mixed but not quite smooth. Freeze in your ice cream maker according to manufacturer’s directions. Serve with Nabisco Chocolate Wafers or Trader Joe’s Triple Ginger Snaps.
The Cooking Schedule
Step 1: The night before –
■ Cook the peaches, add the mint and sugar, and cover the pan for 10 minutes while you make the marinade for the meat.
■ Throw together the ingredients for the marinade in your food processor. Blot the meat dry and load it into a gallon-sized Ziploc bag. [Kitchen Goddess note: The baggie solution is a triple winner: there’s no mess, you can massage the marinade and the meat together any number of times before cooking, and it takes up way less space in the fridge. And when you’ve removed the meat for cooking, you can toss the bag and its soupy contents into the trash.]
■ Throw away the mint, and stash the peaches in the fridge for overnight. Have a glass of wine and go to bed.
Step 2: The next morning –
■ Core and salt the tomatoes, and set them to drain.
■ While the tomatoes are draining, run the peaches and remaining ingredients for the frozen yogurt in your blender just long enough to make sure it’s all well mixed. Move the mixture to your ice cream maker and turn it on.
■ Finish the stuffing and fill the tomatoes. Top them with the cheese and set them in a small baking pan with sides. Cover with cellophane wrap and refrigerate until time to cook.
Step 3: Dinner time –
■ Half an hour before dinner time, preheat the oven to 350º. When the oven is ready, start the grill. (These instructions are for a gas grill; I have no idea how far in advance you have to start a charcoal fire – the Kitchen Goddess doesn’t mess with charcoal.) Put the tomatoes in the oven.
■ While the tomatoes are cooking, assemble the salad.

And have a great Labor Day celebration!


