Sunday, November 23, 2014

Fresh Takes on Old Friends – Day 1 in a Marathon of Sides
What’s cooking? Watercress Purée


Start your engines! In my days as a New Jersey person, the opening notes of the Thanksgiving season were sounded by the obligatory gathering of the neighborhood cooks: my next-door neighbor, Anne; my backyard neighbor, Claudia; and I. We were the original Kitchen Goddesses.

It took a full morning for us to construct a Turkey Day menu, balancing the needs of each family for preferences in stuffings, sweet potatoes, white potatoes, and desserts. Then, in the spirit of healthful eating, we’d each take on something green to prepare. And as we counted 7 teenage boys among the eaters, we included calculations of roast turkey, smoked turkey, and ham in our deliberations. Usually, by the time we had the list of dishes firmed up, we’d planned enough food for our own group and any wandering armies that might pass by.

I miss those years. But my younger son (a doctor) will be working that day, and the older one will be with in-laws in New Jersey. Life moves on. My husband and I will be driving to San Antonio to spend Thursday with my brother and cousins; so this morning, I called my cousin, Helen, who’s hosting that dinner, to make sure I knew what I’d promised to take. We went over the dishes each of us and a third woman will contribute, covering important points like who will make the whipped cream, and oblique issues like serving spoons and candles. It took a good half hour, at the end of which I felt as satisfied as if I’d actually had a meal.

“Well, that was nice,” I said.

“Yes,” said Helen. “There’s nothing like a good menu chat with someone who cares.”

So if you’re cooking this week, I hope you’ll take an opportunity to call a friend and have a menu chat. It helps to get your thoughts organized and to bring a semblance of order to what can often veer dangerously close to chaos. Thus begins the giving season.

* * *

Last year, on the theory that what looks good will taste even better, the Kitchen Goddess vowed to help you give a face-lift to four vegetables:

Haricots Verts garnished with Toasted Panko Crumbs


Gem-cut Carrots garnished with Quinoa Crispies


Spinach and Sautéed Mushrooms


Asparagus Coins

So if you’re looking for side dishes, those are still great choices. This year, my focus again is the sides, in which we’re going for a slightly different take on a traditional food. If it’s not Thanksgiving unless you can serve those marshmallow-blanketed sweet potatoes, I will apologize. But consider for a moment that variety may actually be the spice of life, and give one of these treatments a whirl.

I’ll be posting four different dishes over the next four days. So if today’s offering isn’t what you want, check back tomorrow or the next day or the next.

Today, I want to introduce you to a stand-in for the traditional puréed spinach. Watercress, according to Wikipedia, is one of the oldest known leaf vegetables eaten by humans. Smart choice – it’s high in iron, calcium, iodine, and folic acid, as well as vitamins A and C and all those antioxidants. So it’s great for you, and has two other attributes that push it way ahead in my book: (1) it’s lots easier to clean – none of that soaking and rinsing and soaking and rinsing some more that you have to do to get rid of the sand on spinach; and (2) it has none of the tannins that characterize the “funny” mouthfeel you often get with cooked spinach.

Watercress also has a peppery taste that gives it a bit more zing. And the cooking process for this recipe is almost negligible. So it’s fast, easy, and tasty – what more could you want? Unless you don’t like cooked spinach and didn’t want it or a substitute on your menu. In which case, you should check back tomorrow, when I’ll have another delicious option.

This is about half the amount of watercress you'll need, but the photo has needs as well, so...

Watercress Purée

Adapted from Garlic & Sapphires (2006), by Ruth Reichl

Serves 4.

salt
1 medium potato (9-10 ounces), peeled and cut into 1-inch dice
1½ pounds watercress (3 large bunches), rinsed
4 tablespoons unsalted butter
1½ teaspoons freshly squeezed lemon juice
freshly ground pepper

Bring a large pot of water to boil with 2 tablespoons salt. Add the potato and cook 20 minutes.

While the water continues to boil, remove the potato and set aside. Add the watercress to the water, and when it returns to a boil, cook for 1 minute. Drain the watercress in a colander, pressing with the back of a large spoon to remove as much of the water as possible.

Put the watercress and the potato into the bowl of a food processor and run until it becomes a smooth purée. Add the butter and process again until the butter is completely incorporated. Add the lemon juice and ½ teaspoon each of salt and pepper, and pulse until incorporated. Adjust the seasoning to taste and serve.

Thursday, November 20, 2014

When the Warmth of Summer Is Already a Faint Memory
What’s cooking? Pork & Cider Stew


I took my husband to the beach last weekend. Not historic and sophisticated Nantucket, where we’ve been many times to visit friends, nor the luxury real estate of Kiawah Island, where he’s often played golf and where he thought – briefly – we’d spend our retirement years. Instead, I took him to Port Aransas, a scruffy, ramshackle fishing village at the northern end of Mustang Island, on the Texas coast just north of Corpus Christi. Home to as many crusty shrimpers as deep-sea sport fishing boats, and the beach where I spent my summers as a child.

I know, it’s not really that time of year when you go to the beach. But our younger son had a group of friends who’ve been reuniting every few years since college, and they’ve decided that our house in Austin is the place they most like spending these mini-reunions. Maybe it’s the Austin effect, or the normally great weather, or maybe just the idea that we have enough beds and the price is right. I love the fact that we built a retirement house in a place where the “kids” want to visit. Still, with six 30-somethings showing up for a few days, I also knew the right response – from all perspectives – was to remove my hubby from the scene.

I was a little nervous about taking him to “my” beach. I know my perceptions of the place are colored by my memories of those childhood summers, and I am not deluded by rose-colored sun glasses into thinking the place is pretty by anyone’s standards. Yet the town’s salt-eaten, weather-beaten, funkiness retains a charm for me, and I hoped my mate wouldn’t be put off by it.

Then there was the weather. Yup – record lows, the occasional sprinkle of rain, and not even a glimpse of the sun the entire time we were there. I was pretty sure these weren’t the best circumstances for introducing one love to another. Undaunted, I showed him the nature preserve, the birding center (next door to the town’s wastewater treatment plant, naturally), the golf course, and the thriving downtown. Ok, so not thriving, but relatively unchanged from my youth. And we took the obligatory tour through what a writer friend and I call the tacky stores, where you can get T-shirts for $7 and spongy visors for $4. Then we walked the beach.

As we packed to head home, I apologized for the crappy weather and the lack of excitement.

“Don’t apologize,” he said. “I get this place. We should come back – when the sun is out.”

What a guy.

* * *

By the time we got home, I was ready for a meal that would take away the 3-day chill. On the drive, I scoured my latest issue of Food & Wine, and found a recipe that fit the bill perfectly. In fact, I liked it so much I didn’t bother taking pictures, but made it again a few days later for the photo op. That batch I have happily frozen for when the next big norther hits Austin. I tweaked it a bit the second round – shortening the cooking time, adding the Granny Smith apple for a little extra tartness, adjusting the spices. It’s simple to make and smells and tastes like fall. Both my son and my husband raved over it.

Kitchen Goddess notes: (1) As you know, the Kitchen Goddess likes almost any dish that contains alcohol. For this recipe, I used a local hard cider, Austin Eastciders’ Gold Top Cider, which is medium-dry and deliciously tangy. Check with your local liquor store for a good, dry or semi-dry hard cider. Some grocery stores also carry sparkling hard cider.

(2) The Kitchen Goddess served this dish with baby new potatoes that were boiled in well-salted water for 30 minutes, then peeled while warm. As you know, the KG is a glutton for punishment, but peeling potatoes – even little ones that have been boiled – is a pain in the butt. So next time, she’ll be buying baby yellow potatoes, which don’t have to be peeled. And if you’re not a fan of potatoes, this dish would also be swell with nice, wide egg noodles.


Pork & Cider Stew

Adapted from Chef Fernanda Milanezi of Maeve’s Kitchen in London

Serves 4-6.

3 pounds boneless pork shoulder roast (also called Boston butt)
Kosher salt and pepper
2 tablespoons unsalted butter
2 tablespoons olive oil
5-6 ounces thick cut lean bacon, sliced in ½-inch pieces (or slab bacon, cut into ½-inch dice)
1 medium onion, thinly sliced
3 large garlic cloves, chopped fine
one 500-ml bottle sparkling dry apple cider (see Kitchen Goddess note above)
2 cups chicken stock
½ medium Granny Smith apple, cut in ½-inch dice
2 bay leaves
2 tablespoons cornstarch
½ cup heavy cream
2 tablespoons whole grain mustard
1 teaspoon dried sage, or 2 teaspoons finely chopped sage leaves


Prepare the meat by trimming off much of the fat then cutting it into 1½-inch cubes. Blot the meat with a paper towel and season well with kosher salt and pepper.

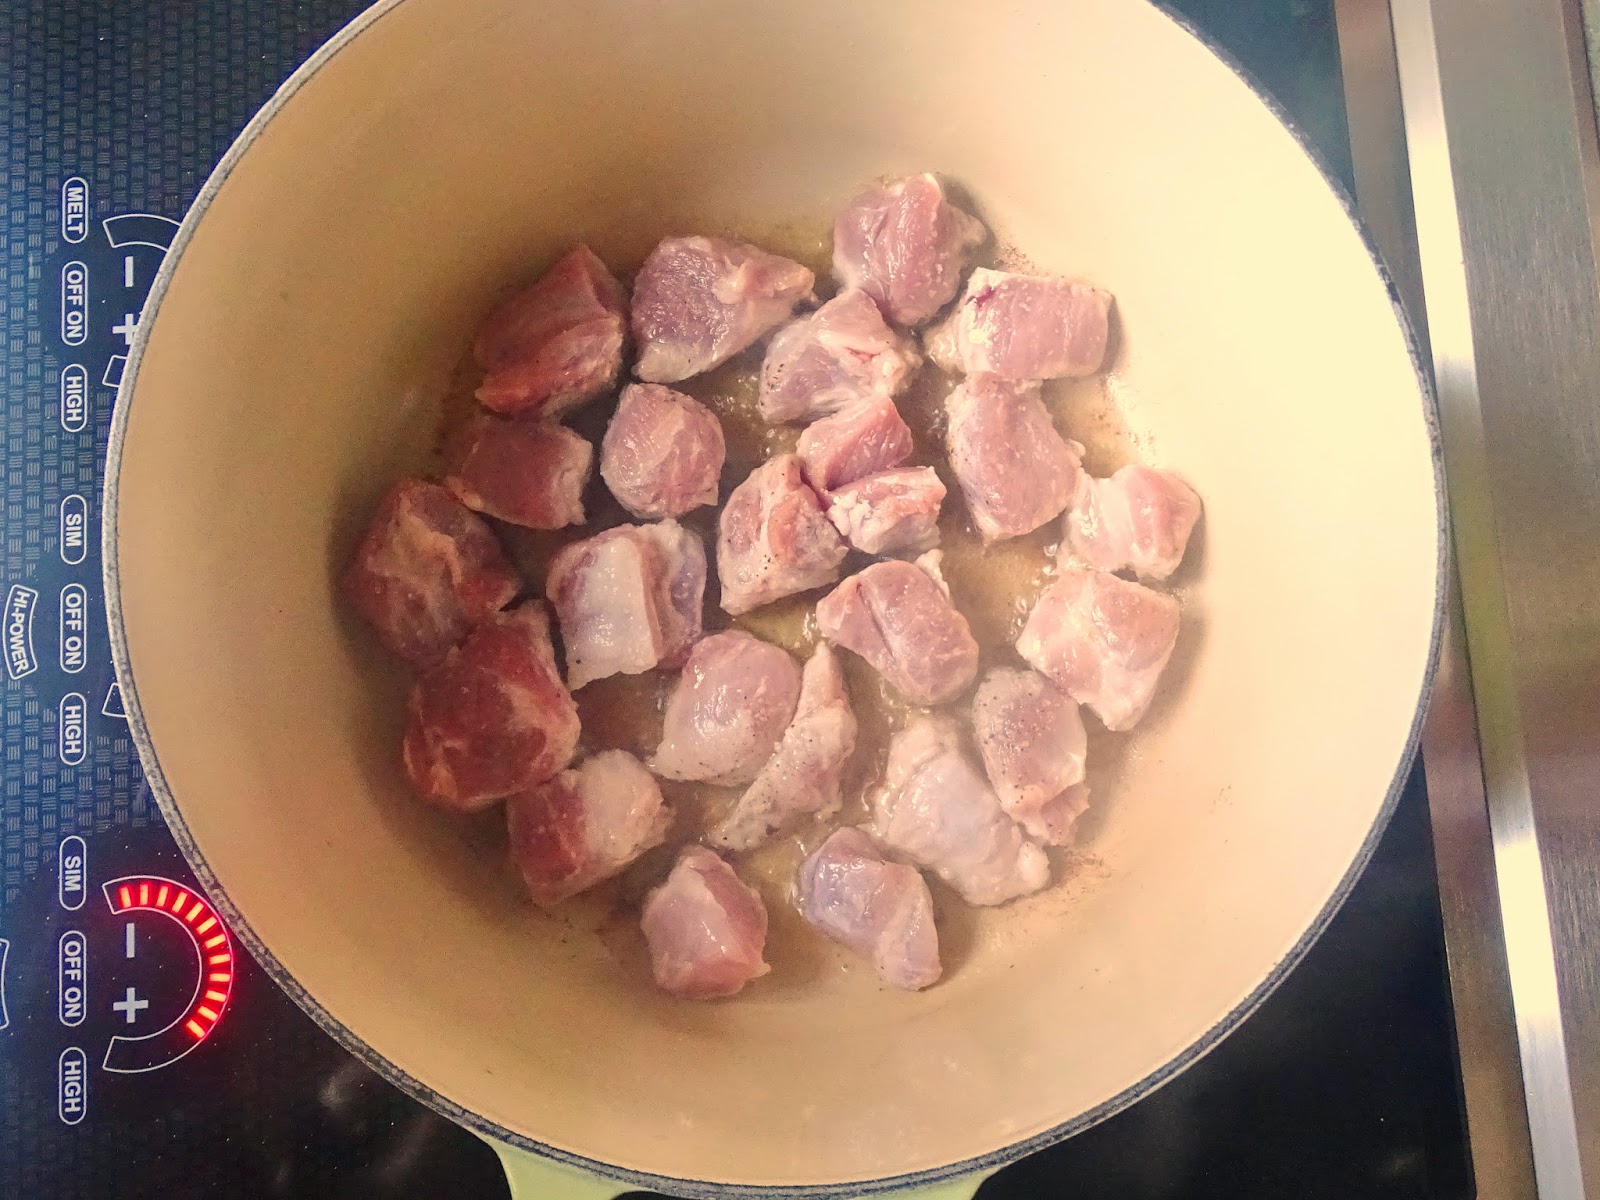
In a large enameled Dutch oven (I use a 5.5-quart Le Creuset round Dutch oven), melt 1 tablespoon of the butter with 1 tablespoon of the oil over medium-high heat. When the oil is hot, add one-third to one-half of the pork in a single layer – don’t overcrowd – and sauté until well browned, about 7 minutes. [Kitchen Goddess note: To get a good browning on the pork, put the meat into the oil on one side and don’t touch it again for about 3 minutes; then use tongs to turn it over and let it cook on the other side. For the last minute or two, you can rotate some pieces to a side that hasn’t browned.] Remove the browned meat to a bowl and continue sautéing with the rest of the pork, adding the remaining butter and olive oil. Reserve the browned meat.

Add the bacon pieces to the pot and cook until golden. Remove the cooked bacon to the bowl with the browned pork.

Discard all but about 4 tablespoons of the fat from the pot and reduce the heat to medium/medium-low. Add the sliced onion and the garlic and cook, stirring, until golden and softened, about 5 minutes.

Add the cider and deglaze the pan by scraping the browned bits from the bottom of the pot with a wooden spatula.

Add the pork, the bacon, the chicken stock, and bay leaves to the pot and bring the stew to a simmer. Cover the pot and reduce the heat to simmer the stew gently for 1½ hours.

[While the stew is simmering, you’ll have plenty of time to cook the potatoes or noodles.]

When the meat is tender, stir together the cornstarch with 2 tablespoons water, and add it to the stew along with the cream, the mustard, and the sage. Continue to simmer the stew until it has thickened, about another 5 minutes. Adjust seasoning to taste with salt and pepper. Discard the bay leaves before serving.


Serve with boiled baby potatoes or over wide egg noodles, and a green salad or green vegetable such as broccolini.

Tuesday, November 11, 2014

Basking in the Glow
What’s cooking? Creamy Lima Bean Soup


The Kitchen Goddess lost her mind recently and invited 40-some-odd people for gumbo last week. Now, I use the phrase “some-odd” here in the idiomatic sense – in fact, none of the people were odd. Okay, a few odd ones, but odd and lovable.

I revel in the planning phase of a party. What to serve, how to decorate the tables,... I can see the event unfold in my mind. But the mind is a funny place, and mine is festooned with light-hearted fantasies that include warp-speed movement in the kitchen, time-travel (as in “Beam me up, Scotty”) from one store to another, and a need to cook for about 20% more guests than will actually be there. Usually, about a week before the date, I start realizing what I’ve let myself in for, and then I also have to make time for a chiropractic appointment or two. My hubby calls this phenomenon “cumulative reality.”

I swear each time that the next one will be different. Less complicated. Ready earlier. But after all these years, I’m not sure I’m physically or mentally suited to that state people call either “simple” or “early.” In the end, I rely on my friends and relatives to forgive me my sins, and to have another hors d’oeuvre while I get the dinner on the table.

One of the really wonderful by-products to entertaining is that, for at least a couple of days after a party, you have all this good food to nosh on, and you don’t have to work to get it. So any energy you have left after the giant clean-up effort can be devoted to binge-watching last season’s episodes of NCIS, or whatever your particular brain candy. Moreover, the Kitchen Goddess is something of a whirlwind through the course of the party, and rarely gets much of anything at all to eat. And after a two-week marathon of cooking, the last thing I want to do is cook some more.

Even after the leftovers are gone, it still often takes me a couple of days to get energized for real cooking. What do I want in the meantime? Comfort food, which for me means one thing: soup.

For a soup that wraps a soft, warm blanket around your heart and stomach, you will not believe how easy this one is, and how little time it takes. Creamy without cream, hearty but not heavy, and gluten-free to boot. It’s one I increasingly rely on when the weather turns chilly. Eliminate the bacon and/or ham to make it vegetarian, and feel free to tweak the herbs for whatever flavor profile you prefer.

I ordered my fennel pollen online, from My Spice Sage
A Kitchen Goddess Note about Fennel Pollen

Fennel pollen appears to be a minor ingredient in this recipe. But appearances can be deceptive. True, you can make this soup without it, and the soup will not suffer, in the same way that the sky without a rainbow will not suffer. But the presence of the rainbow changes everything. And so it is with fennel pollen.

The fennel plant, which is native to Tuscany but also grows wild in much of California and other areas of the West Coast, produces a pollen that is sold as a spice in culinary specialty shops around the world. It has long been used in Italian cuisine, where it’s added to pastas, pestos, and white meat dishes such as pork, veal, and chicken. Although the primary flavor of the fennel bulb is licorice, the pollen carries a much more nuanced mix of flavors that convey a sweet, musty richness that reminds me more of curry. As little as a pinch of the stuff can add a mysteriously rich, savory flavor to anything from soups to roasts.

Fennel pollen has been gaining popularity in the U.S. since Mario Batali began to cook with it in the 1990s, and it’s now available in specialty spice stores, some high-end groceries, or online.  In an article for Saveur magazine, the award-winning food writer Peggy Knickerbocker wrote, “If angels sprinkled a spice from their wings, this would be it.” You’re welcome.


Creamy Lima Bean Soup

Inspired by a recipe in Gourmet magazine, September 1991

Serves 4-6.

4 thick-cut slices of lean bacon
4-5 ounces ham (in a single slab), diced
1 medium onion, chopped fine (about 1 cup)
1 large rib celery, diced (about ¾ cup)
4 cups chicken broth
3 10-ounce packages frozen baby lima beans
1 teaspoon fennel seeds, or ½ teaspoon fennel seeds plus ½ teaspoon fennel pollen
1½ teaspoons fresh thyme leaves or ½ teaspoon dried thyme
½ cup plain yogurt (2% or whole-fat) or cream (light or heavy)
½ cup dry white wine
½ teaspoon salt
¼ teaspoon white pepper
Additional yogurt as optional garnish

In a large, heavy pot, on medium-high heat, cook the bacon until crisp. Remove the bacon to paper towels to drain. Add the ham to the bacon fat, and sauté briefly (for color). Remove the ham and reserve. Pour out all but 2 tablespoons of the bacon fat, and reduce the heat to medium/medium-low.

Add in the onions and celery. Sauté 4-5 minutes, until the onion is soft and translucent. Add the chicken broth, the lima beans, the fennel seeds (and pollen, if using), and the thyme. Simmer 10-15 minutes, until the beans are tender.

In a blender, purée half of the beans with about ½ cup of the broth. Return the purée to the pot and stir it into the rest of the soup, along with the yogurt or cream, the white wine, and the reserved ham. Heat just to a simmer and turn off the heat. Add salt and white pepper, adjusting seasoning to taste.

Serve immediately with a dollop of yogurt and crumbled bacon as garnish.

Kitchen Goddess note on reheating: This soup was wonderful the night I made it, but even better the next day, when the beans had soaked up even more of the broth, intensifying the creaminess. If it gets too thick, thin it out with extra chicken broth.

Sunday, November 2, 2014

Holiday Hosting
What’s cooking? Marinated Olives, Sweet and Spicy Nuts, and Sun-Dried Tomato Pesto


“How about if I ask the group to come for a glass of wine before we go out to dinner?” says my darling hubby.

Yes, it’s that time of year again. Even Grumpy wants to do a bit of hosting. Then he adds those endearing words that speak volumes to wives everywhere: “Don’t worry – you won’t have to do anything.”

I nod and smile, and of course I say “Fine,” even as I roll my eyes and try to imagine how much cleaning up – before and after – it’ll take. Because – let’s face it, folks – men don’t see things the way women do.

Now, of course, this is just my view, but I think women walk into a room and survey the scene. They’re performing a scattershot analysis – pillows on the sofa, hors d’oeuvres on the coffee table, chairs moved around to allow group seating, maybe even flowers on that chest against the wall. Looks like it’s set for a party. Except for that balled-up paper napkin on the wing chair.

Men are more single-minded. They walk into a room and see... nothing. Yep – it’s a room. Probably the living room. But unless they’re, like, on the hunt for the big-screen TV, not much else registers. Wing chair? Balled-up napkin? Huh?

Case in point: I went to water aerobics one morning last week, and when I got back, I felt strongly in need of a short nap. I put on my bright pink robe and lay down on the bed – on top of the blue coverlet, in our very blue bedroom. And just as I was drifting off, the bed shook rather violently, and I heard the sound of a suitcase zipper moving around its track. He’s packing for that golf trip. But if I don’t say anything, he’ll see that I’m sleeping and go away. That’s what I figured.

Sure enough, after a few seconds, he left the room quietly. Then about 5 minutes later, the bed shook again, and I heard the sounds of shoes dropping onto the chest at the end of our bed. Now, when I’m tired, I will admit to not being my usual kind and cheerful self. But when I sat up and said something sharp, along the lines of “What the ...,” he almost jumped out of his skin. He hadn’t seen me.

In the discussion that followed, we agreed that:
(1) I should adopt a more civil tone when speaking to the man I love; and
(2) He should try to notice when I’m in the room/on the bed/not dressed in camouflage.

So while this story starts out being about how “You won’t have to do anything” is a laughable statement for many women, I think it mostly illustrates one more difference in the way men and women go through life. Women actively accumulate information, while men are going, “TV here? No. Ok, next room.”

Being Prepared

I actually do enjoy hosting during the holiday season. And I’ve learned that one way to make the next couple of months less stressful is to have a handful of noshy foods available for those spur-of-the-moment gatherings, or to ease the amount of last-minute prep you have to do for a dinner party.

Olives and nuts, for instance, are great nibbly foods to have on hand. But even better is if you take the time now – well in advance of any thought of entertaining – to add some small touches to those foods that will have your friends thinking you are amazing.

And then there are the dips/spreads you can make and freeze for whenever. Many recipes make enough to split the batch in half and freeze one half while you use the other.

So today, the Kitchen Goddess offers you three ways to plan ahead – or rather, just do ahead and don’t bother with the planning. The first is a recipe for marinated olives, inspired by one I saw in the A16 Food + Wine book I mentioned last week. I thought it needed just the tiniest bit of sweetness, so I added the orange strips, and as usual, I substituted Aleppo pepper instead of chile flakes. These olives will keep at least a month in the fridge, though after you taste them, you’ll think it’s a miracle they’d last more than a week.

The second recipe, for sugared and spiced nuts, is a merging of one from the Silver Palate New Basics cookbook and one from Gourmet magazine (September 1999). The Kitchen Goddess tinkered with the combination of spices and sugar until she got what she thought was the perfect balance.

The third is a sun-dried tomato pesto adapted from the Silver Palate New Basics book, and it is a guaranteed winner. Moreover, it freezes beautifully. I like to serve it with endive leaves and lightly blanched asparagus, but it works well as a dip with any crudité platter. You can also serve small dollops of it on top of ricotta mounded on crostini.

Happy entertaining, everyone!


Marinated Olives


Adapted from A16 Food + Wine.

For this recipe, the Kitchen Goddess used large green and black Cerignola olives, but any good quality mix will do. Just don’t use pitted olives, which will inevitably get smashed in the cooking process and look terrible. The Kitchen Goddess places a small ceramic or glass pitcher next to the olive bowl, where guests can discretely discard the pits.

¾ cup good quality extra-virgin olive oil
4 cloves garlic, smashed using the side of a knife
1 sprig fresh rosemary
¼-½ teaspoon Aleppo pepper (or ¼ teaspoon dried chile flakes)
4 four-inch strips orange peel, separated (Use a vegetable peeler, and with a paring knife, remove any white pith from the underside)
1 cup green olives
1 cup black olives


In a small saucepan over medium heat, warm the olive oil. Stir in the garlic, rosemary, Aleppo pepper, and 2 of the orange strips. Adjust the heat to allow the oil to simmer until it’s aromatic and the garlic turns golden, about 3 minutes.

Add the olives to the oil and stir well to combine. Reduce the heat to low and cook gently, stirring occasionally, for about 10 minutes.

Remove the pan from the heat and let the olives steep in the oil until cool. Replace the cooked orange peel with the reserved strips. Cover and marinate for 6 hours before serving, or put the mixture into a large jar and store in the fridge for 2-3 days. Remove the rosemary before serving.

The olives will keep in the refrigerator for a month.


Sweet and Spicy Nuts


Makes 4 cups of nuts.

½ teaspoon ground cumin
½ teaspoon chili powder
½ teaspoon curry powder
½ teaspoon garlic salt
½ teaspoon Aleppo pepper (or ¼ teaspoon cayenne pepper)
¼ teaspoon ground ginger
¼ teaspoon ground cinnamon
2 tablespoons olive oil
4 cups whole almonds or pecan halves or a mix of both
1 large egg white
1 teaspoon water
½ cup dark brown sugar, packed
2 teaspoons kosher salt


Preheat the oven to 325º.

In a small bowl, mix the first 7 ingredients well and set aside.

Heat the oil in a nonstick skillet over low heat, add the spice mix, and stir well. Simmer 3-4 minutes.

In a large mixing bowl, combine the nuts and the spice/oil mixture, and toss well. Spread the nuts out on a large rimmed baking sheet and bake 15 minutes, shaking the pan once or twice.

Let the nuts cool to room temperature, stirring occasionally if you want to speed the cooling process.

When the nuts are cooled, reduce the oven temperature to 250º. Lightly grease a large baking sheet. (You can use the same one as above – just wipe it clean or use baker’s parchment.)

In a large mixing bowl, whisk the egg white with the water until foamy. Stir in the nuts (and any spices that didn’t adhere to them in the baking), mixing well to coat all the nuts with the egg white. Combine the brown sugar and the salt, and stir well into the nuts.

Spread the nuts onto the greased baking sheet and bake in the middle of the oven until dry, about 60-65 minutes. Let the nuts cool before you touch them, then break them into bite-sized chunks.


Sun-Dried Tomato Pesto


Adapted from the Silver Palate New Basics cookbook.

Makes about 2½ cups.

2½ tablespoons good quality olive oil
4 large cloves garlic, minced
1 large can (28 ounces) whole Italian plum tomatoes in purée
1 jar (8 ounces) sun-dried tomatoes packed in oil
½ teaspoon kosher salt
½ teaspoon freshly ground black pepper


You need to get the canned tomatoes from this...
In a large skillet (I prefer either cast iron or enamel-coated cast iron), heat the olive oil and add the garlic. Cook gently for 3 minutes without browning. (Browning makes garlic taste bitter.)

Add the plum tomatoes (with the purée from the can), and using a wooden spoon, crush them gently against the bottom of the skillet. Simmer uncovered over low heat, stirring occasionally, until the sauce becomes very thick, which will take 60-70 minutes.

... to this.


While the tomatoes cook down, strain the oil from the sun-dried tomatoes and reserve ¼ cup of the oil. Coarsely chop the sun-dried tomatoes.

Turn off the heat and stir in the chopped sun-dried tomatoes. Cover and let the mixture rest for 5 minutes.

Transfer the tomato mix to the bowl of a food processor and process until smooth, adding the reserved ¼ cup of sun-dried tomato oil in a slow stream while the processor runs. Add the salt and pepper and pulse until well combined.

Refrigerate, covered, until ready to use. You can make the pesto 3-4 days in advance, or freeze it in a tightly covered container, where it will be good for about a year.

Friday, October 24, 2014

Listing to Normal
What's cooking? Herbed Salad with Squash Ribbons


Back when I was working full-time, a friend from the HR department walked into my office and told me about a new program his department was sponsoring for employees, to introduce them to the Franklin Daytimers organizing system.

“Sounds interesting,” I said.

“Yes,” he said as he began collecting the Post-Its from here and there around my desk. “And I’ve enrolled you in the first class.”

You know, I think of myself as an organized person. I array my spices in alphabetical order and my sprinkles on the color spectrum; I organize my recipes in files labeled for “Appetizers,” “Desserts,” “Soups and Sauces,” etc. And my kitchen drawers are, well, neat. So I feel like I’ve got a handle on my life. Then I look around my office. (Don’t hope for a photo here – you don’t really think I’d let you look around my office, do you?)


The main point of the Franklin system was to start each day by listing the tasks you wanted to accomplish that day, noting on each its level of importance, and then numbering them in the order you needed to get them done. It was a great system, and it served me well until I stopped working for that company, and shortly thereafter, I fell off the wagon, so to speak. The one piece that carried over is the lists. Not that daily list of what to do and the order thereof – although I have that, sort of – now I also have the secondary list of  possible blog topics, the list of ingredients for something I can’t quite recall, the list of ideas for Christmas gifts, and, of course, the list of what to buy at the grocery store, along with the separate shopping list for Penzey’s (spice store). Among others. Some of my lists have their own sub-lists.

I was feeling kind of bad about all this list-making, until a couple of years ago when the Morgan Library in NYC held a special exhibit on lists – documents (mostly by artists) from the archives of the Smithsonian. What fun! It turns out that all the world makes lists. From Arturo Rodriguez (artist), a list of his paintbrushes with drawings of each; from Adolf Konrad (another artist), a pictorial list of what to pack for a trip, with each item – down to the socks – carefully illustrated; a letter from H.L. Mencken listing 29 personal facts for a profile another writer was doing on him; from the artist Janice Lowry, a list of 50 Angry Grievances which included “No rain” and “George Bush”; and a list by Picasso of artists proposed for a show.

Lists are a natural part of cooking – lists of ingredients, lists of steps to take. For a party we used to hold each year, I have spreadsheets (!) with lists of what worked the previous year and what didn’t, the serving dishes to use for each hors d’oeuvre, and where to find the recipes I used. So at least the Kitchen Goddess is organized!

Trend-Spotting


From the various cooking and food-related magazines I get, I’ve noticed that, in spite of the change in seasons, salads seem to be popping up everywhere. I don’t know why that is, but I like to seize a trend at the outset. Then on a podcast of America’s Test Kitchen radio show, they featured Yotam Ottolenghi, the Israeli-born chef and cookbook author. As he talked about how he enjoys mixing textures and flavors, he moved into a discussion of... yes, salads.

“When I visit my parents outside Jerusalem,” said Ottolenghi, “you see how herbs grow – so easily and so wonderfully, just as well any other leaf... Why can I not have a salad that is just plainly tons of parsley, tons of basil, cilantro, a bit of tarragon and some chervil? Have that as the main thing, rather than dressing a salad with just a bit of herb. It seems so fresh and so right.”


Well, I liked that idea, and I remembered herb-centric salads from two of my favorite new cookbooks: A16: Food + Wine, from the San Francisco restaurant, A16, and Jean-Georges Vongerichten’s latest, Home Cooking with Jean-Georges. Both salads also used squash ribbons, which I’d been dying to try. My own version turned out really well, and the salting/rinsing process with the squash ribbons gave them a smooth but crunchy texture I enjoyed – even into the next day with the leftovers. Fresh and lively, the salad is so much more interesting with the parsley and mint than I would ever have thought. By the way, I’d recommend looking for the smaller, tenderer Italian parsley; it’s lighter in color and less leathery in texture. The dressing couldn’t be simpler – who needs herbs in the dressing when you’ve got herbs galore in the salad?


Kitchen Goddess note on the squash ribbons: You can make these with your vegetable peeler, but I prefer to use my Benriner mandoline. It’s more reliable for getting uniform thicknesses – also more dangerous, and you know how the KG loves danger. An option would be the Kyocera Adjustable Slicer with Guard ($21 at amazon.com), which was awarded “best buy” in a comparison of kitchen slicers in Cook’s Illustrated magazine, so it’s probably less dangerous. The Benriner, which also has blades for julienning, is $22 at amazon.com.


Herbed Salad with Squash Ribbons


Serves 4-6 ... or 2 if you decide to make it lunch.

2 medium zucchini, 5-6 ounces each
1 medium yellow squash, 6-7 ounces
kosher salt
2-3 ounces baby arugula
2 ounces sunflower sprouts (use any hearty sprouts if you can’t find sunflower sprouts)
½ cup loosely packed fresh Italian parsley (leaves only), coarsely chopped
½ cup loosely packed fresh mint leaves, coarsely chopped
½-¾ cup Italian olives (I prefer Castelvetrano or Cerignola), pitted and sliced
1 large navel orange, peeled and segmented (optional -- I like it both ways)
freshly ground pepper
Garnish: shavings of aged Pecorino Romano cheese

Dressing:
¼ cup extra-virgin olive oil (use the best you have)
2 tablespoons freshly squeezed lemon juice

Trim then ends of the squash and, using either a vegetable peeler or a mandoline, slice them into ribbons no thicker than ⅛ inch. Put the slices into a bowl and toss well with 1 teaspoon salt, then place the slices in a colander set over the bowl and let them sit for 10 minutes. This process will cause the squash ribbons to wilt and soften as the salt leaches the water out.


Rinse the squash ribbons under cold running water and pat dry with paper towels. The squash ribbons can be prepared to this point then layered between paper towels and stored in an air-tight baggie for several hours.

When you are ready to serve, place the arugula and sprouts in a large serving bowl, top with the squash ribbons, the parsley and mint, the olive slices, and the orange segments, if using. (You'll note the absence of orange segments in the photo. So shoot me.)

Combine the olive oil and lemon juice in a small bowl or jar and mix well. Toss the salad with the dressing, then taste for seasoning, adding salt if necessary. This salad will require less salt than usual because the squash ribbons have absorbed some salt and the olives are salty.

Arrange the salad for serving, making sure to distribute the olives evenly. Use a vegetable peeler to shave curls of pecorino on top and finish with fresh grinds of pepper.

Here's the salad before the pecorinoo curls -- a little easier to see.

Kitchen Goddess note: This salad is molto easy to serve at a dinner party. Prepare/store the squash ribbons as noted above, then measure out the other ingredients into separate baggies, and mix the dressing in a small jar. Assembling the salad then takes only a couple of minutes. And it’s very pretty, don’t you think?

Tuesday, October 14, 2014

Lost and Found
What’s cooking? Raspberry Rosé Jam, Vinaigrette, and Shortbread Cookies


I’m wondering if I should feel old. I spend at least half my time these days looking for something – if not the iPad or the cell phone or my glasses, it’s something else entirely necessary for my existence.

I used to be the one who found things. When my kids were young, I was the only one who could locate their shoes, their jackets, their lunch tickets,... on a moment’s notice. I was always amazed at the ability of the men in my life – and now I would also be including my husband – to walk through a room and see... nothing. Perhaps it’s a female thing – that women are just more detail-oriented than men. Which is a good thing when someone has to find the pacifier or the birthday party invitation or the other glove on a cold, snowy day.

Remember that game in which someone would put a group of things on a tray, and you got to look at them for maybe 10 seconds, and then you had to write down what they were? I so rocked that game. And then later, in my career as first an editor and then a corporate communications consultant, I was a master at proofreading – so good, in fact, that even on a typeset page, I could spot those places where there was an extra space between words.

So have these talents left me? Surely not. Maybe I’m just not paying attention. Maybe there’s just more clutter in my life. Back in those days when my life was about finding stuff instead of losing stuff, I didn’t have glasses or a cell phone or an iPad. After all, I can find the phone on the land line. And I’m still the only person who can locate the remote. Maybe things aren’t as bad as I thought.

Rosé and Raspberries 

I first saw this recipe on Tastingtable.com, an online food/cooking newsletter, in July. I like rosé wine, and I like raspberries, so I printed it out and put it... somewhere. Periodically, over the next couple of months, I’d find it and swear to get the raspberries, then the phone would ring, or I’d realize I hadn’t finished unloading the dishwasher, or the clock would remind me it’s time for lunch,... And before you could say “Wait a minute!” I had put that sheet down... somewhere else.


So about a week ago, my grocery store had a sale on raspberries, and I thought about that jam made with raspberries and rosé wine – sounds good already, doesn’t it? I got the raspberries home, secured the rosé, and couldn’t remember where I’d seen the recipe or where the printout was. I finally found it – four days later, at which point the raspberries were looking sad and sprouting little black hairs. Which took me back to the store. The moral to this tale is: locate the recipe first, then the wine, then the berries.


This jam is not only gorgeous and elegant – there’s a gem-like quality to the color – but delicious, not too sweet, and amazingly flexible. I’ve done the thick, crusty toast thing with it – comfort food for any time of day – but here’s what else:

■ A sweet-tart vinaigrette (recipe below), perfect on fruit salad or a nice contrast on a traditional spinach salad (or arugula, as shown here);

■ A syrupy topping – warmed or not – for vanilla ice cream or lemon sorbet or – shown here – lemon-buttermilk sorbet (recipe below);

■ Filling for the best shortbread cookies (recipe below) that I think I’ve ever had. Rave reviews on Food.com, so it’s not just me.

So let’s get started. This is about as easy as jam can get, and takes less than half an hour to make. You can process the jars and hope to have enough for the next six months; but I’ve enjoyed it so much, and have even given some away, that just yesterday I went out and bought more raspberries. Also, it’s a great excuse to open a bottle of rosé wine. Rosé is enjoying a surge in popularity right now, with stores everywhere offering a range of choices.

For the winos among you – and surely there are a few – we opened a 2013 Mulderbosch Rosé from South Africa. (The one in the photo at top is Kim Crawford from New Zealand.) The Mulderbosch is fruity but dry, and my resident wino says we paid $10-12. Wine.com describes it as a nice “picnic” wine, which is great because I am always having picnics in my kitchen. Might even have one today, if you get my drift.


Raspberry-Rosé Jam

Adapted from Tastingtable.com, who adapted from Saving the Season (blog and book), by Kevin West

Fills 4 half-pint jars.


36 ounces fresh raspberries (six 6-ounce containers)
2 cups granulated sugar
¼ cup dry rosé wine

Pick over the raspberries to remove any bruised or moldy ones. Combine all the ingredients in a large bowl, and use your hands to mash the raspberries to a thick, soupy texture. Toward the end, you may want to enlist a potato masher to finish the job. As you know, the KG is not one for putting her hands in goop, so she wore a clean pair of rubber gloves. You should work in whatever way floats your boat.


In a 4- or 5-quart saucepan (I used a
5-quart Le Creuset French oven), bring the raspberry mixture to a boil over high heat, stirring often with a wooden spoon. Reduce the heat to medium-high and let the mixture bubble, stirring often, until the jam thickens, which will take about 20 minutes. To test for “doneness,” pour a teaspoon of boiling jam on a cold plate, and put it in the freezer for 2-3 minutes. Meanwhile, remove the rest of the jam from the heat. If the jam on the plate seems to be gelling (i.e., it’s no longer runny), it should be done. If not, return the jam in the pot to a boil for a few more minutes. Kitchen Goddess note: Getting the water out quickly is key to a good jammy texture, so use as wide a pot as you have that still has high enough sides to let the jam boil hard. More surface area means faster evaporation.


Spoon the jam into airtight containers and let it cool to room temperature before storing it in the fridge for use within a month. Or process it for preserving, to have it last months without refrigeration. Or give some away – your friends will love you for it!


Raspberry-Rosé Vinaigrette


Makes almost 1 cup.

¼ cup Raspberry-Rosé Jam
1 small shallot, minced
2 tablespoons white wine vinegar
1 teaspoon fresh lemon juice
½ teaspoon salt
½ cup olive oil
5-6 good grinds pepper

Whisk together the first five ingredients well. Add the olive oil slowly, whisking constantly to emulsify. (Or add the oil all at once and use an immersion blender.) Stir in the pepper. Adjust seasoning to taste.


Lemon-Buttermilk Sorbet


Makes just short of 1 quart.

⅓ cup water
⅔ cup sugar
Zest of 1 lemon
2 cups buttermilk
¼ cup fresh-squeezed lemon juice

In a small saucepan, combine the water and sugar and the lemon zest. Heat at medium temperature, stirring constantly until the sugar dissolves. Once the sugar dissolves, remove the mixture from heat and pour into a small, heat-proof bowl. Let cool to room temperature, then cover and chill well in the refrigerator.

Whisk the chilled syrup into the buttermilk. Add the lemon juice and continue to whisk until the liquid is well mixed.

Process in your ice cream maker according to manufacturer’s instructions. Once processed, the sorbet works best if put in a covered container and stored in the freezer for 2-3 hours before serving.


Thumbprint Shortbread Cookies with Jam

Adapted from LB in Middle Georgia on Food.com


Makes 2-3 dozen cookies.

1 cup butter, slightly softened
⅔ cup sugar
½ teaspoon almond extract (pure almond extract, please!)
2 cups all-purpose flour
½ cup jam (I, of course, used Raspberry-Rosé Jam)

In the bowl of a mixer, cream together the butter and sugar until fluffy. Add almond extract and continue to blend.

Reduce the speed and mix in flour, about ½ cup at a time, until it is thoroughly incorporated into the dough. Turn out the dough onto Saran Wrap or other cellophane wrap and seal. Refrigerate one hour.

Pinch off dough to make 1-inch balls, and set 1-2 inches apart on an ungreased baking sheet.

Using the back of a ¼ teaspoon measuring spoon, make an indentation in the top of each ball, and fill with jam. (The indentation will only hold a scant ¼ teaspoon of the jam. Do not overfill.)

Refrigerate the cookies again while you preheat the oven to 350º. This extra round in the fridge will help the cookies to maintain their shape.

Bake at 350º for 14 minutes. The cookies do not need to brown. If you leave them in long enough to brown, they’ll spread.

Monday, October 6, 2014

Feeling a Little Fruity
What’s cooking? Stuffed Figs with Prosciutto and Phyllo Tarts with Fruit and Ricotta


Kitchen Goddess Spoiler Alert: This post may be about figs, but the dessert recipe is très flexible and can work with almost any soft fruit. See for yourself...

It’s still fig season here in Texas, and I know from experience that it’s high season for them in Italy, so even if you’re not in Texas or Italy, there’s probably a market somewhere nearby where you can pick up a few figs. They emerge for a criminally short season, so catch them while you can.

10 Brown Turkey figs, 6 tiger Stripes, 4 green Sierras, 2 Black Mission figs, and a partridge in a pear tree.

I was first introduced to the fruit by my grandmother, who had two huge fig trees in her back yard. They took up most of the space that might otherwise have held a swing set, but it never really occurred to me that she should have swings instead of those marvelous trees. She made wickedly good preserves with them, using a recipe that died with her, but the way I most remember eating them was in a bowl with a bit of cream for breakfast. She peeled them for me; and while today I eat them with the skin on, in my heart, thoughts of figs are inextricably linked with my grandmother.

Fig trees in New Jersey weren’t in the cards unless you had the energy to move them inside every winter. I did not. But when my husband and I built our retirement house in Texas, I felt that I had to try growing one. We planted in an area that seemed just right, and when, over the next couple of years, no figs arrived, we moved it around to get better exposure to the sun. Still no fruit beyond a handful of “figlets” that never matured. Each fall, I’d sigh and hope for better luck the next year.


Then – miracle of miracles – I arrived back this September and found figs! Not too many (the local bird population seems also to have noticed), and not especially large; but I practically squealed with delight when I saw them. Maybe one of these days, I’ll get to serve some for breakfast to my grandchildren.

A Short Primer on Figs: Although fig trees are one of the first plants cultivated by humans, many unfortunate souls in the U.S. have never tasted the fruit. I think that’s because, generally speaking, figs aren’t pretty. They have an odd, bottom-heavy shape, and aside from the recently-available Tiger-stripe variety, they don’t come in eye-catching colors. The skin is smooth but not shiny. Yet they’re one of the richest plant sources of calcium and fiber, and high in antioxidants. The taste ranges from mildly sweet to sweet, with a delightfully silky flesh and tiny seeds that offer a friendly crunch and don’t stick in your teeth.

Figs are one of the most delicate fruits, and they don’t ripen off the tree. So if you come across some at a market, you want to look for ones that feel plump and just barely soft. Think of the best as Goldilocks fruit – not too hard and not too soft. Don’t pile them recklessly into a bag – be gentle. Then when you get them home, store them in a single layer in the fridge, on a paper towel-lined plate (covered with cellophane wrap) or in a shallow air-tight container, so they don’t dry out. Try to eat them within a couple of days. And just as a treat, pick one up and bite off everything short of the stem. Heavenly.

Let’s Get to the Eating Part, Please

Okay, okay – enough with the lecture. Today, I’m giving you a way to serve figs as an appetizer, and a dessert recipe that can use figs or many other soft fruits.

First up is the appetizer way. Possibly the most elegant dish you can put together in less than 15 minutes. I had a similar dish at a tiny restaurant in New Jersey, and even with my embellishments, it takes no time at all. This dish delivers a magical mix of flavors: sweet from the figs and honey, tart and tangy from the balsamic, and salty from the cheese and prosciutto. Add the range of textures -- creamy, crunchy, chewy -- and you've got an epicurean delight.


Stuffed Figs with Prosciutto


To serve 4.

12 fresh figs (any variety will do, though it’s easier with larger figs such as Tiger Stripe or Brown Turkey)
3 ounces fresh goat cheese or mild feta cheese (French or Bulgarian)
balsamic reduction (best) or balsamic vinegar*
honey
4 ounces thinly sliced Prosciutto ham (12 slices)

Rinse the figs and pat dry with paper towels. Slice about ¼ inch off the tops of the figs, and cut the figs in quarters, slicing only halfway down the fruit so that the fig maintains its bulbous shape.

Stuff each fig with ½ teaspoon of the feta or goat cheese. Drizzle a few drops of balsamic reduction (or vinegar) on the cheese, followed by 2-3 drops of honey.

To do ahead: The figs can at this point be covered and refrigerated for serving later.

When ready to serve, place 3 figs on each plate and microwave for 20 seconds. Pile 3 slices of prosciutto together on each plate with the figs and serve immediately.

*Kitchen Goddess note on Balsamic Reduction: *There isn’t anything easier to make than balsamic reduction. Put 2 cups of balsamic vinegar into a small saucepan, and turn on the heat. When you notice steam starting to rise off the vinegar, adjust the heat to keep that level. (No bubbles.) Allow the vinegar to steam for 2-3 hours (adjusting the heat level periodically), at which point it should have reduced to about ½ cup of a thick, syrupy liquid. If you can’t lower your heat enough, you may want to use a heat diffuser. Store the reduction in a jar or squeeze bottle in your pantry. Keeps indefinitely.

And now for the tarts. I’ll admit right off that phyllo pastry is a little tricky to work with. The first thing you have to know is that you buy it frozen and it needs to thaw overnight. The Kitchen Goddess got all primed to make these tarts one afternoon before realizing the overnight thaw business, and was forced to watch re-runs of “Bones” instead of cooking.


Kitchen Goddess note about Phyllo: Yes, it’s tricky. But not hard. It’s very important, though, to get your mise en place (a.k.a., organize your work space) before you start with the phyllo. The sheets are tissue paper thin, so they tear easily; but with a little practice – and the willingness to say “Screw it” to one sheet and start with another – you’ll be fine. Also, you should know that sheets can be patched together once you start with the butter. The Kitchen Goddess herself threw away four or five sheets before reaching a group that worked. But you get 20 sheets in a box for less than $4.00, so what the heck.

The other important point is that phyllo dries out quickly (i.e., becomes unusable), so you’ll need a damp kitchen towel to cover the sheets you’re not working with at the moment. That said,... (1) Let the box thaw overnight. (2) Remove the roll of phyllo sheets and unroll them carefully. (3) Peel off 7-8 sheets, one at a time, and lay them on top of each other to the side of your work surface. (4) Gently lay a damp kitchen towel on top of your “inventory” before re-rolling the remainder and storing them back in the packaging and back into the fridge or freezer. In the photo above, the sheets I’ll be using are under the green-and-white towel.

You can trust me that the results – light, flaky, not overly sweet but delicately delicious – are worth the trouble. David Tanis in The NY Times calls these pastries “a cross-cultural pleasure,... a French tartlet, but with Middle Eastern undertones.”


I want to note here that these pastries work equally as well with various other soft fruits as they do with figs. I tried the recipe with plumcots (shown above) and pears, and both were yummy. You’ll notice that the tart below has been cut in half, to show that you can make 12 smaller servings – for a brunch, say, or an afternoon tea. (You do serve tea in the afternoons, don’t you?)

If you want to do these ahead, I would assemble the pastry packages and refrigerate them between layers of wax paper in an air-tight container, then put the ricotta mixture and the cut fruit (perhaps with a squeeze of lemon juice to prevent browning) in two more containers in the fridge. Toast the almonds ahead and set aside. Assembly takes very little time. And by the way, I think these pastries would be stellar topped with a small scoop of vanilla ice cream, but I didn’t have any around at the time. So someone should try that and let me know.


Phyllo Tarts with Fresh Fruit and Ricotta

Adapted from David Tanis in The New York Times

Serves 6.

For the ricotta filling:
1 cup ricotta (whole-milk or reduced fat – not skim)
zest of 1 lemon
1 tablespoon fresh lemon juice
2 tablespoons sugar
⅛ teaspoon almond extract

For the pastry:
6 sheets phyllo dough (but have extras if one tears too much)
6-7 tablespoons unsalted butter, melted
12 ripe figs (or 3 large plums, plumcots, pears, or nectarines)
turbinado sugar (e.g., Sugar in the Raw) for sprinkling on top
½ cup sliced almonds
2 tablespoons honey

To make the ricotta filling, combine all ingredients in a bowl and stir well. Refrigerate until ready to assemble the tarts.

Before you begin with the pastry, line a large baking sheet with baker’s parchment.

After fold #1
After fold #2
After fold #3
For the pastry, lay 1 sheet of phyllo dough on a flat surface, the long side toward you. (Note: hands should be dry when working with phyllo.) Brush it lightly all over with the melted butter. Fold the sheet in half, left to right, and brush the top with the butter. Fold again, top to bottom, and brush with butter. Finally, fold left to right again, and brush with butter. You should have a rectangle that’s about 4 inches by 6 inches. Move it to the baking sheet.

Repeat this process with the remaining 5 sheets of phyllo. When you have completed all 6 pastry packages, preheat the oven to 375º.

That's right -- only 4 here.
Spread a heaping tablespoon of ricotta mixture onto each of the phyllo packages, working so the ricotta doesn’t reach all the way to the edges. Cut figs about ¼ inch down from the stems, and slice them into quarters starting from the stem end and finishing just before you get to the bottom of the fig. Lay the cut figs out in a star shape on top of the phyllo, 2 figs per phyllo package. (If you’ll be using pears, plumcots, etc., slice them lengthwise into eighths and arrange 4 slices into a pinwheel pattern on the phyllo.)


Sprinkle 1 teaspoon of the turbinado sugar onto each pastry, and bake 15 minutes or until golden and crisp.

While the pastries are baking, toast the almonds in a dry sauté pan until lightly browned, about 5 minutes over medium heat. When the pastries are ready, remove them from the oven and sprinkle them with the almonds. Warm the honey briefly in the microwave and drizzle it lightly over the pastries. (The photo below was taken before the almonds and honey.)