Wednesday, May 31, 2017

Bright Ideas
What’s cooking? Creamy Corn Pasta with Basil and Mint


As much as I honor the brave men and women who’ve given their lives for our country, Memorial Day inevitably reminds me of the end of the school year. At least, that’s when it ended when I was in school. We had no spring break, so no need to extend the year to recoup those days.

By the time I got through college, I figured I was done with school. (I wasn’t, but I thought I was.) Then I started work. On Wall Street. In research. I knew nothing, about corporate America or the securities business. Which worried me. Then I realized that, in research, what you do is learn. And in the process of learning about the stock market and the economy and financial instruments, I also learned how much I enjoy learning.

This awareness would come as a surprise to most of my college professors. But I was young when they knew me, and my frontal cortex – that place where judgment and higher level thinking take place – was still in the framing stage.

I still enjoy learning, and in that regard, I’ve recently become addicted to podcasts, downloadable audio files that you can play on your phone or tablet or computer. They don’t provide in-depth knowledge on any topic, but I’m not looking for any advanced degrees, so the “interesting tidbits” approach works fine for me. I subscribe to the ones I like best, so the updates come to me wirelessly and automatically, and I listen to them on my car stereo system through a Bluetooth connection with my phone. Twenty-first century magic. How cool is that?

Here’s my list:

This American Life – Journalistic non-fiction stories, ranging from thought-provoking to humorous
Freakonomics Radio – Discussion of socioeconomic issues for a general audience
Serious Eats – Conversations on food and life with food world professionals
The Sporkful – Passionate discussions about ridiculous food minutiae
Radiolab – Broad-based documentaries weaving stories and science and philosophy
Science Friday – News and stories about science
TED Radio Hour – New ways to think, based on talks from the world-renowned TED stage
The Splendid Table – James Beard Award- winning program on culinary culture and lifestyle
From Scratch – Interviews about the entrepreneurial life with pioneers in business and the arts
Wait Wait... Don’t Tell Me! – Humorous panel game show based on current events

So, foodwise, what have I learned? Now, if your eyes are glazing over and you’re wondering if I’m ever going to get to a recipe, the answer is yes. So you can skip down to it now, or maybe you’d like to learn something, too, today...

1. Would you even guess that canned tomatoes are better for us than fresh, locally harvested heirloom varieties? (Amazing, yes? The Kitchen Goddess is having a bit of trouble with this one. She believes the science, but still plans to marinate herself in fresh NJ tomatoes this summer.) Lycopene, the heart-healthy, cancer-fighting nutrient that gives tomatoes (and watermelon and bell peppers) their red color – needs to be heated for best absorption by our bodies. With that in mind, investigative journalist/health writer Jo Robinson says the best product in the grocery store – for lycopene – is tomato paste.

2. Also from Robinson, some vegetables lose their nutrients faster than others. She calls them the “Eat Me First” foods – on the assumption that you shop only once a week and purchase your supply of veggies in one shopping trip. (Ha! The KG has been trying – without success – to do that for ... a lot of years.) So here they are: artichokes, asparagus, broccoli, kale, leeks, lettuce, and spinach. For the most nutrients, you want to eat those foods in the first two days after purchase. For broccoli and kale, in particular, less cooking is best. Robinson says the optimum way to cook vegetables for nutrition is microwave steaming, as short a time as possible. Cooked carrots on the other hand, give you twice as much beta-carotene as raw ones.


[Here’s a tiny Kitchen Goddess recommendation: When you buy broccoli, cook only the flowering head. Use a peeler to remove the tough outer skin from the thick stems (which are almost sweet), and cut them into batons to use for dipping into your favorite crudité dressing. Like this...]


3. Acidic foods – wine/beer, vinegar, and lemon juice, in particular – are a great way to balance the richness or saltiness of a dish. So if you have a soup or sauce that’s too rich, it’s not a surprise that adding a squeeze of lemon or a teaspoon of vinegar or wine will help. But what if a soup is too salty? Same advice: add some lemon or vinegar. Rebalancing the tastes will enhance all the flavors in the dish.

4. You like scrambled eggs for breakfast? You’ll have the lightest, fluffiest eggs if you add salt to the eggs, then let them sit 15 minutes before cooking them. The KG scoffed at this one until she tried it. Yessirree. Try it yourself.


5. If you’re into making pasta, try making it with egg yolks only – no whites – for a more tender pasta. That’s a recommendation of pasta wizard Missy Roberts, the chef/owner of Lilia in Brooklyn. But even if you’re cooking the dried stuff, she says:
(a) Salt the water. About 2 teaspoons of salt per quart of water (it should taste like the ocean) is the most important factor in cooking the pasta. No oil in the water. If you’re concerned about the pasta sticking together, just stir it frequently.
(b) Be sure to add some of the pasta water to the sauce; pasta water contains starch that helps bind the sauce to the pasta.
(c) Finish cooking the pasta in the sauce – i.e., give the pasta dough an opportunity to absorb the sauce in its final minutes of cooking.
(d) Finally, in serving pasta, add only as much sauce to the bowl as can be handled by the pasta – it should never be swimming in sauce.

* * *

Sooooo.... speaking of pasta. Here’s a perfect dinner for one of those nights when you really aren’t up for much effort. Which describes – even for the Kitchen Goddess – a lot of nights.

I found this recipe last summer in the height of corn season, but I didn’t get around to it until just recently. I’d seen corn on the cob in my grocery store, but it was surely not from any place local. So you want to keep this dish in mind when the fresh stuff actually makes an appearance in July. But for now – when you really want to feel like summer – most of this corn is going to get pulverized, so who really cares if you use fresh or frozen?

Orecchiette on left, farfalle on right.
You’ll be amazed to find no milk or cream in the dish, but the heart of the sauce is nothing more than corn and scallions cooked to complete tenderness, then buzzed smooth in a blender. Layer on the toasty flavors of brown butter and caramelized corn, then tang it up with basil and mint and lemon. Toss in some salty,umami-filled Parmigiano-Reggiano, and you will not be able to stop eating it. The New York Times’s Melissa Clark, who originated the recipe, uses orecchiette (the little ear-shaped pasta), but the Kitchen Goddess prefers farfalle (bow-tie pasta). Use whatever you like, but choose a shape that’s got plenty of surface to hang onto that sauce.

And if you needed an added incentive, I should tell you that it cooks in 30 minutes. That doesn’t count the time it takes you to get your s*** together – assembling the ingredients and that little bit of chopping. But not a lot of time, really.


Creamy Corn Pasta with Basil and Mint

Adapted from Melissa Clark in The New York Times.

Serves 4.

Ingredients
I augmented my scallion greens with fresh chives.
Kosher salt
12 ounces dry pasta (orecchiette or farfalle or your choice)
1 tablespoon olive oil, plus more for drizzling
1 bunch scallions (about 8), trimmed and thinly sliced (separate the white parts from the green)
2 cups corn kernels (frozen or from two large ears)
½ teaspoon freshly ground black pepper, plus more for serving
3-4 tablespoons unsalted butter
½ cup grated Parmigiano-Reggiano cheese
⅓ cup combination basil and mint, torn or in a chiffonade*, plus extra for garnish
½ teaspoon Aleppo pepper, or ¼ teaspoon red pepper flakes, to taste
Juice and zest of one lemon

*[Kitchen Goddess note: Chiffonade is a slicing technique for fresh herbs: stack the leaves 8-10 at a time, then roll the stack up like a cigar, and slice them thinly. It produces a lovely, fluffy pile of thin ribbons. If you need photos, go here.]


Directions
Bring a large pot of water to a boil, and stir in salt (2 teaspoons per quart of water). Add the pasta and cook until it is 1-2 minutes away from being al dente. Reserve 2 cups of the pasta water, and drain the pasta.

While the pasta is cooking, heat the oil in a large skillet and add the scallion whites with a pinch of salt. Saute the scallions for 3-4 minutes, stirring, until soft, then add ½ cup of the pasta water and all but ¼ cup of the corn. Bring the mixture to a simmer and cook 5 minutes, until the corn is tender.

Transfer the mixture to a blender, along with another ½ cup of pasta water and purée 1-2 minutes on high, until the mixture is smooth. If it seems too thick to pour easily, add more pasta water. Add ¼ teaspoon of salt and ¼ teaspoon of black pepper, and blend briefly to combine.


In the same skillet you used to simmer the corn, melt the butter over medium heat and add the reserved ¼ cup of corn. Cook, stirring, until the corn is tender, which will take about 2 minutes. You want the butter and the corn both to brown, but be aware that the corn will pop some as it caramelizes, so use a long wooden spoon to stir the corn, and stand back from the skillet.

When the corn and butter have browned slightly, reduce the heat and add in the puréed corn sauce. Stir to combine and cook on low heat until the mixture is evenly heated.

Add in the pasta and raise the heat to medium. Add more pasta water if the mixture seems too thick, and cook another minute. Add the scallion greens (about ¼ cup – and you can augment with fresh chives if your scallion greens aren’t up to par), the Parmesan, the basil/mint, the Aleppo pepper (or chili flakes), and ¼ teaspoon each of salt and pepper.

Stir to combine well and sprinkle over the lemon juice. Stir again – lightly – and adjust seasoning to taste. Serve immediately, garnishing with extra herbs, scallions, and the lemon zest. If you have a good olive oil handy, you can drizzle a little over the top.


Monday, May 22, 2017

We Are Nothing if Not Trendy
What’s cooking? Tex-Mex Meat Loaf


The Wednesday Food section of The New York Times this week asserts that “Mexican cuisine has made the leap to the global stage of fine dining.... In places like Barcelona, London and Melbourne, as well as Chicago, Los Angeles and New York, food lovers are seeing the cuisine of Mexico in a bright new light.”

Hah! I say. As a long-time fan of Mexican food, the Kitchen Goddess is way ahead of The New York Times. Now I will not go so far as to put Tex-Mex dishes in the same category as “Mexican cuisine,” but as I have noted before, enchiladas and queso fresco run in my veins. In my high school days, we had less than an hour for lunch, but that didn’t stop us – on an almost daily basis – from sprinting to our cars when the bell rang at the end of 3rd period, hauling ass across town to eat at a tiny restaurant run by a Mexican couple and their extended family and friends, then hauling ass back across town to arrive panting but exhilarated at the beginning of 4th period. Those were the days.

In fact, those days are still available, as that tiny restaurant, Teka Molino, is now in two places in San Antonio, and both are much improved over the original scruffy operation, but with pretty much the exact same food. And, being semi-retired, the Kitchen Goddess no longer has to haul ass anywhere. She has been known to make the 90-mile trek from Austin to San Antonio, for the sole purpose of lunch at Teka.

But Tex-Mex is not the only trend I am shining a light on today. The other star emerging from the food world shadows is... meatloaf. Yes, you heard it right. Meatloaf.

A thoroughly American invention, meatloaf has been around since the late 1800s. It started as a way to make a meal from the scraps left over when industrial meatpacking began. (The Kitchen Goddess gets slightly nauseous thinking about this version.) It gained ground in the Depression, and by the 1950s, the dish had become a June Cleaver staple. I don’t know anyone who hasn’t got a memory of Mom’s or Dad’s meatloaf.

But I hadn’t thought a lot about meatloaf until the other day when I was listening to a podcast interview with Frank Bruni, former restaurant critic and food writer (and now an op-ed columnist) for The NY Times. The podcast was focusing on Bruni in yet another role, as co-author of a new book, A Meatloaf in Every Oven. And as an example of the multicultural flourishes in the book, he brought up their Mexican meatloaf, which featured salsa and chips.

Wait just a damn minute. Meatloaf with salsa and chips? That’s my recipe, concocted for my two sons on a day when I didn’t have tomato sauce or breadcrumbs. The boys liked it so much, it became the only way I made the dish.

For a tiny sanity check, I went to the web, where I discovered that quite a few other people have come up with those tweaks to standard meatloaf. Rats. But the excursion did make me want to revisit that recipe – something I hadn’t made in years. You’ll be happy to know it’s as good as ever. But in my advanced stage of culinary daring, I’ve tweaked it yet again, adding corn and pork and a little more cumin, for a more authentic Tex-Mex flavor.

Kitchen Goddess notes: The KG has been on a podcast binge recently, but it has enlightened her on a couple of topics that apply with this recipe:
(1) When working with hamburger meat, the tenderest burgers result from salting only the outside of the burger. Salting the meat before mixing causes the proteins to break down and reknit, but the KG was never good at either chemistry or knitting, so if you want to know more, click here. I just know it makes the meat tougher and drier. Which is why I recommend salting your meat in loaf form, right before it goes into the oven.
(2) Garlic’s considerable health benefits are only released when it is sliced or mashed, and it takes about 10 minutes for the relevant enzyme to develop. So to get both flavor and health benefits, chop your garlic at least 10 minutes before submitting it to heat. That’s why the ingredient list below starts with minced garlic.


Tex-Mex Meatloaf


Serves 6.

Ingredients
2 medium cloves garlic, minced
2-3 tablespoons olive oil
1 medium onion, diced (about 1 cup)
1 medium carrot, diced
1 rib celery, diced
1 pound ground beef (I used ground chuck, 20% fat)
½ pound ground pork
2 large eggs, lightly beaten
1 cup chunky salsa (I like Pace’s)
1 cup Nacho-flavored Doritos (or any plain corn tortilla chips), crumbled
1 cup frozen corn
2 teaspoons ground cumin
1 teaspoon Aleppo pepper (or ½ teaspoon crushed chili flakes plus ½ teaspoon sweet paprika)*
1 teaspoon kosher salt
½ cup of your favorite barbecue sauce

Directions
Take the meat out of the refrigerator a good 20 minutes before you begin. (It mixes better at room temperature.) Preheat oven to 400º.


In a large skillet, heat the olive oil on medium heat and add the onion. Sauté the onion for 3-4 minutes, then add the carrot, celery, and garlic, and continue to sauté another 5 minutes. Do not let the garlic burn. Remove the skillet from the heat and let the vegetable mix cool until it’s just warm to the touch.


Place the meats into a large mixing bowl, and add the remaining ingredients, except the salt and barbecue sauce. Mixing by hand, knead the mixture until the ingredients are consistently distributed. (The KG, as you know, doesn’t do gooey with her hands; she wears rubber gloves. But she washes them well, as you should do with your hands, before attacking the meatloaf mixture.)


Transfer the mixture to a baking sheet, and shape it into a loaf form about 2 inches high and 6 inches wide. Or whatever size you’d like it to be. To improve the air flow and avoid runoff on the bottom of my oven, I use a cookie sheet that I place on top of a wire rack set in a baking pan. Seems like a lot of trouble, but it’s not, and it works well. Sprinkle the top and sides of the meatloaf with the salt, and pour the barbecue sauce evenly over the top.

Bake at 400º for 50-60 minutes. If you have a meat thermometer, shoot for 160º internal temp. If you err, make it on the slightly underdone side – there’s nothing wrong with meatloaf that’s medium/medium-rare, but well done meatloaf will be dry.

[Kitchen Goddess note on meat thermometers: After years of limping along with my analog cooking thermometer (for candy and oil) and various cheapo styles (that never worked) for meats, the Kitchen Goddess finally bit the bullet and got this fancy-schmancy digital version: the ThermoWorks ChefAlarm ($59). It’s the favorite of America’s Test Kitchen folks, and you know how they torture a product before they commit. This piece of equipment is amazingly easy to operate, with clear and straightforward labeling of the various functions. Smashing reviews on amazon.com, but as far as I can tell, only available through the ThermoWorks company. And no, they did not give the KG a free one – or even a coupon for a few bucks off – though they certainly should now that I think about it...]

*You may wish to amp up the heat with cayenne or chili flakes, or toss in some chili powder. In my house, we are not big on spicy heat.

One final Kitchen Goddess note: One of the great things about meatloaf is its versatility. If you are out of one ingredient, do not despair. Here are a few substitutions the KG has used in a pinch:
● For yellow onion, use white onion, red onion. If you’re low on onion, fill in with shallots or spring onions. Just remember that shallots and spring onions are more tender and need less cooking time, so maybe add them when you add the carrots and celery.
● Instead of celery, try fennel or even bok choy.
● Instead of salsa, throw in a can of diced Rotel tomatoes.


Tuesday, May 9, 2017

Celebrate Teacher’s Day!
What’s cooking? Mushroom Toast


In my humble opinion, there is no group more deserving of a special day than teachers. You may grimace at the elementary school teacher who kept you in from recess for misbehaving, or the high school teacher who seemed to have his/her favorites, or even the college professor who made a pass at you, but these are such a small minority that I hesitate even to mention them.

Here are the ones I do want to mention:
■ Mrs. Sweeney, my 2nd grade teacher who literally forced me to overcome my fear of competition in arithmetic races;
■ Marilyn Montgomery, my 7th grade math teacher who proved to me that you could be both glamorous and good at math;
■ Paul Foerster, my high school math teacher, who taught me that higher math could be fun and useful;
■ The writers Phyllis Theroux and Susan Shapiro, who helped me find my voice;
■ The angels who shepherded and inspired my own darling sons through nursery school and all the way through law school and med school – way too many to name. And now those who have my grandchildren as well.
■ My good friend, Anne Poyner, who, as a drama teacher at Summit High School, has convinced thousands of young men and women that they are capable of greatness beyond their imaginations if they work hard and support each other.

Most teachers care deeply about even the monsters that show up day after day in their classrooms; they are incredibly patient with the whiny kids and whinier parents who don’t understand why they can’t be granted yet another exception to the rules that give us a civilized society. They come in early and stay late to offer help and encouragement, then they go home and grade papers while the rest of us watch “Dancing with the Stars.”

But it’s worth it to them because of the millions they make in compensation.... Oh, wait – that’s wrong. In fact, it’s embarrassing how little we pay for their efforts.

So to all those teachers, I congratulate you on your dedication and invaluable, unending efforts to make the world a better place. Happy Teachers’ Day!


And now, in honor of those amazing molders of minds, the Kitchen Goddess has a dish that’s not just delicious, but fast and easy to prepare. And if you stick to crimini mushrooms, it’s also easy on the wallet.

Kitchen Goddess note on mushrooms: You want to cook mushrooms as soon as possible after buying them, but if that’s going to be a couple of days, store them – without washing – in a paper bag in the fridge or another cool, dark spot. Avoid keeping them in the vegetable drawers because those are areas of high humidity. You want them as dry as possible when you toss them into your skillet, so the best method of clearing them of debris is to wipe them with a clean, damp cloth or paper towel. If you feel compelled to use water, dump them into a bowl of water, swish them around, and quickly pull them out. Lay them on paper towels or kitchen cloths and blot them dry.


Mushroom Toast

Adapted from David Tanis in The New York Times.

Serves 2. (There’s actually enough mushroom mixture to serve 4 pieces of bread, but – trust me – you’ll want seconds.)

Ingredients
2-3 tablespoons unsalted butter, plus extra for toasting the bread
1 pound cremini mushrooms (or a mix of cremini and white button mushrooms or shiitakes, or morels), sliced about ⅛ inch thick
1 teaspoon fresh thyme leaves or ½ teaspoon dried thyme
2 small garlic cloves, minced
Salt and pepper
2 tablespoons medium-dry sherry (like Amontillado)
¼ cup crème fraîche
2-4 thick slices country bread, for toasting
2 tablespoons chopped parsley


Directions
The process of cooking and assembling this dish takes about 20 minutes total, so this is another of those recipes that needs to start with a reminder to get your mise en place before you turn on the heat. (Plus, you’ll feel incredibly professional – I know I do.) Have your mushrooms and bread sliced, and the other ingredients measured out and ready to go. And now that you’re ready,...

Lightly spread butter on both sides of the bread, and set aside.

Kitchen Goddess note on cooking mushrooms (repeated from other mushroom posts to make sure you don’t forget): It is easy to screw up sautéed mushrooms. Also easy to do it right, as long as you are careful that (1) the mushrooms are dry; and (2) you get the butter hot enough that it foams and then subsides before you add the mushrooms.

Heat the butter in a large skillet over medium high heat. Swirl it around to cover the entire bottom of the pan. When the butter foams and the foam subsides, it’s time to add the mushrooms.

Before they lose all that water...
Toss the mushrooms in the hot fat for 4-5 minutes, stirring almost constantly, during which time they’ll absorb all the fat. Continue to cook them, stirring, for another 2-3 minutes, when they’ll release some of that fat and brown.

And after.


Stir in the thyme and garlic, to combine well. Season well with salt and pepper – mushrooms don’t have that much taste on their own – then add the sherry and the crème fraîche. Bring the mixture to a bare simmer and cook another 2 minutes.


While the mushroom mix is simmering, in a separate skillet, toast the bread until it’s a golden color. (You can also use a grill or broiler to toast the bread – your choice. But in that case, you may want to wait to butter the bread until after it’s toasted.)

Place a piece of bread on a plate. (For extra elegance, heat the plates before serving.) Spoon the mushroom mixture over the toast, and garnish with chopped parsley. Serve immediately.

And say a small prayer of thanks for the teachers in your lives.

Wednesday, April 26, 2017

Easy-Peasy
What’s cooking? Three-Pea Pasta with Herbs and Pancetta


There’s a funny smell in my garage. (I know that’s an unusual beginning for a food blog. The mind goes where the mind wants to go...) Probably a critter that got in by mistake and couldn’t find the way out. But ignorance is bliss, and that’s pretty much the approach my prince and I take when it comes to projects we’d just as soon not shoulder. For a couple of weeks now, we go out to the car and he says to me, “Do you still smell it? Because I don’t much.” And I say, “Yes, I definitely smell it. We have to investigate.” And then we get in the car and leave.

I have lots of friends who know how to focus on such issues. When they see a problem, they get right down to it. We are not in that camp, unless the problem is something like changing a light bulb, and even then I can think of at least one bulb that’s been out for a while. If it’s golf- or wine- or music-related, he’ll gladly tackle it. And if it’s food- or cooking-related, I’m on it like white on rice. So it’s not that we’re lazy. At least, I hope it’s not. We just neither of us want to charge into an experience that’s guaranteed to be unpleasant.

To my mate’s credit, if we knew where the critter was – like in the middle of the driveway – he’d find a shovel and some newspaper and get rid of the thing. But the idea of poking around in the recesses of the garage, and hoping that nothing jumps out, ... even just that moment of discovery... Not our thing.

What we need is an assistant. Some go-getter type. Well organized. A person of action. We’ve got both Siri and Alexa, and neither of them can actually do a damn thing. I want to say, “Alexa, change the lightbulb in my bathroom.” “Siri, find the source of that smell in the garage.” But no, they just sit there. We can do that much.

For certain activities, we’ve found that if we hang out with the right friends, we don’t have to be action people. We can take advantage of their organizational skills. For social activities, a couple of our friends often come up with fun dinner-type experiences. For travel, others are amazingly good at planning golf or sightseeing trips. Last fall, when a group of us went to Sicily, the house we stayed in and the sites we visited were all figured out by others on the trip. We believe every group needs a few Type B personalities, and that is our contribution. We pack our bags and go where we’re told. No whining, no complaining, no suggesting.

But so far, none of our friends has stepped forward to find the dead critter in the garage. If you know anyone who’d consider taking that on, please tell them to give me a call. I’ll make dinner.

* * *


Speaking of which, I made the loveliest pasta the other night. The grocery stores are finally offering real spring veggies, like snow peas and sugar snap peas and English peas, though I must confess that I haven’t actually found any English peas. In making this dish, I substituted frozen peas, and thought neither the taste nor the texture suffered.


The other great thing about this recipe is the use of herbs. While I took the sage and parsley and mint from my kitchen garden, they’re all available in great quantity at the stores now. The heady aroma of all those herbs, combined with the nice crunch of the pea pods, made this dish a real celebration of spring. The ricotta salata – ricotta cheese that has been pressed, dried, and salted, and which tastes like a very mild feta cheese – provides a nice, lightly tart accent, but the dish is also terrific without it if you’re not into cheese.

The recipe comes from Melissa Clark of The New York Times, and Ms. Clark developed it to use with farro pasta. But the Kitchen Goddess is not into scouring the planet for such specialized ingredients, so she used whole wheat fusilli and was very satisfied. (I will say that the color of the whole wheat pasta works really well with the peas.) I also added the mushrooms, just because it seemed like a good idea – and it was! I served it to friends – who were effusive with their praise – as one of my “guinea pig” dinners, with French bread and my favorite citrus salad, orange slices with black olive tapenade and fennel seeds. A terrific light meal that takes almost no time to prepare. And you’ll love the leftovers. Spring into it!

Kitchen Goddess notes: (1) Pancetta is just Italian bacon, made from pork belly, salt cured and jazzed up with black pepper and other spices. It’s sometimes eaten raw, but not in this dish. It comes in a spiral shape, which makes it a little funky to slice; but it’s really flavorful, so you should try some. Get it at the deli counter.

(2) Almost all the work in this recipe comes from trimming the little ends off the snow peas and the strings and tips off the sugar snap peas, which is a bit tedious but certainly not hard. And because the peas should be eaten firm-tender, the sauce takes almost no time to cook. So if you get your mise en place – peas trimmed, pancetta chopped, scallions sliced, herbs shredded, lemon zested, etc. – you can start the pasta before you even put the olive oil into the skillet. By the time the pasta is al dente, the rest of the dish will be ready to go.


Three-Pea Pasta with Herbs and Pancetta

Adapted from Melissa Clark in The New York Times.

Serves 6.

Ingredients
1 pound whole wheat fusilli or other pasta
2 tablespoons extra-virgin olive oil
4 ounces pancetta (or bacon), 2-3 thick slices, cut crosswise into strips about ⅜-inch wide
3 tablespoons butter at room temperature, separated
4 ounces fresh morel mushrooms (or crimini mushrooms), sliced
1½ cups thinly sliced scallions (white and light green parts), about 2 trimmed bunches
1 teaspoon Aleppo pepper, or ½ teaspoon crushed red pepper
2½  tablespoons fresh sage leaves, roughly chopped
1½ cups frozen peas (not thawed) or shelled English peas
8 ounces sugar snap peas, strings removed and ends trimmed
6 ounces snow peas, ends trimmed
Kosher salt and freshly ground pepper
zest of 1 lemon (about 1 teaspoon)
2 heaping tablespoons roughly chopped parsley
2 heaping tablespoons roughly chopped mint
2 ounces (about ¼ cup) ricotta salata or mild feta cheese, crumbled

Directions
In a large pot of well salted water, cook the pasta until it is just al dente. Before you drain the pasta, reserve 2 cups of the pasta water for use with the sauce.

While the pasta is cooking, heat the olive oil on medium-high in a large skillet, and add the pancetta. Cook, stirring, for 5-6 minutes, until it starts crisping and turning brown. Use a slotted spoon to remove it to a plate or bowl, but leave the skillet on medium-high heat.

Add 1 tablespoon of butter, and when it sizzles, add the mushrooms and cook, stirring, for 4-5 minutes. Add the scallions, Aleppo pepper, and sage to the skillet and stir well for about a minute, to distribute the oil on the scallions. Stir in the peas (all three kinds), and season well with salt and pepper. Cook the vegetables, stirring often, for 5 minutes or until the peas (all three kinds) are barely tender.


Stir the drained pasta into the pan, along with about a cup of the reserved pasta water. Bring the mixture to a simmer. Gently toss the pasta and the veggies as they cook, and season to taste with salt and pepper. Continue to simmer the mixture until the pasta has reached a just-done stage and the veggies are still only fork-tender, adding more pasta water as needed. (This is a personal preference thing: If all the liquid has been absorbed and it seems like the pasta is still too al dente for your taste, use that extra cup of pasta water.)

Turn off the heat, and add the butter and the reserved pancetta. In a small bowl, stir together the lemon zest, parsley, and mint until well combined. Toss the mixture gently with the pasta, and season again with salt and pepper to taste.

Serve the pasta in large shallow bowls. Sprinkle the ricotta salata on top.

Mangia!

Saturday, April 8, 2017

Tilting at Windmills
What’s cooking? Date Shakes


Just to be clear, I don’t actually have imaginary enemies, but I really wanted windmills in the headline, and that’s all that came to mind. I might, on the other hand, have a few imaginary friends. Have to think about that one.

My hubby and I recently returned from the latest in a series of biennial reunions among his college friends and their wives. Yes, you heard me correctly: biennial. Every two years for the last decade, we’ve gotten together with this group – guys my mate lived with his junior and senior years, plus their wives – in various places around the country, depending on who was foolish enough to volunteer as host. And if you’re wondering, yes, we hosted four years ago, and it was such fun, I/we have actually offered to do it again.

This year, we went to Palm Springs, where we took over a delightful boutique hotel called The Monkey Tree. We played golf and croquet (not your grandfather’s game – this one on whites-only, tightly manicured lawns), swam, hiked, biked, shopped, and generally shot the breeze for four days.


Then we found the windmills. Someone got the idea of touring the windmill farm in Desert Hot Springs, just outside Palm Springs on US10. Totally amazing. We learned more, really, than we even wanted to know about the history of wind power generation and the renewable energy industry; but being a massively geeky group, we loved it. It turns out that the San Gorgonio Pass, the gateway into Coachella Valley which extends southeast from Palm Springs, is one of the windiest places in California. So it’s a natural habitat for the more than 4,000 windmills there.


Just to give you some perspective on the size of these puppies.

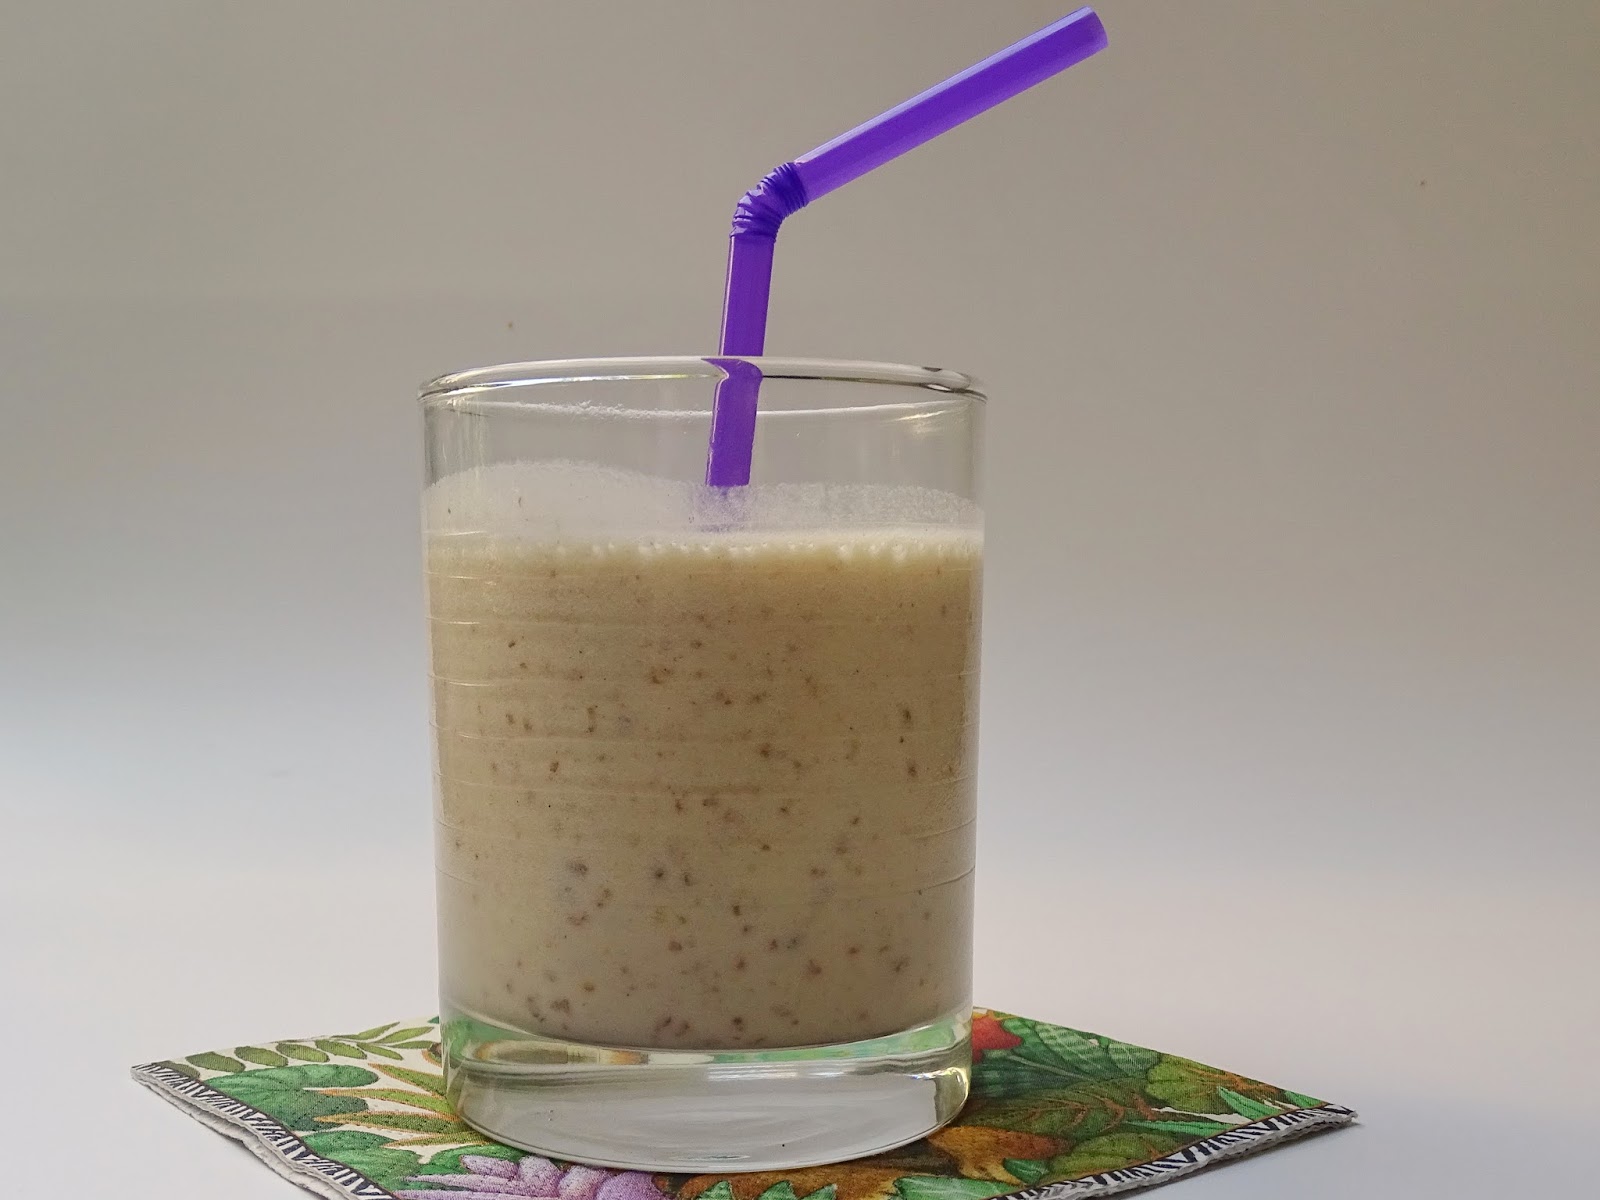
At the end of the tour, the bus stopped at this place, Windmill Market, a few miles west of town on a barren stretch of Indian Canyon Drive. Where we were all treated to date shakes. OMG. The Kitchen Goddess was in heaven. Big, gloppy milkshakes like we used to get at the local drugstore soda fountain, where you sat on stools that twirled and watched while they poured milk and ice cream into those big metal cups. Oh, my. And these drinks were flavored with dates grown nearby, at Leja Farms.


Now, before you get all “ewww-y” on me about the dates, let me say that there must have been 25 people at this little store, and every single one of them guzzled those shakes down like there was no tomorrow.


So of course, the KG had to try it at home. And she has two versions that you will absolutely love. She won’t promise they’re as good as the ones from Windmill Market, where you can slurp their cool, creamy sweetness while gazing at the San Bernadino Mountains and the swanlike grace of the giant wind turbines. Like that fresh clams oreganata you had on the Amalfi Coast, the atmosphere gets a lot of credit for improving the taste. But first...


More than you ever wanted to know about dates: The dates to use are Medjool dates, larger and thinner-skinned than most other varieties. The fruit is rich in dietary fiber, which prevents LDL cholesterol absorption, and high in iron (oxygen in blood), potassium (heart rate and blood pressure), and B-vitamins (eye health). Coachella Valley is the date capital of the U.S. More than 90 percent of dates harvested in the U.S. are grown there.

I could go on, but will limit myself to this one cute story. Historically, dates have long been an essential element in Middle Eastern diets; evidence of date palm cultivation has been found that goes as far back as 4000 BC. But they aren’t native to the U.S. At the turn of the 20th century, when USFDA experts were looking for ways to expand U.S. agriculture, they noted that the climate and soil conditions in the Coachella Valley were similar to those of Algeria, so they arranged for 9,000 Arabian palms to be shipped to California. Most recently, palms in Morocco and Algeria have been practically wiped out by disease, and some Americans have returned the favor by sending healthy stock back to its homeland. Maybe this is how we achieve world peace.

Kitchen Goddess note: When you make your shake, you’ll notice that it doesn’t really look like enough for 2 people. I say it serves 2 because it’s very rich and very filling. Which is not to say you can’t just drink the whole thing yourself. The KG, in fact, downed a whole batch for breakfast on the day she made these, without even an ounce of regret. But she did feel much like oinking for most of the morning.


Date Shake


Adapted from Kim Severson in The New York Times (October 19, 2010)

Serves 2.

4 pitted Medjool dates, coarsely chopped
½ cup cold milk (whole, low-fat, or skim, though whole is the choice for the richest drugstore fountain experience)
1-1¼ cups good vanilla ice cream
Optional garnishes: whipped cream, a few gratings of nutmeg

Combine the dates with half of the milk in a blender, and blend on high speed until the dates are smoothly puréed. Add the ice cream and the rest of the milk and blend until well incorporated and smooth. Pour and enjoy.

And now for a slightly different take on the same concept...


Creamsicle Date Shake


Serves 2.

Instead of the cold milk, make your date shake with fresh orange juice and vanilla ice cream.
Mmm-mm.


Monday, March 20, 2017

Put Some Spring into your Step... er, Soup
What’s cooking? Spring Vegetable Soup with Orzo


Yup. It’s here. At 5:28 this morning (that would be Central Daylight Time), Spring arrived. Certainly cause for some celebration. I know you want to put away your quilts and your sweaters, throw open your windows, and head out looking for pansies or lettuces or whatever it is you like to plant once the ground thaws.

Trouble is, the ground hasn’t really thawed in most places. And you’ll wish you had those quilts and sweaters available, at least for the next few weeks. Unless, of course, you live in Texas, where it actually is warm enough to plant the garden, but still not necessarily warm enough to put away the sweaters.

KG’s kitchen garden: lettuces and sorrel.
The KG’s kitchen garden: basil, tomatoes, arugula and pansies.


In the meantime, the Kitchen Goddess recommends... Spring Cleaning. Very satisfying and way more fun than doing your taxes. I was making Sticky Toffee Pudding for a St. Pat’s celebration this weekend and was chagrined to find that my self-rising flour carried a use-by date of August 27, 2016. I wasn’t sure how critical that window of opportunity was, so I checked on the web, where I noted that the flex-time was 4-6 months. Let’s see...[counting on fingers] Sept-Oct-.... Well, it appears that I reached almost the 7-month mark. Still, in a desperate effort to avoid that last-minute run to the store, I thought there must be a way to decide if it was really no good.

Then I remembered that the difference between self-rising flour and all-purpose flour is salt and baking powder. Well, I reasoned, if there’s baking powder in the stuff, I can tell by putting some in water if it’s got any life to it. You do remember, don’t you, that baking powder will bubble in water if it’s still working? So I threw a little into a small bowl of water. Nothing. Maybe I didn’t put enough in, I thought. So I put a little more in. Nothing. I poured the whole mess out and tried again. Nothing. Folks, that self-rising flour was as dead as the mice my cat used to bring me. So into the trash it went and off to the store went the KG.

Which is why I spent a bit of time this morning checking other use-by dates in my pantry. I found Melba crackers that should have passed on last March, cake flour in the same condition as my self-rising stuff, and microwaveable popcorn with a best-buy date of September 21, 2015. Yikes – how did I miss that last year?! And others I don’t dare tell you about for fear that you’ll get the wrong idea about me. But it’s a great way to clear some of the shelf space in your pantry. Tomorrow I’ll be giving my spices their annual sniff test.

When you’ve finished that little survey, you’ll be feeling noble and energetic. What to do with that energy? Why, cook! (Notice the difference the comma makes in that little sentence – it’s a totally opposite sentiment without the comma. The Kitchen Goddess loves the nuances of good punctuation.)

For you, I have just the dish. Yes, it’s early for most veggies. But you can pretend. And some – like sugar snap peas – are now in stores, fresh! So even though most of what’s in the soup is fairly standard, it doesn’t cook for so long that the veggies mush up; those sugar snap peas still have a bit of crunch. The real key is the basil and arugula, which give this delightful soup all the freshness of spring, without sacrificing the warmth you need for a while. See how clear the broth looks? Perhaps because the orzo tends to maintain a firmness without dissolving in the way that rice or some other pastas might. And once you get the veggies chopped, it takes very little cooking time. Add some orange slices – it’s still citrus season! – and some French bread with melted cheese, and the meal is complete.

Welcome spring!


Spring Vegetable Soup with Orzo

Adapted from Food & Wine Magazine, March 2017.

 Serves 4.

Ingredients
Somehow, I left out the peas and avocado. But they’re in the soup.
¾ cup orzo
2 tablespoons extra-virgin olive oil
1 medium carrot, halved lengthwise and thinly sliced crosswise
1 small turnip, cut into ⅜-inch dice
1 small sweet onion, cut into ⅜-inch dice
1 small fennel bulb, cut into ⅜-inch dice
1 celery rib, thinly sliced
2 garlic cloves, minced
Kosher salt
Freshly ground black pepper
4 ounces sugar snap peas, sliced diagonally into ½-inch pieces
6 cups good quality chicken stock
½ cup cherry tomatoes, quartered
½ cup frozen peas
1 small avocado, peeled and cut into ½-inch dice
2 ounces arugula (about 2 cups packed), thinly ribboned
½ cup basil leaves, thinly ribboned

Directions
In a medium saucepan, boil the orzo in lightly salted water until al dente, about 10 minutes. Drain and set aside, covered.

In a heavy soup pot, heat the olive oil over medium heat and add the carrot, turnip, onion, fennel, celery, and garlic, along with ½ teaspoon of salt. Sauté the vegetables for 6-7 minutes, and stir in the sugar snap peas for another minute.


Add the chicken stock, and bring the soup to a simmer. Stir in the tomatoes and frozen peas, and return the soup to a simmer. Cook partially covered over medium-low heat, for 12-15 minutes, or until the vegetables are fork-tender. Stir in the avocado, and continue to cook the soup for another 3-4 minutes. Stir in the orzo, and adjust seasoning with kosher salt and freshly ground black pepper.


Place a generous portion of basil and arugula into each bowl, and ladle the soup on top. Stir and serve hot.


If you want to make the soup ahead of time, follow directions down to just before the avocado. (The orzo tends to clump a bit if it sits on its own for long, so you may want to break it up before stirring it into the soup. Or you can cook the orzo at the last minute when you’re getting ready to serve.) When you’re ready to serve, reheat the soup, add the avocado, and proceed from that point in the directions above.