Sunday, April 27, 2014

A Little Something from Your Auntie Pasto
What’s cooking? Roasted Red Peppers and Sausage-Stuffed Dates


Kitchen Goddess note: Roasted red bell peppers is only the first half of this post; the rest of what constituted my gourmet antipasto, including the recipe for those dynamite stuffed dates, follows the recipe for the peppers.

Another gourmet group dinner haunted me this month. The theme this time was Italian, and our assignment was the appetizer course. Which should have been easy, right? Antipasto. In Italian, the word “antipasto” literally means “before the meal.” And I even had the authentic set of dishes used to serve it. But what would go into a “gourmet” version? I needed it to be more than a bunch of things I bought ready-made. I needed it to be special.

The ingredients for an antipasto platter (plural is “antipasti,” though when or how you’d use that formulation is beyond me) would fill a book on their own. From what I've read in a ridiculous number of Google searches, here’s a summary of sorts:

■ Cured meats (pepperoni, prosciutto, soppressata, salami,...)
■ Pickled mushrooms and vegetables in oil and/or vinegar: artichoke hearts, asparagus, peperoncini (unrelated to pepperoni, these are little pale yellow peppers that come in jars, pickled)...
■ Olives
■ Anchovies
■ Italian cheeses: provolone, mozzarella, Parmigiano-Reggiano, ricotta, goat cheese
■ Fruits: chunks of fresh melon (cantaloupe, honeydew, watermelon), figs (dried or fresh), dates
■ Roasted nuts
■ Roasted red peppers

In short, food from Italy. Well now, that’s helpful, I said to myself.

Something about the number of combinations and permutations made me feel like I was back in my college probability class, and the probability was that I’d drive myself crazy figuring it out. So I used my gourmet “shout out”: I called my friend Barbara, who is the closest combination I know of (1) Italian heritage, (2) a great cook, and (3) a good enough friend that she wouldn’t mind if I called and whined about my dilemma. (She's also a very talented interior designer, with a website here.)

“First,” she said, “you have to have roasted peppers.”

“But I don’t like roasted peppers,” I whimpered. “And the times I’ve tried, that business of steaming them in a paper bag then peeling off the skin just made me crazy.”

“The reason you don’t like them,” she countered, “is that you’ve never had mine. And I have a much better way of cooking and peeling them.”

She was right on both counts. Turns out she halves the peppers, then marinates them before she cooks them on the grill. Grilling them on both sides (rather than whole, which most recipes dictate) induces the halves to flatten out, which makes the skins easier to peel off. It also introduces that lovely roasted flavor to the inside of the peppers. Once she gets the skins off, she marinates them again. The result is completely delicious – tender, smoky, slightly sweet yet suffused with the herb-and-garlic flavors in the final marinade. None of that briney taste you get with the ones in the jars. I’ll confess it was a bit of a project, but there’s nothing hard about it, and I now have plenty for other uses:

■ Stir chopped into scrambled eggs or a frittata;
■ Add chopped to pasta with sautéed onion, roasted tomatoes, and spicy Italian sausage;
■ Loosely puréed with olive oil, basil, cream, sautéed onions and garlic for a great pasta sauce;
■ Best of all, puréed with mayo, lemon juice, garlic, and some olive oil to make an aioli sauce that’s great as a condiment for grilled shrimp, crab cakes, fish, or chicken, or as a dip for veggies.

Kitchen Goddess note: I am now so dying to make the pasta sauce and the aioli that I will get you some recipes next week. Get busy and roast some peppers, so you’ll be ready.

Roasted Red Bell Peppers

Makes 1½ quarts, but you can easily halve the recipe if you want.

For the vinaigrette:
½ cup balsamic vinegar
½ cup good olive oil
1 clove garlic, chopped (or, for extra flavor, one clove of roasted garlic – You have some in the fridge, don’t you?)
1 teaspoon Dijon mustard
½ teaspoon salt
⅛ teaspoon freshly ground pepper

For the peppers:
8 red bell peppers
12-15 cloves garlic, sliced
6 sprigs rosemary, cut in half
6 sprigs thyme, cut in half
olive oil, as needed

special equipment: one 1-quart mason jar plus one 1-pint mason jar, or 3 one-pint mason jars

1. Mix the marinade: Purée the vinaigrette ingredients and reserve in a jar or other pourable container.


2. Prepare the peppers for grilling: Halve the peppers, removing stems and seeds. Cut out the soft whitish interior ribs. Put the prepared pepper halves into a large bowl and pour about ¼ cup of the marinade over them. With your hands, slather the peppers inside and out with the marinade. Let the peppers sit for at least 15 minutes at room temperature, or up to a day in the fridge. (If you put the peppers overnight in the fridge, let them come to room temperature before grilling).

Notice the cuts I made that make it easier to flatten them while grilling.
3. Grilling the peppers: Preheat your grill to medium-high. Before grilling, make small (1-inch) cuts up the curvy ends, to allow the halves to flatten out as they cook. Grill both sides of the peppers for a total of 15-20 minutes – 5-7 minutes on the insides, the rest of the time on the outsides. The goal is to get the outsides about 70% charred.

You can see how the skin pulls away from the flesh, even on the lower left, which could use a bit more char.
4. Finishing the peppers: Let the grilled peppers cool a bit, then lay them on a cutting board, blackened side up, and with a paring knife, scrape or peel the skin off, removing as much of the char as you can. Slice the skinned peppers into strips about an inch wide. (They’ll be delicious now, but go through the next step anyhow.)


5. In the bottom of your mason jars, pour 2-3 tablespoons of the remaining marinade. Toss in a couple of cloves-worth of the sliced garlic, add about an inch of peppers and some of the herbs. Continue layering the jar with marinade, garlic, peppers, and herbs. If you run out of marinade (and you will), add plain olive oil. Close the jars and turn them up and down to thoroughly mix the marinade with the other ingredients. Store in the refrigerator for a day or up to 3 weeks.


In Praise of Bell Peppers: Remember that red bell peppers are sweet, not hot, nor acidic like green bell peppers. Moreover, these lovely orbs are a great source of Vitamin E as well as antioxidant and anti-inflammatory nutrients. Choose peppers that have a deep coloring, smooth skin without blemishes, and feel heavy for their size. The shape is not important.

The Complete Antipasto


Now that I had the roasted red peppers, what else would go on the antipasto?

I used as much as I could of homemade items, and I’ve included links here to the posts where you’ll find the tomato confit and the ricotta (that post also has instructions for the bruschetta). Sort of like the “something old, something new, etc.”, the goal should be to have a range of color, flavor, and texture.

■ Asparagus (roasted at 400º for 10 minutes), wrapped in half slices of prosciutto, for my cured meat and my green veggie.

■ A mix of Italian olives (Castelvetranos and black and green Cerignolas), for color and texture.

■ Sticks of Parmigiano-Reggiano with a plastic butter cup of fig jam to spread on it, for my hard cheese and something sweet.

■ Homemade ricotta cheese with herbs, for a soft cheese and the herbs.

Red and yellow cherry tomato confit, for color and because it goes well with the ricotta on bruschetta.

■ The perfect roasted red peppers, again for color and to pair with the ricotta on bruschetta.

■ Medjool dates stuffed with spicy Italian sausage, wrapped in bacon, and baked. I wanted something that would be served warm, and these offered the additional something sweet with meat. OMG – what a taste.

■ Separately, a basket of bruschetta (also called crostini – thin slices of toasted baguette, brushed with olive oil and rubbed with garlic), for the ricotta topped with either roasted red peppers or tomato confit.

And now, since I know you’re drooling over just the thought of those stuffed dates, here’s how to have some of your own.

Sausage-Stuffed Dates


Adapted from Giada De Laurentiis on FoodNetwork.com.

1 package seeded medjool dates (about 20)
2 links hot Italian sausage (raw)
10 slices bacon, halved
toothpicks

Preheat oven to 400º. Line a baking pan with baker’s parchment.

Remove the sausage from its casing. Pry open each date along the line where the seed was removed, and stuff enough sausage into the date to fill the interior (1-2 teaspoons). You should use enough sausage that the date no longer closes completely. Wrap a half slice of bacon around the stuffed date and secure with a toothpick. Place the finished dates on the baking sheet.

Bake the dates for 12-15 minutes, then turn them over and bake another 12-15 minutes, until the bacon looks crisp. Makes 20.


* * *

One Final Thought


You don't have to have a set of antipasto dishes to make an attractive antipasto spread. I got this set of Chinese soup bowls at a garage sale and recreated all but the stuffed dates for an alternate presentation. (We ate every last one of those delicious dates.)


Friday, April 18, 2014

One Fish, Two Fish, Old Dish, New Dish...and Dessert
What’s cooking? Fennel Flounder, Spicy Crab Linguine, and a Dessert Bonus


The Wall Street Journal this week reported that seafood consumption in the U.S. has been in a steady decline since 2004, from 16.6 pounds per average consumer to a low of 14.4 pounds in 2012, the last year for which they have figures. That’s compared to 46 pounds of pork, 57 pounds of chicken, and a whopping 82 pounds of beef. I’d say “holy cow,” but it would just sound like a bad joke.

The Kitchen Goddess, for one, has been doing her part to lift seafood consumption. At least for the Lenten season. From Salmon Cakes and my best Broiled Fish, to Tuna Spinach Souffle – I’ve done what I could to give you a nice range of techniques and types of fish for your Friday Lenten dinners. And today, I have not one, but two more options for cooking and eating seafood. See what a good friend I am?

Let’s just start by reviewing the facts.

1. Most fish and other seafood have at least some omega-3 (unsaturated) fatty acids.

2. Omega-3 fatty acids are proven aids in reducing inflammation in the body, which helps prevent both heart disease and Type 2 diabetes.

3. One study of 20,000 men found that eating fish once a week slashes the risk of sudden cardiac death in half. And fish lovers have much lower rates of Type 2 diabetes. The American Heart Association recommends two servings of fish or other seafood each week.

4. All kinds of seafood are also great sources of protein.

5. Seafood is delicious.

So, ladies and gentlemen, let's eat some fish!

The first preparation today is one that I’ve posted about before, but never with a photo. Yes, sometimes, the Kitchen Goddess will actually cook something and forget to get the camera out. Mostly, that happens when she is either really really hungry or her husband is really really hungry and threatening who-knows-what. But this week, I made that dish and remembered just in time to take a photo or two.

There’s a lot of chopping with this dish, but it’s very easy and takes little time to assemble. The fennel sweetens as it cooks, and that sweetness presents a great counterpoint to the acidity of the tomatoes and just perks the fish right up. In this photo version, I used overlarge tomatoes, with the result that the dish was soupier than ever before, but just as tasty. (I ended up serving it in bowls.)


Fennel Flounder

Serves 4.

For the mirepoix:
2 tablespoons olive oil
1 tablespoon butter
2 large carrots, diced
1 medium onion, diced
2 stalks celery, diced

1½ pounds flounder filet (or other relatively flat fish)
1 large fennel bulb, trimmed and thinly sliced
tomatoes – about 2 cups diced (fresh tomatoes – not canned)

Heat oil/butter in a skillet over medium heat and add mirepoix, stirring frequently for 7-8 minutes. Spread the cooked vegetables on the bottom of a medium-sized (approx. 2-quart) casserole dish. Arrange half the fish in one layer, and sprinkle with half the fennel. Arrange the rest of the fish in the next layer and top with remaining fennel. Scatter tomatoes evenly on top. Season with garlic salt and lemon pepper. Bake, covered, at 400º for 30-35 minutes, then remove cover and broil until the tomatoes get slightly toasted (about 2 minutes).


Kitchen Goddess note: I have made this recipe using a 4-inch deep casserole dish, and using a low, flat dish. If your casserole dish is low and flat, you may only need one layer of the fish and one layer of fennel. Either way works.


The second dish is from a recipe I spotted in The New York Times this week, and simply couldn’t resist. Now I know you might have seen this recipe and thought about making it. But you don’t know David Tanis (the writer), and he’s being paid to give you these recipes, so how reliable can he be? On the other hand, you know the Kitchen Goddess, and you know she gives you these preparations out of pure love. So you can believe me when I say you should make something. This crab dish is one of those somethings.


It’s a great dish for dinner with roasted asparagus, or as Tanis suggests, on Easter Sunday as a lunch entrée. If you chop up the herbs and other seasonings first, and have them ready in a small bowl, you can put this dish together in almost no time. I took the trouble to find fresh pasta – which cooks faster than dried – at my grocery store, and the entire meal took about 20 minutes to cook. It’s creamy but with a bright green freshness that really livens up your taste buds.

Kitchen Goddess note: Do not ignore the jalapeño pepper. If you are a heat-avoider (which I am), go with the jalapeño and remove the seeds and ribs; for more heat, leave some seeds in or buy a serrano pepper instead. But the jalapeño keeps the dish from being too rich, provides a nice spark, and heightens the taste of the herbs.

Spicy Crab Linguine

Adapted from David Tanis in The New York Times

Serves 4.

The seasoning bundle:
1 medium-sized jalapeño chile (seeds and ribs removed), finely diced
2 tablespoons finely cut chives
5-6 scallions, sliced thinly and on an angle
1 tablespoon fresh tarragon leaves, chopped
1 pound linguine
½ cup low-fat plain Greek yogurt
½ cup crème fraîche
3 tablespoons Dijon mustard
Pinch of cayenne pepper
1 pound cooked crab meat, lump if possible and fresh (not pasteurized) if possible
Salt and freshly ground pepper to taste
Cilantro sprigs, for garnish

Prepare the seasoning bundle, combine and set aside.

Bring a large pot of water to boil with a couple of tablespoons of salt. Add the linguine and cook until al dente.

At the same time that you add the pasta to the water, combine the yogurt and crème fraîche over medium heat in a large, deep skillet. (I used a 3½-quart Le Creuset cast iron braiser to cook and serve the dish.) Whisk in the mustard and cayenne, and season to taste with salt and pepper. You are only trying to get the mixture warm, not boiling, so adjust the heat accordingly.

Fold in the crab meat so as not to break up the lumps, and heat through.

When the pasta has reached the al dente stage, drain it and add it to the skillet mixture. Fold it gently into the sauce, again so as not to break up the crab meat too much. Add the seasoning bundle and stir to distribute evenly.

If you are serving in a separate dish, be sure to heat the dish ahead of time, as the linguine with sauce needs to be served warm. Garnish with cilantro sprigs.


And now, because I am such a generous soul and know how much you like dessert, I have a short, easy idea for dessert – the very same dessert I served with the crab linguine. I knew I had it right when, at the grocery store, the clerk checking out my ingredients for that evening cast her eyes across the collection and said, “Can I come to your house for dinner?”


I love fresh pineapple, and the ones showing up now in my local grocery stores need only a day or two on the kitchen counter to get lusciously ripe. To serve it as dessert, I turned to pineapple’s long-time best friend, the coconut. I found coconut gelato in one store, but if you are not so lucky, I know that many supermarkets now carry at least one brand of coconut-milk-based ice creams (to satisfy lactose-intolerant customers), which are quite good.

I piled diced pineapple on top of the gelato, and spooned some of my ground cherry shazam – that syrupy stuff made from cape gooseberries (also called ground cherries) that I told you about last summer. You did make some, didn’t you? Ground cherries have a faintly pineapple taste, so it worked well with the fresh fruit. If you don’t have any shazam, you could drizzle a bit of honey on top, or dilute your favorite jam – peach jam or orange marmalade would both work. So easy, and so yummy looking!


Saturday, April 12, 2014

It’s Spring – Time to Stretch a Little
What’s cooking? Tomato Tarte Tatin


About a year ago, my hubby and I connected with a group of acquaintances who wanted to create gourmet dinners with good wines. As you know, the Kitchen Goddess has never been particularly shy; but she’s also not what you’d describe as hard-core competitive. And with a gourmet dinner for which each person produces a dish, there’s a certain element of competition that just naturally creeps in. It’s a lot of fun, but slightly nerve-wracking in the process.

Now if you’re having a dinner party on your own, you arrange the menu with an eye toward balance – focusing attention on one or two items – the entrée and the dessert, say – while the rest of the dishes stay simple and straightforward. But with each chef providing only one dish, it’s a bit like the finale of a fireworks show – excess everywhere you look. I’d provided the main course to the previous dinner, and hadn’t been even a little hungry by the time we served it.

So for the most recent of these dinners, it was my turn to provide the salad, and I was determined to deliver something light. The theme: French. I searched my French cookbooks, wondering all the while what a French salad looked like. For much of what I found, the ingredients were either impossible to find (pistachio paste? black truffle juice?) or beyond what I think of as my skill set. I tell myself nothing is really beyond my skill set – but some skills I’m just not interested in mastering. I began to get frustrated.

Then I found it. A version of tarte tatin, made with tomatoes. The classic tarte tatin is made with apples, arranged in a pinwheel pattern with the crust baked on top so as not to get soggy; then the whole thing is turned upside down to serve. This tomato version was in Daniel Boulud’s Chef Daniel Boulud: Cooking in New York City. I got the book because I loved the photos, never really planning to make much from it. But there I was, under duress, and I decided to see if I could stretch a little and make this really interesting looking dish. Read the instructions, see what made it seem difficult. And what I discovered was that nothing on the page was actually hard. Lots of ingredients – which you know I love – and lots of steps; but it looked gorgeous, and light, with an interesting mix of tastes and textures. I can do this. I just have to give myself enough time.

Let me say here that I was right. It was completely doable and swoon-worthy. Also completely elegant. The acidity of the tomatoes melded perfectly with the creamy goat cheese. The caramelized onions balanced those tastes with a hint of sweetness, and the puff pastry made a perfect platform for the presentation without changing the flavor. The frisée salad added a cool freshness that worked perfectly with the warm tart. I would make it again in a heartbeat. In fact, we had one tart left over – you’d be a fool not to make an extra in case one fell on the floor or suffered some other disaster – and my husband and I devoured it when we got home. Yes, that good.

You should try this. Try it with a meal that is otherwise simple, straightforward, and easy. Make it the first course to a menu of grilled steak, baked potatoes, and roast asparagus. Or roast leg of lamb, wild rice, and steamed broccoli rabe. It's good to push yourself occasionally, and this dish is well worth the effort.

Moreover, much can be done ahead. The pistou, the puff pastry circles, the caramelized onions, and the herbed goat cheese can all be made at least a day in advance. The tomatoes and the salad have to be managed on the day of the meal, but the tomatoes can sit in their little tart pans for a couple of hours before you bake them. And the assembly is fast and easy. Stack it up, flip it over, and voilà. Your guests will think you’ve been secretly going to culinary school.

When I penned this post, it was late at night and my resident wino was asleep. So I punted and told you we served this dish with a white wine from the Languedoc region of France. The wino is now awake, so I have a correction. The wine recommended by Boulud's book was a Côteaux du Languedoc, a low-acid blend of Roussane and Marsanne from the south of France. We tasted that one and liked it, but liked even more the wine we ended up serving, a 2010 J.L. Chave Selection Saint-Joseph Céleste, another Roussane-Marsanne white but from the Rhône region. I know this is more information than anyone wanted, but when I ask my husband about wine, this is the sort of answer I get.


Tomato Tarte Tatin

Adapted from Chef Daniel Boulud: Cooking in New York City

Makes 8 salad course servings.

Special equipment needed: 8 4-inch tart molds, a mandoline slicer, a 4-inch round biscuit cutter

Part 1: The Pistou Sauce
Can be made several days ahead.

2 bunches fresh basil (about 8 ounces), leaves only
1 small clove garlic, peeled and coarsely chopped
1 teaspoon pignoli nuts, lightly toasted
1 rounded teaspoon grated Parmigiano-Reggiano
½ cup extra-virgin olive oil

Bring a medium pot of salted water to a boil. Dump the basil into the water and blanch 2 minutes. Drain the leaves and run them under cold water to stop cooking. Remove the leaves to paper towels and squeeze dry.

Combine all ingredients in a food processor and process until smooth, about 2 minutes. Refrigerate in an airtight container.

Part 2:  The Herbed Goat Cheese
Can be made a day or two ahead.

The pistou in the small bowl, the herbed goat cheese -- which uses the pistou -- in the larger.

4 ounces fresh goat cheese, softened at room temperature for 30 minutes
2 teaspoons mascarpone cheese
2 teaspoons heavy cream
2 tablespoons Pistou Sauce (from Part 1, above)
2 tablespoons shallots, finely chopped
2 tablespoons chives, finely chopped
1 teaspoon garlic, finely chopped
salt and freshly ground pepper

In a small bowl, stir together all ingredients, adding salt and pepper to taste. Refrigerate in an airtight container, but remove and bring to room temperature 30 minutes before serving.

Part 3: The Caramelized Onions
Can be made a day or two ahead.

Use the mandoline to slice the onions nice and thin.

2 tablespoons unsalted butter
2 medium yellow onions (about 7 ounces each), thinly sliced
4 sprigs fresh thyme, leaves only
½ teaspoon sugar
salt and freshly ground pepper

In a large skillet (not non-stick), melt the butter over medium-low heat. Add the onions and thyme and a pinch of salt and cook, stirring occasionally, for about 20 minutes. As you stir, scrape up the “fond” that collects on the bottom of the pan and stir it into the onions. After about 20 minutes, you may need to add a tablespoon or two of water to deglaze the pan (i.e., dissolve the fond) as you cook. This process will turn the onions brown. Stir the sugar into the onions and continue to cook them for another 10-15 minutes, stirring occasionally and adding water (a tablespoon at a time) as needed. You want the onions to reach a deep brown color, without burning. (N.B. Boulud claims this takes only 10-15 minutes. Baloney.)

The onions go from this...


... to this.
Check seasoning, adding salt and pepper to taste. Refrigerate in an airtight container.

Part 4: The Puff Pastry
Can be made a day ahead.


A confession: I forgot to photo the pastry rounds. These are from a dessert I made and are smaller, but you get the idea.

1 pound frozen puff pastry sheets
1 egg, whisked with 2 teaspoons water

Preheat oven to 400º.

On a lightly floured surface with a lightly floured rolling pin, roll out the puff pastry to a 3/16-inch thickness. Using a 4-inch round biscuit cutter, cut the dough into 8 discs. Place the discs on a parchment-lined baking sheet and refrigerate 15 minutes.

Use a fork to prick the surface of the dough, and brush the tops of the discs with the egg wash. Bake in the center of the oven until golden brown, 10-12 minutes. Cool the discs on a rack, then store them in an airtight container – not in the refrigerator.

Kitchen Goddess Notes on frozen puff pastry:
1. Remove the sheets from the box and defrost separately for 40 minutes on the kitchen counter,  or re-wrap in cellophane and defrost overnight in the refrigerator. While you wait, chill your rolling pin, pan, and biscuit cutter in the fridge.
2. Work with one sheet at a time, storing the other sheet in the fridge.
3. As a test, I made 3 batches of these, and had best outcomes when I placed a second piece of parchment on top of the discs (after pricking and brushing with egg wash) and used a second pan of the same size on top of that, as a weight to keep the discs from puffing up. I baked the discs for 8 minutes then removed the top pan and parchment before baking the final 4 minutes. If you use a convection oven setting, you’ll only need a total of 11 minutes.

Part 5: The Tomatoes
Start early enough in the day to allow for the slices to drain 2-3 hours before assembling.

Use a mandoline for the tomatoes, too, so you get nice, even slices.
10 large plum tomatoes, cut crosswise into rounds ⅛-inch thick (save the ends of the tomatoes for some other dish)
kosher salt and freshly ground pepper
olive oil for greasing the bottoms of the tart molds

To remove excess water from the tomato slices, place them in a single layer on baking pans lined with 2-3 layers of paper towels. Season lightly with salt, and place the pans in the refrigerator for 2-3 hours.

Grease the bottoms of the tart molds with the olive oil. Using about 12 slices per tart, arrange the tomato slices in the molds in an overlapping circle. Season with salt and pepper, and place the pans on a rimmed baking sheet. Set aside until you are almost ready to serve. (The tarts can stay this way for a couple of hours.)

It might take a little practice to get the pinwheel effect, but it's not hard. These tart molds are paper -- fine for use if you're baking the tarts soon after assembling them. Otherwise, they tend to flatten out and you have to replace them. And yes, that's what I had to do.

Part 6: The Frisée Salad
The dressing can be made the day before, and the salad ingredients can be prepped and refrigerated separately in small bowls a couple of hours in advance.

Frisée  also known as curly endive  looks like a small, furry green animal. The darker outside leaves tend to be bitter. If you can't find frisée, use baby arugula or mache.


¼ cup extra virgin olive oil
1 tablespoon freshly squeezed lemon juice
2 small heads frisée, white, yellow and pale green parts only, trimmed
8 small white mushrooms, thinly sliced
½ cup Kalamata olives (10-15, depending on size), pitted and sliced
16 cherry tomatoes, halved
2 tablespoons chervil leaves
8 chives, cut in ½-inch pieces
salt and freshly ground pepper to taste

Whisk together the oil and lemon juice. Season with salt and pepper to taste.


WHEN YOU ARE READY TO SERVE:

Preheat the oven to 350º. Let the goat cheese sit at room temperature for at least 30 minutes.

Bake the tarts 10 minutes in the center of the oven. Remove the pans and, using the back of a spoon, lightly press down on the center of each tomato pinwheel to flatten.

While the tarts are baking, warm the caramelized onions (30 seconds in the microwave).

Toss together the salad ingredients in a medium bowl. Add the oil/lemon juice to taste (I used about half) and season with salt and pepper to taste.

While the tomato slices are still warm in their pans, place a rounded tablespoon of the goat cheese in the center of each. Spoon the warm caramelized onions (you’ll have about 1 rounded tablespoon per tart) over the herbed goat cheese, and top with a disc of puff pastry.

Invert the tarts onto the center of each plate and remove the mold. Place a small mound of the dressed salad on the side of the plate, and drizzle the pistou sauce around the plate.

Serve immediately.


Saturday, April 5, 2014

Another Fishy Dishy
What’s cooking? Tuna Spinach Soufflé


I’ve been cooking for my son and daughter-in-law this week – they had a baby a couple of weeks ago, and that’s what I do to help out. I figure it’s a win for everyone – they get to avoid cooking or even thinking about preparing meals, and I get to spend time with my two-year-old granddaughter and the new baby.

But it’s more exhausting than I thought it would be, with the thinking and the shopping and the prep and the clean-up, and the 40-minute drive each way. Last night, on the way home, I was stopped at a light when a guy drove up beside me to tell me my headlights were off. I turned them on and thanked him, and at that moment, the light changed. Suddenly, I noticed the Garden State Parkway entrance to my left, so I quickly turned onto the ramp and headed for home. The night was quiet, there wasn’t too much traffic, and I was listening to NPR, so I wasn’t really aware of the various road signs until at some point I thought it had been a while since I’d been driving and I should be seeing my exit number. Hmmm... this part of the road doesn’t look familiar – why is that? Did I miss my exit? As the next sign approached, I realized the numbers were going down instead of up. Then I noticed that the little compass on my rear-view mirror said “S” instead of “N.” That’s right – I had gotten onto the Parkway heading away from home – not toward it. And somehow I’d also managed to get myself onto the Express lanes, where I couldn’t exit for another 6 miles. Needless to say, it was quite late when I finally got myself turned around and back home. So even if you don’t think you’re tired, it’s a good idea to pay attention at the end of the day.

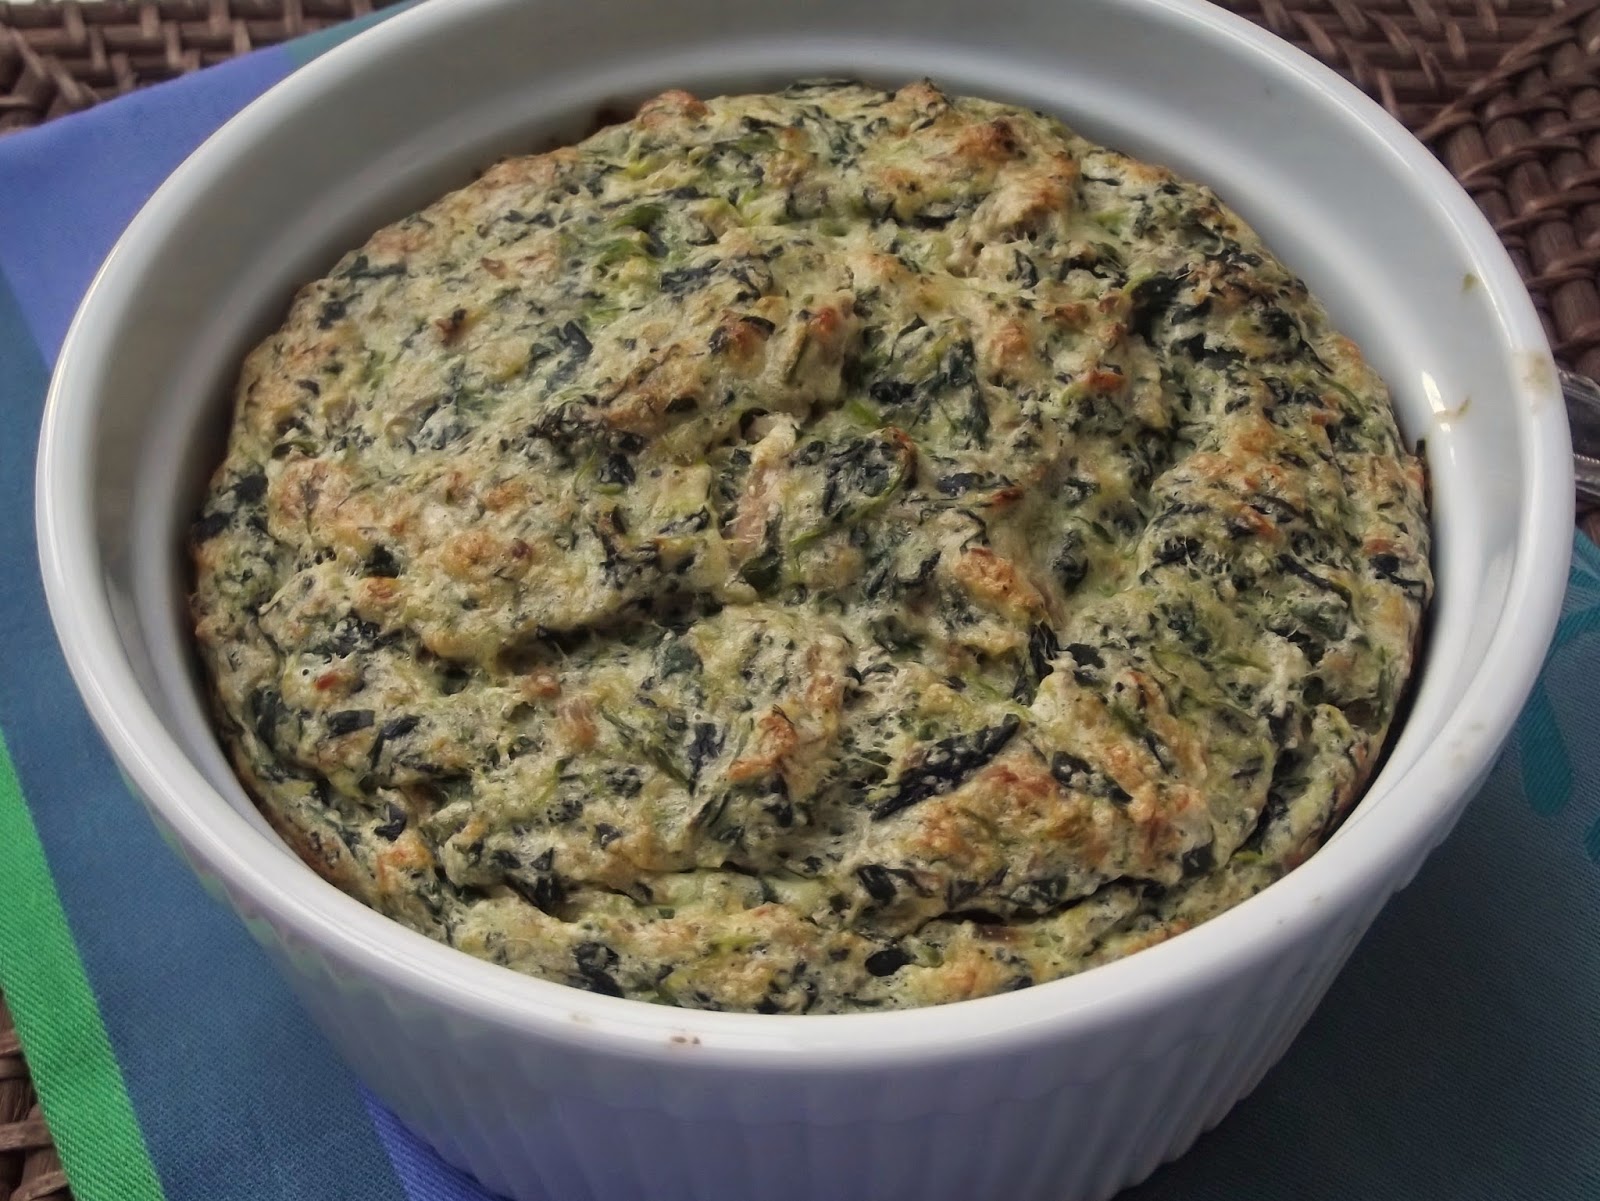
Last week, as I thought about possible menus, I recalled some of the recipes I’d prepared back when my son was still living at home. One of the ones I remember he liked was a dish I hadn’t cooked in ages. A dish the whole family really liked. And it’s a fish dish. Just right for the Lenten theme I’ve been working on. Just to see if I still liked it, I made it for myself and my hubby. Yup. Still a great dish. I found the recipe in a booklet that came with a set of soufflé dishes I bought so long ago that I think the booklet is the only thing left. Just goes to show that good ideas are everywhere. So here you are.

Kitchen Goddess note: Please do not be put off because this is a soufflé. Soufflés are not hard, and there’s a wonderful lightness to the texture that comes from the whipped egg whites. ❶ You make a roux. That’s the butter and flour mixture that you cook for a couple of minutes until it loses that floury taste. ❷ Stir in milk until the sauce thickens and add egg yolks. ❸ Add your flavoring ingredients – in this case the tuna and spinach and spices. ❹ Whip the egg whites until just stiff – the point at which you lose the shine and have nice, elegant peaks. The more you try this, the better you’ll get. ❺ Fold the flavoring into the whipped egg whites. Fold gently, using a large rubber spatula. Lay the beaten whites on top of the flavoring mixture, and use the spatula to slice down through the middle of the whites, then scoop into the batter and fold one half up over the other and into the batter in a looping motion. Turn the bowl a quarter turn, and repeat. The key is to go slowly and gently, and not to overdo it.


Because the flavoring ingredients in this soufflé are heavy and dense, the soufflé won’t rise as much as a dessert soufflé or a cheese soufflé, but it will rise some, and the top will brown. Serve it with dinner rolls or French bread and a salad or some other green veggie. It’s light, airy, and delicious. Also, it works equally well with salmon and spinach.

One final note. Dear readers, do not turn up your noses at the packaged tuna. Feel free to try this with fresh tuna, cooked and chopped finely, then let me know how it went. The Kitchen Goddess has only ever used packaged tuna or salmon. But get the kind that’s vacuum-packed in those foil pouches, and get the tuna that’s been packaged in oil. You just don’t save enough in calories to overcome the difference in flavor.


Tuna-Spinach Soufflé


Serves 2-3.

3 tablespoons unsalted butter
3 tablespoons flour
¾ cup milk (not skim)
½ teaspoon salt
¼ teaspoon dry mustard
½ teaspoon grated lemon rind
3 large egg yolks
½ cup cooked or canned tuna (6-oz pouch, squeezed dry then flaked)
½ cup frozen chopped spinach (a 10-oz package, microwaved about 7 minutes until not quite done, and squeezed dry)
3 egg whites, beaten until just stiff

Preheat oven to 350º.

In a large saucepan, melt the butter and stir in the flour. Whisk over medium-low heat for about 2 minutes, then gradually whisk in the milk. Stir over medium heat until the sauce thickens and begins to bubble.

Remove the mixture from the heat and stir in the salt, mustard, lemon rind, and egg yolks. Add the tuna and spinach and blend well. Let this mixture cool to room temperature while you whip the egg whites.


Using a mixer fitted with a wire whisk, whip the egg whites on high until they lose their shine and produce stiff peaks. (If you have the energy, you can instead whip them by hand using a wire whisk, but I don’t know anyone like that.) Gently stir a large spoonful of the whipped egg whites into the tuna/spinach mix, then add the rest of the whites and gently fold them in.


Pour the mixture into an ungreased 1½-quart soufflé dish and bake at 350º for 35-40 minutes or until puffed and brown. Serve at once. (Unless you are the Kitchen Goddess and have to first take a photo.)

This recipe can easily be doubled. If you double it, bake at 375º for 50 minutes.


Friday, March 28, 2014

Something for the Kids... or the Resident Chocoholic
What’s cooking? Moon Pies


You know, sometimes you just need some chocolate. I’d been feeling that way for at least two weeks, and normally, I’d have been in the kitchen making something to satisfy that craving long before now. But once you make something, there it is. And then someone has to eat it. Which wouldn’t be a problem – after all, I did say I needed some chocolate – but you do generally end up with more than is really a healthy portion, unless you’re hosting dinner guests or the local Boy Scout troop.

I have had just enough other stuff going on in my life that company wasn’t a possibility; but some neighborhood friends were having a small party, so I offered to take dessert. And then as I looked around for what to make, I spotted an article in Garden & Gun that completely sucked me in. (Side note: The Kitchen Goddess is anything but a gun advocate. I often imagine how dangerous it would have been for my family if I’d ever had a gun in the house. But Garden & Gun is more about food and flowers than firearms – I can alliterate with the best of them – and a lot about Southern living. So I subscribe.)

The story featured a chef, David Guas, now in Arlington but originally from New Orleans, who makes his own moon pies at Mardi Gras time. Apparently, moon pies – graham cracker cookie sandwiches with marshmallow filling, and dipped in chocolate (!) – are a big deal for Mardi Gras, and historically a big Southern treat with RC Cola. So I’ll start with a confession: I was born and raised in the South by Southern women, and I have never had a moon pie, and I never really liked RC Cola. Or Dr. Pepper, for that matter. Heresy, I know – must be my Yankee father.

But these moon pies looked soooo yummy. They also looked a bit like a project, and as you all know, I love a project, especially if it takes place in the kitchen.

It turns out that they really are yummy, in a sort of messy way. Great kid fare. And if the guests at the party I took them to are any gauge, also great man fare. It’s only the ladies who are focusing on their weight and don’t like to get chocolate on their hands who shy away from this dessert. They should loosen up.

But first, a few notes on the process and my suggestions, which are reflected in the recipe that follows:

Step 1 – The graham cookies, which I decided to make a bit thinner than Chef showed. His were ¼-inch thick, but when I rolled the dough out to that thickness, it looked like slabs of sidewalk. So I rolled mine slightly thinner, and would roll them even thinner – like ⅛-inch thick – next time. Don’t get me wrong – they tasted great, very graham-y, better texture and more flavorful than graham crackers. I just think I’d prefer a more equal marshmallow/cookie ratio per bite.

Step 2 – The marshmallow filling. I’d never made marshmallows, but it seemed easy enough, and it was fun. The toughest part is waiting until the candy thermometer moves from 220º to 240º, which always seems like forever. Chef Guas recommends starting to whip the egg whites when the syrup reaches 200º, but if you have a KitchenAid or other stand mixer – which I definitely recommend, and not only for this recipe – you can start when it hits 220º. I also extended the whipping time by about 2 minutes after the syrup went in, because they hadn’t set up as firmly as I’d hoped at the end of 10 minutes. Twelve minutes seemed about right. This part of the recipe will be laborious in the extreme if you don’t have a good stand mixer.

Step 3 – Assembling the sandwiches. Well,... I noticed that the weight of the cookies seemed to be smooshing down the filling, so I decided to pile the filling on some of the cookies and let it chill a few minutes before adding the tops. Big mistake. It turns out that the chill sets the filling so firmly that you can’t get the top cookie to stay down. I had a few moments of hilarity while I tried putting the tops on those and setting a sheet pan on top to force them down, but they bounced back like Jack-in-the-Boxes (Jacks-in-the-Box?). Eek!! When I stirred the marshmallow around by hand for just a minute or two longer in the mixing bowl, it firmed up and worked fine.

Step 4 – Dipping. Chef Guas suggested using two forks in a sort of Emergency Room paddle formation to dip the sandwiches into the chocolate. Ha ha ha ha ha. It works, but don’t dip and then say to yourself, “I’ll just twist it around the other way to make sure the chocolate coats it.” Because that’s when you’ll drop it back into the chocolate and enjoy a little bit of cursing. So if the kids are going to be around while you do this part, just watch your language. It doesn’t hurt to drop them back into the melted chocolate – it just adds to the time. And I’ll try tongs next time.

Yes, there will be a next time. I don’t want to scare anyone off from doing this recipe. Actually, once you get the cookies done, you might have a great time with the kids or grandkids putting together the rest of it. And the Kitchen Goddess has already suffered through all the mistakes for you. Make it an after-school affair or a weekend project. Have fun!


Mardi Gras Moon Pies

Adapted from Chef David Guas of Bayou Bakery, Coffee Bar & Eatery in Arlington, VA, from Garden & Gun magazine

Makes 18-20.

For the cookies:

6 ounces unsalted butter
¼ cup brown sugar (light or dark)
¼ cup dark molasses
¼ teaspoon vanilla extract
1½ cups all-purpose flour
1¼ cups graham cracker crumbs, ground fine (put them in a ziplock bag and wale away on them with a rolling pin)
¾  teaspoon kosher salt
½  teaspoon baking powder
½  teaspoon baking soda
¼  teaspoon ground cinnamon
2 tablespoons whole milk, plus one teaspoon

Using a stand mixer fitted with a flat beater (or paddle, as it might be called), combine butter, brown sugar, molasses and vanilla until smooth.

In a separate bowl, using a fork, stir together the dry ingredients, being sure to mix well the flour and graham crumbs.

Add the dry ingredients to the butter/sugar, and mix on low speed while dribbling in the milk. It should be a fairly stiff dough, but even so, you may need to add another teaspoon of milk if the dough isn’t coming together.

Press dough into a flat disk and wrap in plastic. Refrigerate at least one hour. Kitchen Goddess note: I left my dough to chill for several hours, and it was rock-hard when I took it out. A few minutes on the kitchen counter softened it up enough to work.


Preheat the oven to 325º. Line a baking sheet with parchment paper. Roll the dough to a ⅛-inch thickness (thicker if you feel like it) and stamp out rounds with a 2½-inch cutter. (The Kitchen Goddess gathers together the scraps and re-rolls for a second batch. She can’t stand to throw away good dough.) Bake the cookies 10-12 minutes, long enough to get them medium-crisp. Transfer the cookies to baking racks to cool.

For the marshmallow:

4 teaspoons powdered gelatin
½ cup cold water, plus ¼ cup water at room temperature
4 tablespoons light corn syrup
3 tablespoons honey (clover or wildflower)
¾ cup granulated sugar
3 large egg whites

Special equipment: candy thermometer.

In a small bowl, sprinkle the gelatin over the cold water and reserve. Put the egg whites into the bowl of a stand mixer fitted with a whisk and set aside. (Egg whites whip better at room temperature.)

In a small saucepan, combine the room-temperature water, corn syrup, honey and sugar over low heat, stirring until the sugar is dissolved. Raise the heat to bring the mixture to a simmer, and continue to simmer until it reaches 240º on a candy thermometer.

When the temperature of the syrup mixture reaches 220º, begin to whip the egg whites on high until they hold firm peaks but are not stiff. If they reach this stage before the syrup reaches 240º, stop the mixer until the syrup is ready.

Once the sugar syrup reaches 240º, remove it from the heat, and whisk in the gelatin. Now, while the egg whites are whipping on high, carefully drizzle the hot syrup down the inside of the bowl into the egg whites. Continue whipping for an additional 10-12 minutes, until the mixture stiffens and becomes opaque.

Notice the little indentation where I scooped a bit out with a spoon to test. This is just ready.

Assembling the sandwiches:

Spray a large spoon (like a tablespoon) with nonstick cooking spray. Turn over half the cookies, and spoon 2-3 tablespoons of marshmallow onto each. Let the marshmallow set for a minute, then gently lay the remaining cookies on top of the marshmallow, pressing down gently to get the marshmallow to spread to the edge. Chill the sandwiches in the fridge for at least 15 minutes.

For the chocolate coating:

1 pound bittersweet chocolate (60–70% cacao)
2 tablespoons vegetable oil or canola oil

While the cookie sandwiches are chilling, melt the chocolate in a heatproof bowl set over a small saucepan of simmering water. Stir the chocolate until it melts, then remove the bowl from the heat and let it cool slightly. When the chocolate has cooled slightly but is still warm, whisk the oil into it in a slow stream. Cool the chocolate to room temperature before dipping the cookie sandwiches.

Don't forget to spray the rack with cooking spray.

Coat a wire rack with cooking spray, and set it in a parchment-lined rimmed baking sheet. Kitchen Goddess note: That cooking spray is critical, as you will otherwise find your moon pies sticking to the rack. I know this. Using a couple of forks or a pair of tongs, gently dip the chilled sandwiches into the chocolate and set onto the rack to rest. Move the pan to a cool place – not the fridge – to let the coating harden for at least a couple of hours.

Moon Pies can be kept in an airtight container, layered between sheets of parchment, at room temperature, for 4-5 days.

Kitchen Goddess Bonus  – The Kitchen Goddess had so much marshmallow filling left over that she couldn’t bring herself to throw it out. So she made marshmallows, which were also fun.

You will need:
• an appropriate-sized metal pan
• ¼ cup corn starch
• ¼ cup powdered sugar

Cover the pan with foil and spray the foil with nonstick cooking spray. Mix the powdered sugar and cornstarch together in a small bowl, and sprinkle a generous dusting of the mix over the entire pan.

Pour the marshmallow filling into the pan, and use a spatula to spread it evenly. The Kitchen Goddess also drizzled the leftover chocolate coating (Waste not, want not!) over the marshmallow.
Let the marshmallow set at room temperature for several hours or overnight.

The foil is another thing the Kitchen Goddess forgot. And was sorry.
Dust a work surface generously with more of the sugar/starch, then lift the marshmallow block from the pan using the foil, and flip it over onto the work surface. Peel off the foil, and dust the top of the marshmallow block with more of the sugar/starch.

Spray a large chef’s knife with cooking spray and cut the block into squares of whatever size you like. Dredge the cut sides of the marshmallows in the remaining sugar/starch. The marshmallows can be stored up to a week in an airtight container. You may have to re-dip them in sugar/starch if they get sticky.


Friday, March 21, 2014

Here Fishy, Fishy!
What’s cooking? A Meal in Minutes: Best Broiled Fish and Roasted Fingerlings


Happy Spring!!

I don’t know about you, but Daylight Savings Time throws me completely off my internal “time to cook” clock. It’s light so late, and Austin is in the far western part of the Central Time Zone, so at 6pm, I feel like it might be time for a mid-afternoon nap. Or maybe a walk. For sure, it doesn’t feel like time to cook dinner.

On the other hand, my husband looks at the clock, and when it says 7pm, he thinks it’s time to eat. Not time to start cooking – time to eat. And because he’s generally a patient sort when it comes to my kitchen quirks, we often solve the time dilemma with something like pizza.

So we’re at that time of year – Spring Forward! – when pizza shows up really more than it should. As much as I like the many variations on toppings that can make tonight’s dinner seem completely different from last night’s, we do reach a point when I yearn for a normal meal.

Thankfully, the Kitchen Goddess has come to the rescue with a truly wonderful meal that can – literally – be accomplished from start to finish in less than an hour. And it’s Lent-friendly. (This will be #2 of my fish-Friday preparations.) The other wonderful thing about this combo is that fish and potatoes just really go together. I don’t know why, they just do. Of course, you have to start with the ingredients being already in your house. If you have to go to the grocery store at 7pm, I can’t help you.

Let me say from the get-go that I know there’s a fair amount of fat here – at least a tablespoon per person. The Kitchen Goddess loves real butter. She recently bought a couple of pounds of that Kerrygold Irish Butter – on sale at Costco over St. Paddy’s Day – which has an even higher fat content than US butters. But the rest of the meal is relatively low-calorie, and if you use butter (waaaay better than margarine) and olive oil (really good for you), you’ll just swoon at the taste this delivers. Moreover, most of the meal gets cooked in the oven, so less mess for the stovetop.

Kitchen Goddess note about fingerling potatoes: These little spuds aren’t always available, but when you see some, grab some. The skins are delicate, papery, and ultra thin – no need to peel. And the insides are creamier – also lower in starch – than any other potatoes you can find. For this recipe, I used a mix of white, deep purple, and red fingerlings, just for the color; the tastes are the same. If you can’t find fingerling potatoes, use the smallest baby red-skinned or white-skinned potatoes you can find, and cut them into pieces no bigger than your thumb.


The fish technique here is adapted from marvelous Mark Bittman’s book and app, How to Cook Everything; the fingerling recipe is adapted from Tyler Florence, whose TV show, Tyler’s Ultimate, airs at 10am eastern time on the Food Network.

Meal in Minutes: Best Broiled Fish and Roasted Fingerlings

Serves 4.

For the potatoes:
1¼ pounds fingerling potatoes, rinsed and patted dry
, skins on
2 sprigs fresh rosemary
3 sprigs fresh sage
3 sprigs fresh thyme
6 large cloves garlic, skins on
3 tablespoons olive oil
salt and freshly ground pepper

For the fish:
1½ pounds white fish fillet (cod, flounder, grouper, tilapia, haddock, etc.)
2 tablespoons butter
1 tablespoon olive oil
paprika
salt and freshly ground pepper
optional garnishes: lemon wedges, parsley

Start by heating your oven to 500º. Look over your collection of fingerlings, and if any are markedly larger than the others, cut them in half. The goal is to have the potatoes all generally the same size, for roasting purposes.

Put the potatoes in a bowl, along with the olive oil and garlic, and toss to coat well. Strip the leaves from the herb stalks and toss with the potatoes and garlic. Pour all into a quarter sheet pan (any small baking pan with sides), and sprinkle with salt and pepper.

Put the potatoes and garlic into the oven, and immediately turn it down to 425º. Bake for 20-25 minutes, shaking the pan about halfway through.


While the potatoes are roasting, pat the fish dry with paper towels, and set aside. Put the butter and oil into a large, cast-iron skillet or other heavy skillet that can go into the oven.

Kitchen Goddess note: If you have a green vegetable, prepare it while the potatoes are roasting.   Because I wanted these sugar snap peas crunchy, I actually sautéed them while the fish was cooking.


When the potatoes are ready (easily pierced with a fork), remove them from the oven and cover the pan with foil. While the fish is cooking, squeeze the roasted garlic out of its skins and stir it around with the potatoes.

Turn the oven to broil and move the top rack to be about 4 inches from the heat. Put the skillet with the butter and oil in the oven on that top rack until the butter is completely melted and sizzling (2-3 minutes). Remove the skillet from the oven and place the fish in it. Using a spoon, drizzle some of the melted butter/oil on top of the fish, and sprinkle with paprika and salt/pepper.

Return the skillet with the fish to the oven and broil 2 minutes for thin fillets, 3-4 minutes for thick fillets. The fish should flake easily with a fork when it’s done. Garnish if you want with lemon wedges or parsley.


* * *

And that’s all, folks. Dinner complete in less than an hour. Maybe even less than 45 minutes if you’re good. Take note that the herbs, after baking in the oil with the garlic, taste simply amazing on their own.