Showing posts with label strawberries. Show all posts

Wednesday, June 21, 2017

One Car, Two Drivers, Three Days on the Road
What’s cooking? Strawberry Mess


Well, we made it. Once again, my hubby and I ventured out onto the interstate highways to cover 1,738 miles with only each other for company. And survived.

Just the packing process should be sufficient to cause a rift in our marriage. To wit:

Grumpy’s one small suitcase is packed and ready to go a full two days before our departure date, which turns out to be one day later than we originally planned, though everyone knows that first target was just for aiming at, not for actually hitting. He takes nothing more than what he’ll wear on the trip, plus a suit and its accoutrements for our nephew’s wedding the week after we arrive. That would be because his wardrobe for the summer consists almost entirely of golf shirts, slacks and shorts, of which he has a full supply in New Jersey.

My packing is more complicated, as the wardrobe overlap for spring in Texas and summer in NJ means I have shoes, blouses, and pants that require schlepping back and forth. So even with rigorously restricting myself, I need two suitcases and at least a dozen shirts on hangers.

In the non-clothing category, what he needs are a set of golf clubs and a couple of issues of Bridge World magazine. And his computer. I need the stack of recipes and articles I’ve collected over the past several months for managing my weekly haul from the farmers’ market, books/magazines I’ve bought but not read, and a small file cabinet of papers I’d be able to tell you about if I could remember what’s on them. I just know I need them. And my computer. And a cooler full of the food that won’t fare well in the freezer and might be nice to have once we reach our destination.

Reading all this, you might think I would start days – maybe weeks – in advance. You would be wrong. It turns out that almost any sort of deadline sends the squirrel in the KG’s brain running faster and faster on that little wheel, remembering the long list of projects she must complete before she can possibly leave, like...

■ bake and decorate 6 dozen cookies to thank the medical staff in my son’s residency program for their friendship and guidance as he graduates;
■ invite friends for dinner, but they can’t come until the night before the first target date;
■ interview a guy for a magazine article (I volunteered for this, can you imagine?);
■ clean out the fridge.

You may now be thinking that my darling husband has the patience of Job. You would be right. And yet, the only item we managed to leave behind was...[drum roll] ... his suit. Define irony.


The best part of all this activity is that, while working on the menu for those friends who came to dinner, I noticed two large pints of strawberries in the fridge. Inspiration struck, as I remembered a delightful summer dessert I read about recently in The New York Times. Of course, that also meant staging and shooting photos, which was another delaying activity, but such a reward at the end. The Kitchen Goddess will have her way.


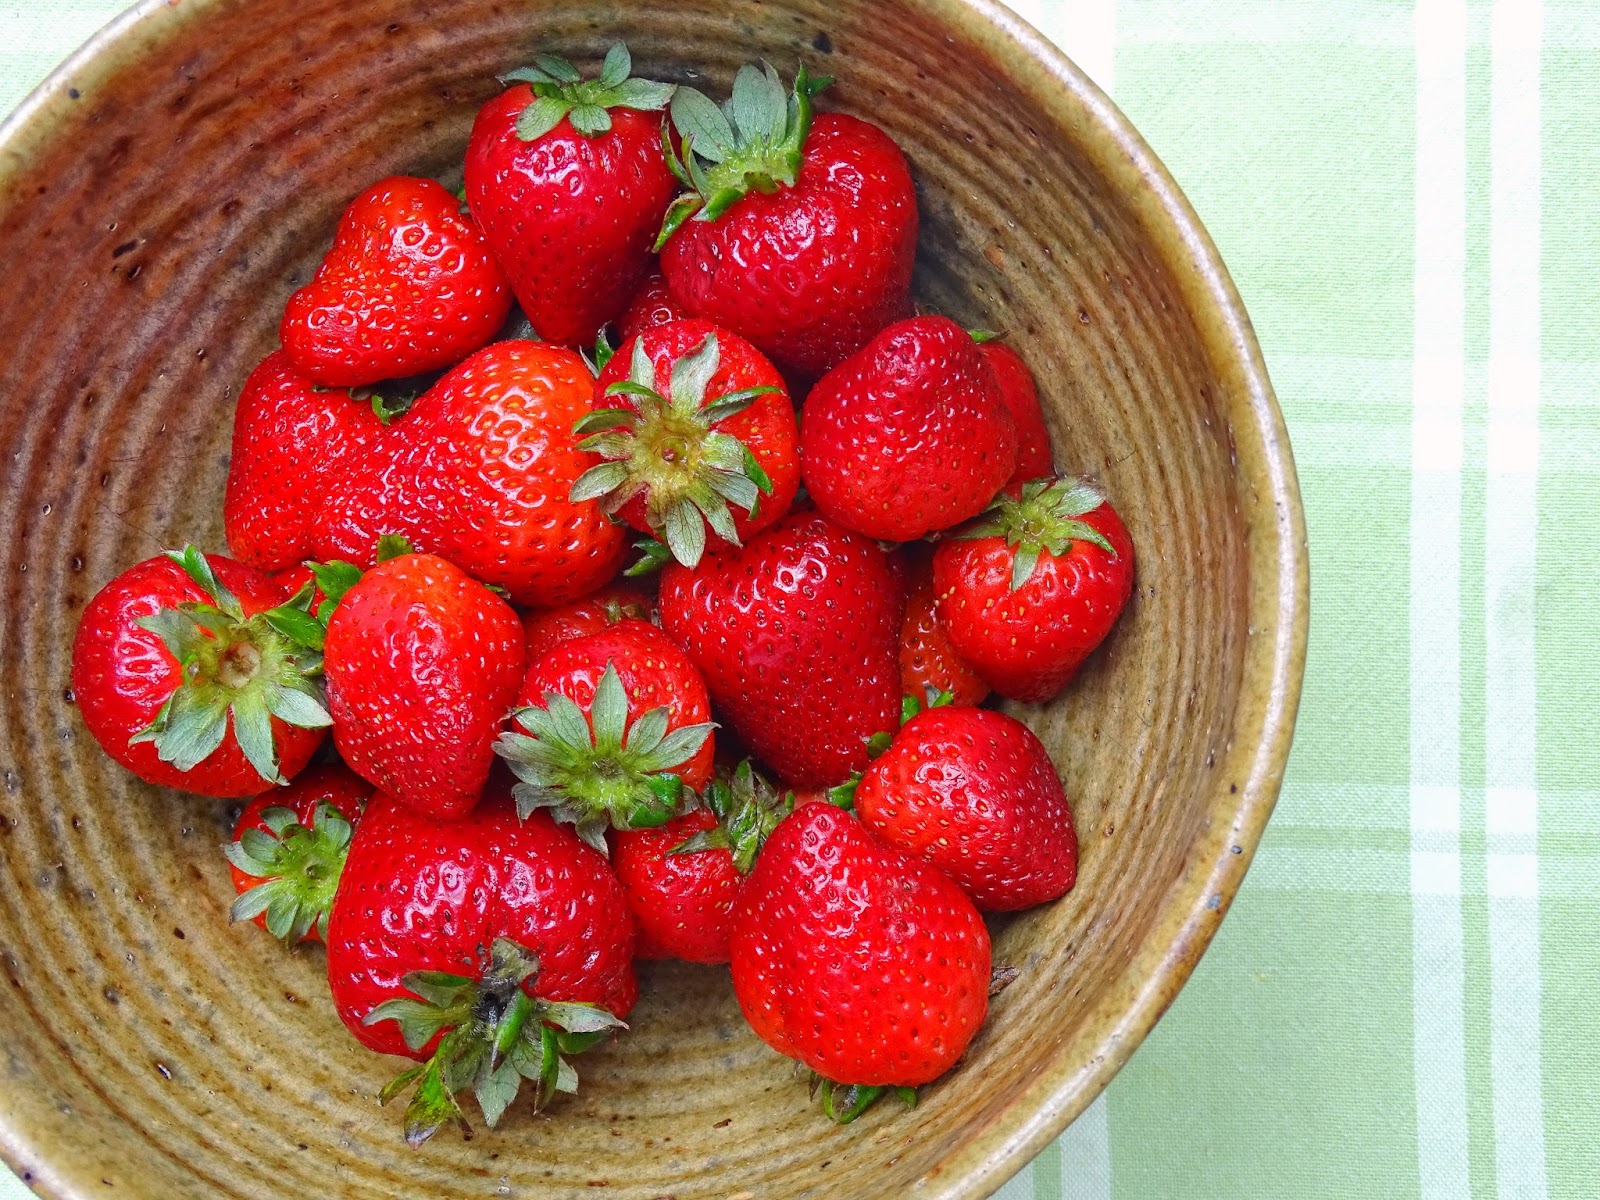
In the throes of the strawberry season – and we are there, folks – any cook worth his/her salt should be shot for not doing something with them, given how vastly superior the fresh fruit is over what shows up in stores over the rest of the year. Here’s what you can do: make an Eton Mess.

Eton mess is a traditional English dessert, a mixture of strawberries, broken meringue, and whipped heavy cream. According to Wikipedia, the first mention of it in print was in 1893. Legend has it that the folks at Eton College started by serving it at the annual cricket match against Harrow School.

The early versions were made with either strawberries or bananas mixed with ice cream or cream. Some genius added the meringue later. And while you can obviously make it with any type of summer fruit – or a combination, as you’ll find below, strawberries are the most traditional. The Kitchen Goddess used these red raspberry apriums, one of the new fruits to emerge from crossing an apricot and a plum, because she fell in love with them in her grocery store.


Kitchen Goddess note about Eton Mess: Do not stand on ceremony – it’s a small and wobbly perch, and will limit you from many wonderful experiences, especially in the world of food.

The essential elements of an Eton Mess are:
1. Pieces of broken meringue;
2. Fruit sauce;
3. Fruit cut up and sweetened;
4. Heavy cream.

The original version used shards of leftover meringue from previous nights’ dessert; you can buy pre-made meringues from any bake shop, or make your own, as the Kitchen Goddess did. But of course. Be aware that if you make your own, they work best when made the day before serving so they can dry out over night.

For the fruit sauce, the classic took more strawberries and mashed and macerated them in ginger liqueur. David Tanis in The NY Times cooked diced rhubarb with cinnamon and clove. The KG used red raspberry apriums, but other berries would work well, as would other fruits that go well with whipped cream. So think flexibly.


Kitchen Goddess’s Strawberry Mess


Inspired by David Tanis in The New York Times.

Serves 6-8.

Ingredients

FOR THE MERINGUES:
4 egg whites, at room temperature
¾ cup sugar
¼ teaspoon cream of tartar

Or... 6-8 store-bought meringue shells

FOR THE MESS:
½ pound red raspberry apricots (or other summer fruit), seeded and cut in ½-inch dice
¼ cup sugar, plus 1 tablespoon for the strawberries and 1 tablespoon for the cream
2 pints strawberries, hulled then halved or quartered
10-12 mint leaves, plus more for garnish
1 cup heavy cream
1 teaspoon rose water, optional (but well worth looking for it – try Trader Joe’s, Whole Foods, or middle eastern groceries) (or try 1 tablespoon ginger liqueur)
3 tablespoons chopped pistachios, for garnish


Directions

FOR THE MERINGUES:

Kitchen Goddess note: If you are making your meringues, don’t forget to start the day before you’ll serve the dessert.


Preheat the oven to 200º. Line a large (half sheet) rimmed pan with baker’s parchment.

In a large mixing bowl (glass, metal, or ceramic), whip the egg whites with the cream of tartar at medium speed until they get foamy. Begin gradually adding the sugar, a couple of tablespoons at a time as you increase the mixer speed to medium-high and continue beating until soft peaks form. When all the sugar has been added, increase the mixer speed to high and continue beating until the whites form stiff, glossy peaks when you lift the beater out.

Spoon eight large blobs (about 3 inches across) of the whites, evenly spaced, onto the parchment-lined pan. Using a knife or metal spatula, flatten the meringues a bit to help them cook evenly. Bake them for an hour in a 200º oven, then rotate the pan and reduce the heat to 150º or as low as you can (some ovens have a lower limit of 170º). Continue baking for another 1½ hours, until they are dry and crisp. Turn off the oven and leave the meringues in it with the door closed for as long as possible (overnight, if you can). Store the cooled meringues in an airtight container.

FOR THE SAUCE:


Put the fruit for the sauce into a non-reactive pan with the ¼ cup of sugar, over medium heat, stirring just until the sugar is dissolved. When the sugar is dissolved, raise the heat to medium-high and cook, stirring often, until the fruit reaches a boil. Reduce the heat and let the fruit simmer 10 minutes. You want it to be syrupy but not mushy. Remove from heat and let cool. Store in the fridge until ready to serve.

FOR THE FRUIT:


Put the cut fruit into a medium bowl. Stack the mint leaves and slice thinly. (This is called a chiffonade.) Toss the chiffonade with the tablespoon of sugar and add to the cut fruit. Let it sit, covered, at least 10 minutes.

FOR THE WHIPPED CREAM:


Chill the cream, the bowl, and the whisk well before beginning. Stir 1 tablespoon sugar and the teaspoon of rose water into the cream, and whip on medium-high speed until gentle peaks form. The whipped cream should still be soft and pillowy. Chill, covered, until ready to serve.

TO ASSEMBLE:


Into a large bowl, break or cut the meringues into 1-inch pieces. Combine the cut fruit and the fruit sauce and pour over the meringue pieces. Use a rubber spatula to gently fold the whipped cream into the mix and combine all elements.

Spoon the mess into individual serving dishes and sprinkle chopped pistachios over the top. Garnish with a mint leaf, if you want.


Saturday, May 7, 2016

A Treat for Mom Any Day
What’s cooking? Pâté Maison and Strawberry Pâte de Fruit


Pétanque. It’s French. Rhymes with kebonk. The Kitchen Goddess was recently invited for an evening of pétanque. I know, I hadn’t ever heard of it either. It’s a French lawn bowling game, much like the Italian bocce, in which the object is to toss or roll heavy balls at a smaller, target ball. All these games – in the larger category of boules – are played in open-air rectangular courts made of flattened earth, gravel, or crushed stone, surrounded by wooden or stone borders.

Our friends have built a pétanque court in their backyard, and they invited a small group for a “friendly” tournament. I put that word in quotes, because it turns out that guys can get charged up over a game of tiddly-winks. We all know women are much more reasonable.


In any case, it was a fun idea, made even more so by the hostess’s choice of a country French theme to the food. Guests brought cheeses, fruits, various dry sausages, and liver pâté; the hostess provided a bakery’s worth of baguettes, a gigantic salad, more cheese, and dessert. And of course, everyone brought wine. A great way to spend an evening with or without the pétanque.

The Kitchen Goddess was asked to bring a chicken liver pâté. As luck would have it, she has a great one in her repertoire, a tried and true recipe adapted from the original Silver Palate Cookbook (which, thankfully, is still available). Even if you don’t like chicken liver, or think you couldn’t possibly eat a dish made from chicken liver, you should consider this one. The KG tried it the first time because the book’s authors claim to have sold some two tons of it in their shop, and that sounded like endorsement enough.

Creamy, smooth, and slightly nutty tasting from the blend of spices, with so much butter that it’s almost more butter than chicken liver. And, of course, that makes it irresistible. There’s also a hint of sweetness from both the Calvados and the currants. I have friends who can’t believe how good it is, and it disappears completely every time I serve it at a party. The recipe makes two small pots of the stuff, and the good news is that you can freeze it for the next time the boss or your mother-in-law or anyone else you’d like to impress will be dropping by for cocktails.

But the Kitchen Goddess has never been known to leave well enough alone, so she wandered onto the interweb to see what other kinds of pâté might be available. There she discovered a darling dessert that is also a pâté, known as pâte de fruits. [Translation note: pâté – pronounced “pa-TAY” is a meat dish; pâte – pronounced “pot” – is a fruit paste. Or so I’m told.] The bigger challenge: purse your lips together, and try to pronounce f-r-wee – the sound you must make to say “fruits” in French. It’s spelled the same way as in English, but in French, you need to let your upper lip curl up in that truly Gallic fashion.


Pâte de fruits is an elegant and gorgeously simple type of confection – a French favorite for hundreds of years. Tiny cubes of pure fruit gelée dusted with sugar, they’re pretty and light and a great dessert bauble. Also très easy to make. Put out a plate of them with coffee or champagne, and watch them disappear.

So what does all this have to do with Mother’s Day, you might ask? What nicer way to celebrate than with a tray of goodies and a glass of wine? Happy Mother’s Day!!

Kitchen Goddess timing note: The pâté maison takes less than an hour, but needs to set for at least 4 hours. The pâte de fruit will take about 2 hours. It sets up very quickly, but you’ll want to wait a few hours until it’s completely cooled before cutting it into cubes and rolling it in sugar.


Pâté Maison

Adapted from The Silver Palate Cookbook (1982), by Julee Rosso and Sheila Lukins.

Makes about 3 cups pâté.

Ingredients
2 small celery ribs, including leaves, cut in 2-inch lengths
4 whole black peppercorns
1 teaspoon salt
1 pound chicken livers, drained, rinsed, and patted dry, and trimmed of stringy membrane bits
pinch of cayenne pepper
½ pound unsalted butter
2 teaspoons dry mustard
½ teaspoon grated nutmeg (freshly grated is best)
¼ teaspoon ground cloves
¼ cup coarsely chopped onion (about 2 ounces or ½ small onion)
1 small garlic clove
¼ cup Calvados
½ cup dried currants
Optional garnishes: sage leaves, fresh raspberries

Preparation
Put 6 cups of cold water into a large saucepan over medium-high heat. Add the celery ribs and peppercorns, and bring the mixture to a boil. Reduce the heat to a simmer, and cook for 10 minutes.

Add the chicken livers to the pot and simmer gently for an additional 10 minutes.

Drain the livers and discard the celery ribs and the peppercorns.

Into the bowl of a food processor, place the livers and the rest of the ingredients, except for the currants. Process until very smooth, at least a minute.

Transfer the paste into a small mixing bowl, and stir in the currants. The KG then divides the mixture into two 1½-cup terrines, but you could also use a single 3-cup serving dish. Smooth the tops with a spatula, then cover the dishes with cellophane wrap and refrigerate at least 4 hours. (If you taste the pâté before it has had time to set, you won’t like it. It needs that time for the flavors to meld.)


When ready to serve, garnish (if you want) and allow the pâtés to stand at room temperature for at least 30 minutes. Serve with water crackers or fresh or toasted baguette slices.


Pâté de Fruits


Adapted from Elizabeth LaBau at About.com.

Makes 64 1-inch squares.


Ingredients
1 pound fresh strawberries (can use frozen if they have no sugar added), hulled
1 tablespoon fresh lemon juice
2 cups granulated sugar, divided
2½ tablespoons liquid pectin

Special equipment: candy thermometer, 8x8" baking pan (glass or metal)

Preparation
Spray your baking pan with non-stick cooking spray. (Ms. LaBau recommends first lining the pan with foil or parchment, but I sprayed a glass pan with PAM – no lining – and had no problem removing the finished gelée.)

Process the strawberries in a blender or food processor until very smooth.

Pour the strawberry purée into a large saucepan. Stir in the lemon juice and ½ cup of sugar. Stir well to combine. Set the pan over medium-high heat and attach your candy thermometer.

Kitchen Goddess note: The minutiae of these temperature instructions may seem anxiety-producing. Do not fret. The KG herself spent a few worried moments in adjusting the heat up and down, and the results were great. Just do the best you can. The KG found a similar recipe – for a pear-cranberry pâte de fruit at marthastewart.com, where the process was much more loosey-goosey; but I give you the directions I tried to follow.

Stirring the mixture constantly with a spatula to make sure it doesn’t stick to the bottom of the pan, bring it to a temperature of 140°. Add the remaining 1½ cups of sugar and the pectin, and stir to combine.

Lower the heat slightly and continue to cook, stirring constantly, until the temperature reaches 200°. Be patient – this part could take 30 minutes or more. Once it reaches 200°, adjust the heat to maintain that temperature for 2-3 minutes.

Return the heat to medium/medium high until the temperature of the mix reaches 225°, and let it cook at 225° – still stirring! – for another 2-3 minutes.

Immediately pour the liquid all at once into your prepared pan, using your spatula to scrape it all in. This stuff sets up quickly once the heat is off and if you pour it in stages, you’ll find that the second stage simply sits on top of the first.

Set the pan on a cooling rack for several hours, until the mixture has cooled completely. (If you have the time, you can leave it out on the counter overnight.)

Using a sharp knife, cut the pâte de fruit into 64 1-inch squares, and roll them in your choice of sugar: superfine, regular granulated, or large-crystal sanding sugar.

Pâte de fruit keeps best at room temperature. If you choose to keep it in the refrigerator, you may need to re-roll it in sugar before serving.

* * *


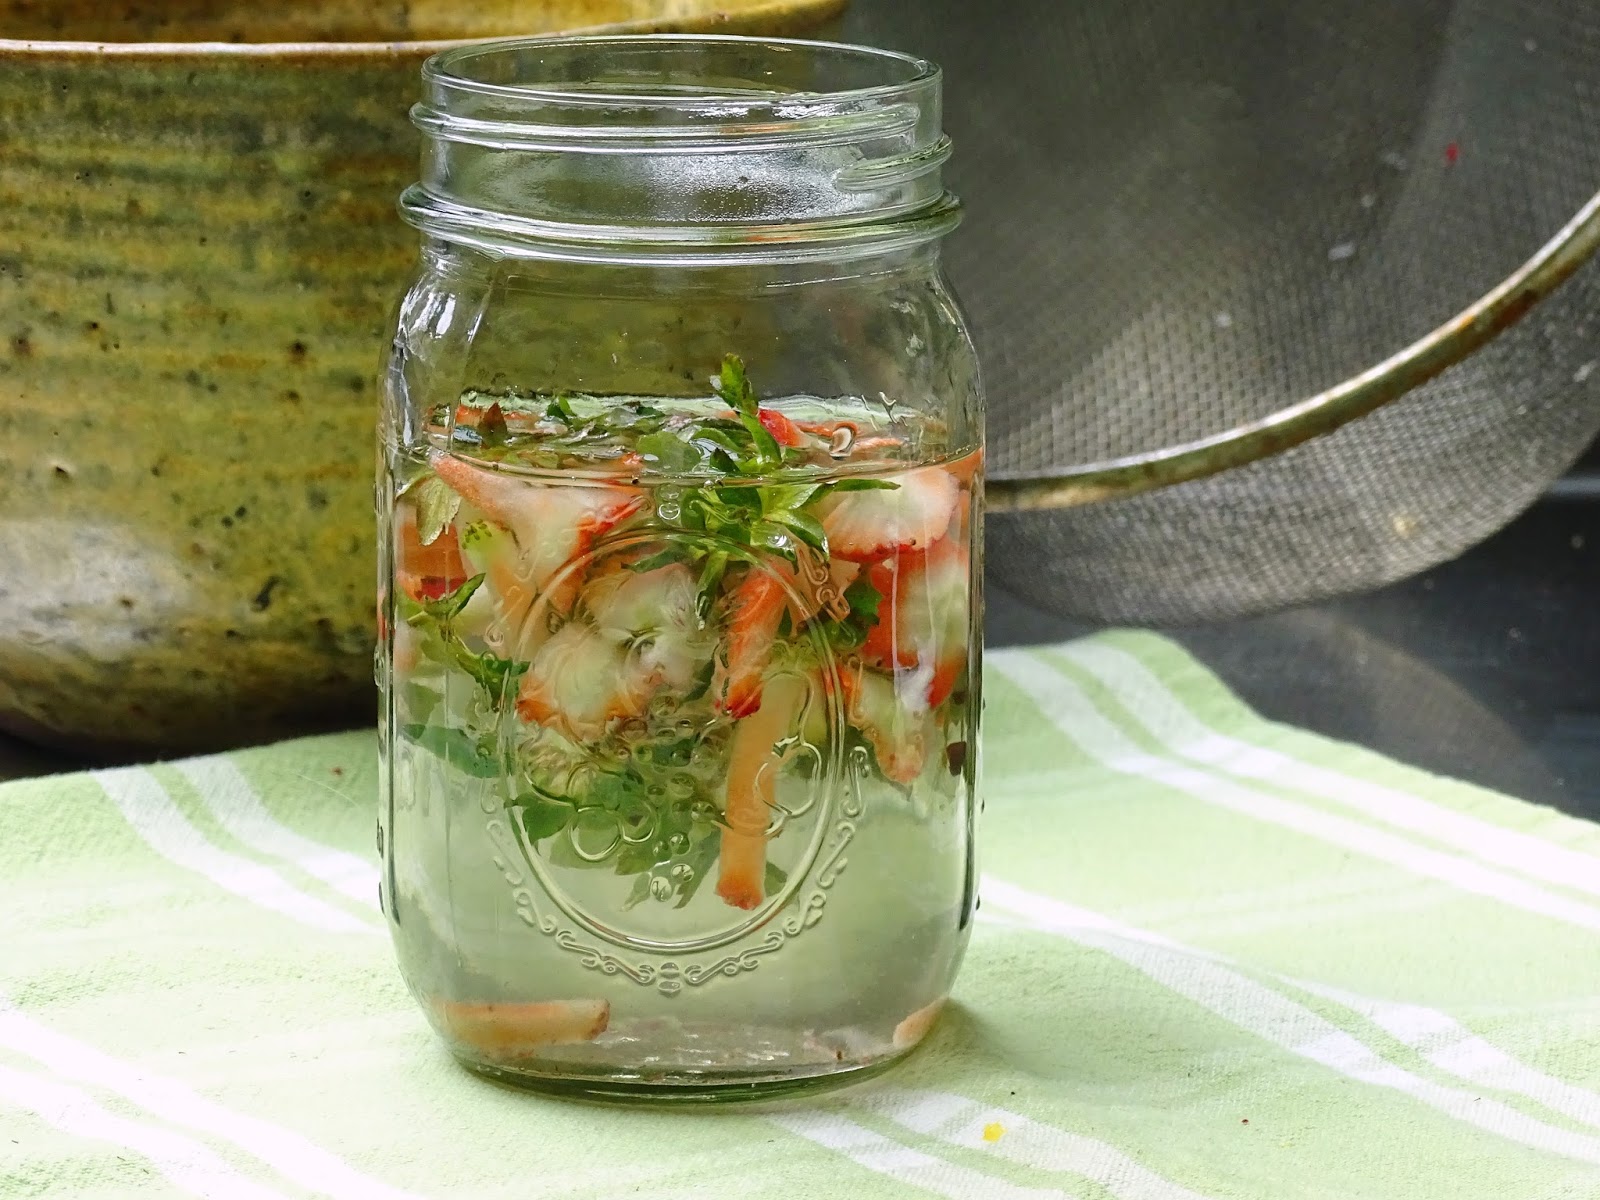
Kitchen Goddess note about strawberries: The KG has posted about the most fun and amazing way to quickly hull strawberries, here. But if, when you hull your strawberries, you simply throw away the hulls, you are missing out on a great treat: strawberry water.

To make it, add those hulls – leaves intact – into a mason jar of plain water. (You’ll need about a pound’s worth of strawberries to get the full flavor.) Refrigerate overnight, then drain out the hulls. You’ll be left with a truly wonderful, strawberry-flavored water – light and so refreshing, you’ll want to buy more strawberries just to make another batch.


Wednesday, September 9, 2015

For Your Post-Labor Day Celebrations
What’s cooking? Summer Fruit Rosé Sangria


The Kitchen Goddess has worked herself into what in the South we call a “tizzy” over this post. It was supposed to be short and easy – a simple sangria for the Labor Day celebration. And now of course, Labor Day is over, but do not tell me you can’t find a way to celebrate something. The weekend? The still-warm weather? The start of football season?

Back to the sangria, the KG found herself overwhelmed with choices. For starters, which wine? Red felt too hot. White? Well, the KG had already posted her favorite white sangria, which you’ll find here. That left rosé. Over the years, rosé has unfairly gotten a reputation for being a sweet wine, but there are literally hundreds of really nice, dry rosé wines, and many are very nicely priced for this purpose. So that’s what we’re going to use today.

A tiny tidbit of trivia: According to Wikipedia, rosé may actually be the oldest type of wine. Evidence of winemaking goes back as far as 8000 years ago, in ancient Georgia (the country, not the state, though my friends in the state may claim to have been drinking that long). As I understand it, the earliest methods left the skins in contact with the juice for up to 3 days. And that, my friends, is how you make rosé.

So you have the wine, and now you have to add something. Again, too many choices. Your basic sangria contains wine, fruit, and some type of liqueur (most often Triple Sec or Cointreau). Beyond those, I found any number of other liquids in what the authors called “sangria”: rum, gin, port, brandy, various fruit juices, and simple syrup. Some also threw in cinnamon sticks, mint, or citrus rinds to enhance the flavor. Finally, some recipes added sparkling water at the end. The mind reeled...

I did find an interesting recipe – which I’ll share here – but once I made it, my hubby pronounced it “too alcoholic.” Hrmph. Probably because of the gin. I’ve tasted it today – after giving it a night in the fridge – and it’s really quite good; but there is the gin. Even after adding a bit of sparkling water, the Kitchen Goddess noticed a kick. So if you think you’d prefer a version that won’t have your friends falling asleep on your couch, I’ve come up with another, simpler concoction with more fruit and no gin.

First, the recipe with gin. I’ve already modified it because it called for Campari, which I don’t like. And the mixologist serves it with fruit juice ice cubes, which I found to be a little too precious – also too much work.

Kitchen Goddess note: Both of these recipes call for simple syrup. In fact, many cocktails and most sangrias call for simple syrup. It’s so simple, you should just keep some in your fridge. It’s also useful for sweetening iced tea or lemonade – no need for extended stirring to get the sugar to dissolve. To make simple syrup, combine equal parts sugar with cold water (measuring by volume, which is reasonably accurate, you want ½ cup sugar to ½ cup water, or 1 cup sugar to 1 cup water, etc.) in a small saucepan. Set over medium-high heat and stir just until the sugar dissolves. When the mixture reaches a simmer, turn off the heat and set the pan aside. Pour the mixture into a sterile jar and it will keep in the fridge for at least a month. (Remember, sugar is used as a preservative, so if your jar is clean, it should keep indefinitely.)


Rosé Sangria


Adapted from Troy Sidle, a bartender and bar designer based in New York City, as seen on the food site, TastingTable.com.

Serves 6.

½ cup gin
3 tablespoons St. Germain liqueur (or Campari, if you prefer)
8 slices of peel from a grapefruit, 1 inch wide and 2-3 inches long (use a vegetable peeler)
8 slices of peel from a lemon, same as above
½ cup raspberries
1½ cups strawberries, hulled – ½ cup quartered and 1 cup sliced into rounds
2 tablespoons simple syrup
1 bottle dry rosé wine (750 ml)
1 nectarine, thinly sliced
Sparkling water
Garnish: mint sprigs

In a small bowl, stir the raspberries, the quartered strawberries and the citrus peels into the gin and the St. Germain. Muddle (crush) the berries to add their juices into the other liquid. Refrigerate at least 2 hours or overnight.

Once the fruit-infused gin mixture has had time to mellow, strain out the berries and peels and add the remaining liquid to a large pitcher along with the 2 tablespoons of simple syrup and the wine. Cover with cellophane wrap and allow the ingredients to get to know each other overnight in the fridge. Stir in the sliced strawberries and the nectarine. Serve over ice with a splash of sparkling water.


Kitchen Goddess note: The above mixture is relatively high in alcoholic content, so you may want to suggest that your guests treat it as a cocktail instead of a wine punch, drinking sparingly. Alternatively, you can go with the following, which is fruity and refreshing, yet lower in alcohol.


Summer Fruit Rosé Sangria


Serves 6.

1 ripe peach, peeled and diced
1 teaspoon juice and 8 slices of peel (about 1 inch wide, 2-3 inches long) from 1 Meyer lemon
2 tablespoons St. Germain liqueur
2 tablespoons simple syrup
1 bottle dry rosé wine (750 ml)
1 sliced nectarine
½ cup sliced strawberries (hull removed)
Garnish: mint sprigs

In a small bowl, muddle together the peach, the lemon juice and the peel with the St. Germain liqueur, and set aside for 2-3 hours.

Separate the lemon peels and reserve, then strain the muddled peach from the liqueur. (There’s no further use for the peach, but I’m sure you can find something to do with it. It’s quite yummy.)  In a large pitcher, stir together the simple syrup, the wine, and the peach-infused liqueur. Add the peels to the wine mixture, along with the nectarine slices and the strawberries. Refrigerate 2-3 hours and serve over ice with mint garnish.


The Wines

I used two wines for these concoctions, one from Italy and one from France. The first was a rosato from Tuscany, Salcheto’s 2014 Obvius.


 The second was a 2014 Cœur Estérelle Côtes de Provence rosé. Both were dry and somewhat fruity; both cost less than $14.


And now the KG is off to enjoy the fruits – and spirits – of her labors. Happy Wednesday, all!

Sunday, June 28, 2015

8 Ideas for Happier Hosting in the Summertime
What’s cooking? Strawberry Shortcake


I know that today is not the first day of summer. The Kitchen Goddess does not live in a cave. But the first day of summer was also Father’s Day, and dads tend to get short shrift as it is. It didn’t seem fair. So maybe we can just now celebrate the onset of summer without this year tying it to a particular day.

Summer is such a great season for entertaining. Inside or outside, at the beach or in your backyard. It’s more casual than in the other seasons, and more flexible by adding the grill to our toolbox of available techniques.

And in the fun-loving spirit that is the hallmark of this blog, the Kitchen Goddess has pulled together a few suggestions that’ll she hopes will help your warm-weather entertaining be even more inspired than usual:

1. Keep appetizers light – use slices of cucumber or red bell pepper to serve dips and spreads instead of crackers or bread.


Note the finger bowl at top left.
2. When you’re serving finger food, add a small plate with a damp cloth (washcloth or napkin) at each setting, so guests aren’t wiping barbecue sauce on your good napkins.

3. Chill your salad plates before serving – it keeps the greens fresh longer.

4. Set the table with large (20”x30”), colorful dishtowels –  half the towel goes under the plate to serve as a placemat, the other half drapes into your lap as a napkin. Dishtowels are a lot less expensive than linen napkins, and they come in a wide range of bright colors for a festive table.


5. Consider cacti or other succulents to decorate your table instead of flowers. They won’t wilt in the heat, they’re relatively cheap, and some of them even have blossoms.

6. Haul out the Christmas lights – the tiny twinkly ones that come with batteries. Instead of candles in lanterns, fill a fishbowl-type container, or even a gallon-sized jar, with those little lights. The look is of a bunch of fireflies – a magical effect on your table. In the photo here, I layered in some Easter basket grass to further the illusion.

7. If you’re serving a punch or iced tea, use ice cubes made from the drink itself. Then as the cubes melt, they won’t dilute the drink.

8. When the weather is warm, even your red wine can do with a short stint in the fridge. Reds lose flavor when they’re too warm, and will fare much better after 20 minutes or so in the fridge before serving.

One of the best signs of summer is the appearance of strawberries at the farmers’ market. I know, you can get strawberries all year long at the supermarket, but really, folks – we all know those supermarket berries are nothing compared to the red lusciousness of the fresh, in-season fruit. And there’s hardly a better way to enjoy them than when they’re lightly macerated in a little sugar and lemon juice, then spooned over shortbread with whipped cream.


Now before we get started, the Kitchen Goddess wants to show you the most wonderful way to hull strawberries. In fact, it’s so much fun, you’ll want to keep at it long after you have enough strawberries. It’s a great way to get your children or grandchildren to help.

The equipment: a plastic straw.
Step 1: Mise en place.


Step 2: Insert the straw in the base of the strawberry.


Step 3: Keeping a firm but gentle hold on the berry, push the straw up through the center of the stem.


Step 4: Remove the hull from the straw and move on to the next strawberry. Now, wasn’t that fun?!


Today’s recipe for shortbread cakes is adapted from Martha Stewart, and it’s amazingly easy, as you can make the dough in your food processor, and there’s no rolling (!) involved. It’ll take less than an hour starting from the moment you take the lid off your canister of flour until you’re pulling those puppies out of the oven.

I’ve referred to this dish as Strawberry Shortcake, but of course, the same dish made with raspberries or blueberries or blackberries – or any combination thereof – is equally easy and delicious. The key is the shortbread, which is the best I’ve found.


Strawberry Shortcake


Adapted from Martha Stewart online (marthastewart.com).

Serves 6.

For the berries:
2 pints strawberries (or whatever berries you choose), hulled and sliced in half
1 teaspoon lemon juice and finely grated zest of 1 lemon (the zest is optional, but the KG likes it; if you prefer, you can mix some of the zest into the whipped cream)
¼ cup sugar

For the shortcake biscuits:
2 cups all-purpose flour
6 tablespoons sugar
1 tablespoon baking powder
½ teaspoon salt
6 tablespoons unsalted butter, cut into ½-inch dice and kept chilled
1 cup plus 1 tablespoon heavy cream, separated
1 egg (any size)

For the whipped cream:
1 cup heavy cream
1 teaspoon sugar
½ teaspoon vanilla extract

Prepare the berries:
In a large bowl and using a wooden spoon, stir the berries gently with the lemon and sugar. Cover and refrigerate for an hour before serving.

Make the shortbread biscuits:
[Special equipment note: you’ll need a biscuit cutter that’s 2-2½ inches across, or a glass about that size. If you use a glass, be sure the flour the edge.]

Preheat the oven to 350º.

In the bowl of a food processor, add the flour, sugar, baking powder, and salt. Pulse the processor 4-5 times to thoroughly mix the dry ingredients.

Add the butter and pulse 12-15 times, until the bits of butter are no larger than a small pea.

It's about ready when the dough starts forming a large clump.
Pour in 1 cup of the cream, and continue to pulse – in bursts of about 2 seconds each – until the dough begins to form a ball (10-12 pulses). Give it another few pulses, and turn the dough out onto a lightly floured piece of wax paper. It’ll be a bit sticky, but you can pat a little flour onto the outside to make it easier to manipulate.


Turns out my wine glass was just the right size.
NO ROLLING. Just pat the ball of dough into a rectangle that’s about ¾ of an inch thick – it should be large enough that you can cut out 6 biscuits. Place the raw biscuits onto a baking sheet lined with baker’s parchment. Then gather up the remaining dough, reform it into a slab ¾ inch thick, which should be large enough to cut another 2 biscuits. And if you’re compulsive like the Kitchen Goddess, you’ll take those remaining pieces of dough and cut one last biscuit. I even took what was left after that and rolled it into a few cigar-shaped tea biscuits.


Ready for the oven.

Whisk together the egg and the remaining 1 tablespoon of cream, and brush it on top of the biscuits to help give them a glossy, golden brown finish.


Bake 25 minutes (rotating the baking sheet at the halfway point), or until that glossy, golden brown finish develops.

Whip the cream:
Combine the cream, sugar, and vanilla in a bowl and whip at high speed until soft peaks form.


TO ASSEMBLE:
Slice the biscuits in half, placing a bottom half on each plate. Mound strawberries with juice on the bottoms, then add the tops and whipped cream. Drizzle juice on the whipped cream and scatter remaining berries around the plates.


Tuesday, June 17, 2014

Heaven Is a Place Where Strawberries Grow
What’s cooking? Frozen Strawberry Yogurt and Spiced Strawberry Preserves


When I was four years old, my family was uprooted from San Antonio and plopped down in Sacramento, California, courtesy of the Korean War. My dad had been a pilot in WWII, and I guess they were desperate for pilots in Korea, so off we went. I don’t remember much about that year – it was only one year, during which my brother was born – but I have a completely clear memory of the huge strawberry field that began at the edge of our back yard. I remember picking those strawberries – the bright red color, the dimpled surface, the unmistakable mix of sugar and grassiness in the scent, the watery sweetness of the flesh, and the crunch of the tiny seeds. Ever since then, I’ve had a deep-seated fondness for the fruit, especially when it’s ripe and fresh from the fields.

As an adult, I tried growing them in our yard when we lived in the New Jersey suburbs, and while they didn’t seem unhappy, our property wasn’t sunny enough for them to bear fruit. When my husband and I moved to Texas five years ago, I bought a couple of strawberry plants for my uber-sunny kitchen garden. Still no fruit. But I liked the look of the greenery, and I had hopes. And the plants were hardy enough to make it through the winter. Thus it developed that this year, by some miracle, a few berries showed up. I was thrilled as I waited for them to ripen, and even caught a couple on camera. But it seems that the squirrels were watching as closely as I, and the number of berries that made it into the kitchen could be counted on one hand. Very sad.


Then we headed north to New Jersey for the summer. As I wandered through my favorite farmers’ market last week, I caught a scent. Could it be? I quickened my pace, and, sure enough, one of the farmstands that specialize in fruit had a huge display of them. I bought four quarts. And this past Sunday, I bought four more. I’ve added them to my yogurt for breakfast, put them into salads, made frozen strawberry yogurt and strawberry jam, eaten them with a bit of cream and sugar, and nibbled on them plain. This week, I also spotted rhubarb, so now I’ll be making strawberry-rhubarb sorbet. Watch for that in a later post.


In the meantime, here are the two recipes I’ve made: a creamy, very-berry frozen yogurt with a color so clear and bright you want to slather it all over your body; and a balsamic-and-peppercorn laced version of strawberry preserves that’s so good with goat cheese it will have your guests sneaking back into your house to steal the leftovers. Neither of these recipes is labor-intensive, so you have time to kick back and enjoy the summer.


For the frozen yogurt recipe – and for any recipe I have that uses yogurt – I prefer Greek yogurt. For starters, it’s strained extensively, which removes more of the whey and makes the result thicker and creamier. Moreover, Greek yogurt has twice the protein, half the sugar, and half the salt of regular yogurt. Go Greek!


Frozen Strawberry Yogurt

Adapted from David Lebovitz’s The Perfect Scoop

Makes about 1 quart.

1 quart strawberries, hulled and sliced
⅔ cup sugar
2 teaspoons vodka or kirsch or other favorite liqueur (I used Domaine de Canton ginger liqueur)
1 teaspoon freshly squeezed lemon juice
1 cup plain non-fat Greek yogurt plus ¼ cup heavy cream, OR 1 cup plain whole-milk Greek yogurt (I don’t have many other uses for whole-milk yogurt, and it’s fairly high in fat, so I prefer to use non-fat yogurt and heavy cream)

In a large bowl, combine the strawberries, sugar, and vodka or liqueur. Let sit for an hour, stirring occasionally.

In a blender, purée the strawberry mix with the lemon juice, yogurt, and cream, until very smooth (about 1 minute). Chill for at least an hour, then process according to your ice cream machine instructions.

* * *

The preserves in this post are very similar in taste to the Spiced Strawberry Sorbet I blogged about a year ago. In fact, they use the exact same ingredients, just in slightly different proportions. So the flavor is that same peppery-sweetness that makes the tip of your tongue sizzle a bit. It’s delightful any time of day: with savory biscuits for breakfast, or spooned over fresh goat cheese on crostini or crackers as an hors d’oeuvre, or drizzled over vanilla ice cream for dessert. The recipe satisfies all my criteria for a great post on epicurious: as of this writing, it carries a 4-fork rating and was reviewed by 41 home chefs, 95% of whom would make it again.

And depending on how fast you can slice strawberries, you might even be able to make it in less than an hour.


Spiced Strawberry Preserves

Adapted from Gourmet, June 1997

Makes about 16 ounces (enough to fill two half-pint jars).


2 mounded cups strawberries, hulled and quartered
1¼ cups sugar
3 tablespoons balsamic vinegar
3 tablespoons water
1 teaspoon coarsely ground black pepper

In a medium-sized heavy saucepan, bring all ingredients to a boil, stirring. Reduce the heat slightly, so that the mixture remains in a low, rolling boil. If you are compulsive enough (which I am not), you may want to skim the foam, to produce slightly clearer preserves. Let the mixture boil, stirring occasionally, for 18-20 minutes, or until thickened and translucent. [Kitchen Goddess note: To test whether your preserves are set, start by putting a saucer in the freezer at the beginning of the cooking. When you think the jam might be ready, retrieve the saucer and dribble a small spoonful (about a quarter of a teaspoon) onto the center of the saucer. Let it sit for 30 seconds then tilt the plate to about a 15º angle. If the jam barely moves on the plate, it’s done. If it runs down the plate, let it boil a few more minutes.]

Remove the pan from the heat and spoon into jars. Allow to cool completely before storing in the fridge where they’ll keep for a month. Or process for preserving in jars.

Kitchen Goddess warning: Don’t overcook this stuff. Start with a large enough pan to give plenty of surface area, which will reduce the preserves faster. (I used a 3½-quart saucepan.) The second key is to bring it to what I’d call either a hard simmer or a low-rolling boil, and keep it there. If you follow these two tips, your jam should be ready in 18-20 minutes.

I overcooked mine the first time I made it. I’d read many reviews that suggested 20 minutes wasn’t nearly enough, so I boiled it for 30 minutes. What I got was this, which I had to literally pry out of the jars – before throwing it out – the next morning. Hilarious but frustrating, and a waste of good berries. Here endeth the lesson.