Showing posts with label potatoes. Show all posts

Thursday, November 21, 2019

On the Light Side – Marathon Day 2

What’s cooking? Crushed Potatoes with Spiced Oil


Here’s something I just realized: Not a single onion was sacrificed for these dishes. (That would be yesterday’s dish, today’s, and two more coming tomorrow.) I was trying to figure out what made this group of Thanksgiving recipes so easy, and that’s certainly one reason. No endless scratching at the papery outer skins to get to the insides, no “Whoops!” moments with the knife when you see blood seeping across the bulb, and – most important – no tears. The Kitchen Goddess loves cooked onions in a dish, but not the process by which they get there.

For today’s contribution, I must say that I haven’t made a potato dish this quickly... ever. Of course, they’re not mashed potatoes. But they’re pretty damned close, and with a very interesting texture. They’re called crushed potatoes, because you that’s just what you do – you crush them through the grid of a baking rack. Lay a potato on top of the rack, smack it good, and push it through those little squares. Wham, bam, and there they are. Add the spiced oil and you’re ready to eat. The texture is great and the spiced oil adds a mildly exotic flavor that works when you serve the dish warm or at room temp.

The original recipe, which I found in the most recent issue of Food & Wine Magazine, suggested that pushing the potatoes through a baking rack would also easily remove the skins. So, fool that I am, I believed them. I boiled my potatoes, cut them in half, and crushed the first half of the first potato down on my little rack. Take a look at this photo and see what I learned. Notice that the thin skin of the potato gets a death grip on the wires of the baking rack, and you can spend the next 5-10 minutes digging it out. Multiply that process against 6-8 potato halves, and you have what we used to call a screaming meemie in the kitchen.


So I peeled the rest of my potatoes, which wasn’t hard because after boiling, that skin comes off pretty easily. But the Kitchen Goddess said to herself, “Maybe there’s a better way.” And by gum, she was right. It turns out that any number of clever folks have discovered that if you take a sharp paring knife and make a shallow cut around the circumference of the raw potatoes before you boil them, the skin literally lifts off in two whole pieces when they’re done. That tip is too late for the Goddess this season ... unless she decides to make this dish again soon, which is not a bad idea. If you’re not sure what I mean about the technique, check out this video.


Once you’ve boiled your potatoes, you will want a couple of pieces of equipment for this preparation.

A baking rack/wire cooling grate. I call it a baking rack; but it’s listed on the website for my local restaurant supply store as a “wire cooling grate.” And it’s $1.99. Also available on amazon.com for $1.99, but amazon wants to charge $19.74 for shipping. So I’d recommend you look around for a restaurant supply store in your area. (On further inspection, I see that the rack sold by amazon is shipped from Ace Mart Restaurant Supply, which is the store I go to. Hahahaha!)


To grind the spices, the easiest way is with a spice/coffee grinder. If you don’t have one of those, use a mortar and pestle. If you don’t have one of those, try wrapping the seeds in a clean kitchen towel and taking a hammer to them. But a spice grinder (a.k.a., coffee grinder) is a nice piece of gear to have, and the best (according to America’s Test Kitchen) is the Krups Fast-Touch Coffee Mill ($13.88 on amazon.com). If you’re an amazon prime member, you can have it tomorrow!

So after all that preamble, here at last is the recipe. I want to say that the trio of toasted spices – caraway, coriander, and fennel – brings lovely, warm flavor notes to the potatoes, especially in combination with the olive oil. Caraway has a distinctly sweet but tangy flavor, often used with winter vegetables like carrots, potatoes, and cabbage. Coriander is sweetly aromatic with a hint of citrus, and found in many curries. And fennel has a sweet, grassy flavor, with notes of anise and licorice.


Crushed Potatoes with Spiced Olive Oil

Adapted from Justin Chapple in Food & Wine Magazine (November 2019)

Serves 8-10

Ingredients
5 pounds medium-sized red potatoes or Yukon Gold potatoes
3 tablespoons kosher salt, divided
2 teaspoons caraway seeds
2 teaspoons coriander seeds
2 teaspoons fennel seeds
¾ cup extra-virgin olive oil
1 teaspoon freshly ground black pepper

Kitchen Goddess note: For the photos on this post, I made a half recipe instead of the quantities listed here. I still had more than ample servings for 6 people.

Directions
Into a large pot, place the potatoes (after scoring the circumference for peeling, of course). Add water to cover by 1 inch, and bring to a boil over medium-high heat. Add 2 tablespoons of salt, and reduce the heat enough that the potatoes are only simmering. Simmer until tender, 25 to 30 minutes. (Test by piercing a potato with a fork or a skewer; if it slides in easily, the potatoes are done.)

While the potatoes are cooking, combine the caraway seeds, coriander seeds, and fennel seeds in a small skillet over medium heat. Stir almost constantly, until the spices are very fragrant, about 5 minutes. Transfer the seeds to a spice grinder or mortar, and process or crush until the seeds are slightly finer than a medium grind. Stir the crushed seeds into the olive oil in a medium bowl until well combined. Set aside.


Kitchen Goddess note: If you don’t have a spice/coffee grinder or a mortar and pestle, and you don’t feel like crushing the seeds in a kitchen towel with a hammer, you can always use the pre-ground versions of caraway, coriander, and fennel. The grind will be finer than recommended, so the look of the dish won’t be quite so rustic, but the taste should be close to the same, as long as your ground spices are fresh. To tell the freshness, take the lid off the jar and put it up to your nose; fresh spices should have a good strong smell.

When the potatoes are done, drain them and cut them in half lengthwise. Lay your wire rack over a large bowl, and place a potato half, cut side down, on the rack, and press completely through to the bowl.


Fold the spiced olive oil gently into the potatoes, so as to preserve that lovely crushed consistency. Stir in the pepper and remaining tablespoon of salt. Serve warm or at room temperature.


Kitchen Goddess P.S. – 
What you can do ahead:
1. Cook the potatoes.
2. Crush the potatoes.
3. Mix the spiced oil.
4. Assemble the entire dish.

You can do step 1, or steps 1 & 2, or steps 1, 2, & 3, or all four. Reheat the potatoes to serve warm or at room temperature.


Friday, August 30, 2019

Tripping the Light Clam Chowder

What’s cooking? Rhode Island Clam Chowder


One of the few soups I associate with summer is clam chowder. That’s because the clams and other seafood I find at my favorite farmers’ market are so fresh and sweet tasting, the experience spoils me for the rest of the year. So I feast all summer on fresh clams and scallops, as well as the tuna, flounder, fluke, etc. I can get at that stand. Once I’m back in Texas, I focus on salmon, Gulf shrimp, and the other seafood from my local grocer. But I only buy clams and scallops from Jimmy.


The Kitchen Goddess loves a food expert, and Jim LaPrete, owner of Shore Catch, is the most knowledgeable guy I’ve met when it comes to seafood. He sells his fish fresh from the dock on Long Beach Island on the Jersey shore, and in his words, “The fish was swimming in the ocean two days before I get it to market.” Which means they stay fresh for way longer than whatever you get at a grocery store. (I can keep clams and scallops unfrozen – but in a cold part of the fridge – for a week, with no off effects.) He is ably assisted by Cindy, who is kind enough to store my order in the giant freezer so that I can go off to coffee without worrying about whether my fish will stay cold enough. A Kitchen Goddess’s BFF.

Clockwise from top left: swordfish, cod, squid, scallops.

Jimmy's clams and oysters. Yum!

Kitchen Goddess note about safety: My hubby occasionally worries about buying shellfish in the months without an “R.” That was the conventional wisdom in the days before rampant refrigeration and commercial fishing. Today, this warning applies only to oysters and shellfish you might harvest on your own. On modern commercial fishing boats, refrigeration is de rigeur; and commercial oyster farms employ scientific methods to control spawning, so that commercially sold oysters stay safe year-round.

In years past, the Kitchen Goddess has made all manner of seafood chowders. Tomatoey Beach Chowder made with canned chopped clams, chunky Salmon Chowder, and creamy Clam and Corn Chowder. This summer, she learned of a new variation, one that originated along the southern coast of Rhode Island, where it’s a local delicacy. What makes it different? No tomatoes, no cream. Just the clams, a few veggies, and a simple broth with some wine. As you know, the Goddess loves adding wine to a soup.

According to wikipedia, the term “chowder” has no clear etymology. One possible source is the French word chaudron, for “cauldron,” which was the type of cooking or heating vessel in which the first chowders were probably made. From the cauldrons of coastal France, the dish migrated to kitchens across the English Channel in Cornwall, and eventually to the U.S., where it has become ubiquitous in almost every coastal area east or west.

Writing about this version of chowder, Sam Sifton of The New York Times said, “Eating Rhode Island clam chowder recalls the feeling of pulling into Block Island after a long day at sea, tired and scented with salt spray.” The Kitchen Goddess has been to gorgeously rugged Block Island, and so can testify to the windy, salty atmosphere; but she’s not a boat person, so that “long day at sea” is not a familiar sensation. On the other hand, the KG will say that this light, clear-broth chowder seems like the truest version of the dish. It’s the seafood-lover’s clam chowder.


Rhode Island Clam Chowder

Adapted from Daniel Gritzer of Serious Eats (seriouseats.com)

Serves 4.

Ingredients

2 pounds live littleneck clams*
Kosher salt
1 tablespoon olive oil
3 thick-cut slices bacon, cut into 1/2-inch pieces (about 4 ounces)
1 medium yellow onion, finely chopped (about 1 cup)
2 medium carrots, finely chopped (about 1 cup)
2 stalks celery, finely chopped (about 1 cup)
2 medium cloves garlic, minced (about 2 teaspoons)
1 cup dry white wine
4 cups broth, to include one of these:
– 8 ounces bottled clam broth + 3 cups water + 2 teaspoons Knorr chicken bouillon powder, OR
– 8 ounces bottled clam broth + 3 cups good quality store-bought chicken stock, OR
– 4 cups water + 3 teaspoons Knorr chicken bouillon powder, OR
– 4 cups good quality store-bought chicken stock
2 medium sprigs fresh thyme (or 1 teaspoon dried thyme)
1 bay leaf
12 ounces small red potatoes, quartered, or medium-sized fingerling potatoes, quartered
2 tablespoons Italian parsley, choppped


*The Kitchen Goddess prefers littlenecks because they’re more tender, but it’s always acceptable to use cherrystone clams instead of littlenecks. Keep in mind that cherrystones are larger, so you need fewer, but they’ll take a bit more time to cook. You may want to roughly chop the cooked cherrystones before adding them to the finished soup. If you can’t get fresh clams in either size, try whole canned clams. Recommended brands include Bar Harbor, Cento, and Chicken of the Sea. Two cans should do it for this recipe. If you use canned clams, use bottled clam broth for at least half the broth.

Directions

Scrub the clams well under running water and place them in a large bowl with cold, salty water to cover for 20-30 minutes. After soaking the clams, lift them by hand out of the water – in order to avoid the sand which will likely have accumulated in the bottom of the bowl – and rinse. (See below for more elaborate instructions on buying/storing/preparing your clams.) Discard soaking water.


Add the olive oil to a large stew pot with the chopped bacon and cook the bacon over medium-high heat until crisp, about 3-4 minutes. Stir in the onion, carrot, celery, and garlic and cook, stirring, until softened but not browned, about 6 minutes.

Stir in the wine, and bring it to a simmer, cooking about 4 minutes, or until any alcohol smell has cooked off. Add the stock mixture, thyme sprigs, and bay leaf and bring to a simmer.

Gently ladle the clams into the simmering broth. Cover and return the broth to a simmer. Cook until the clams begin to open, about 5 minutes. Using tongs, transfer the clams to a large heatproof (glass, ceramic, or stainless) bowl once most of the clams have opened. (You can leave ones that haven’t opened in the broth a bit longer, to see if they’ll open, but do not use any that stay closed after 6-7 minutes. Cover the bowl while you finish the soup.


Add the potatoes to the broth and simmer until tender, about 10 minutes. If you want, you may use this time to remove the clam meat from the shells and discard the shells. (The Kitchen Goddess doesn’t do that part – she likes the look of the shells in the serving bowl as well as that Popeye the Sailor feel she gets from scraping the clams out of the shells with her teeth. She’s funny that way.)

Serve the soup in bowls, along with the clams with/without shells. Garnish with parsley.

The Kitchen Goddess’s Guide to Buying/Storing Fresh Clams

Buy from a reputable seller. Best is to find someone who can tell you where the clams came from and when they were harvested. (By law, they have to be labeled when shipped out of state.)

Buy them alive. They should be closed, but if any are open slightly, give the shell a light tap; if the clam is still alive, it will shut immediately.

Store clams in a bowl with a damp towel or washcloth draped over them – in the coldest part of your fridge. NO water, NO plastic wrap – they need to breathe. Good fresh clams can keep this way in the coldest part of your fridge for 2-3 days. (I was told by a reputable fishmonger that they can keep fresh clams alive on ice for up to 2 weeks, but I’m not willing to try that for myself.)

Handle them properly. When you’re ready to cook them, scrub the outer shells under running water with a brush or plastic mesh scrubbing pad to remove residual sand. Then soak the clams in well-salted cold water for about 30 minutes – certainly less than an hour. This salt-water soak will encourage the clams to expel any sand inside. Then when you’re ready to add them to the pot, lift them out of the bowl using your hands to keep from disturbing the water, so that the sand the clams have expelled will remain in the bottom of the bowl.

Finally, don’t eat any clams that don’t open in the cooking process. Even in a restaurant.

KG Post Script: The KG is always finding little tidbits she wants to pass on. This time, it was in the final proofreading stage, so here goes... According to LEAFtv.com, clams  farm-raised or wild caught  are one of the best choices of seafood. (1) Among the sources of sea protein, clams have one of the lowest-known mercury levels. (2) Clams can be raised without polluting or damaging the environment, so they’re an ocean-friendly choice. And because clams are filter-feeders, they improve the quality of the water where they are farmed without compromising their quality.


Tuesday, November 22, 2016

So-Easy Sides for a Thanksgiving Marathon: Day 4
What’s cooking? Cheesy Scalloped Potato Cups


The big day is almost here, and the Kitchen Goddess wants to once again take an opportunity to tell you how thankful she is that you stop by now and then. Writers need readers, just as cooks need eaters. But the reading part is much less obligatory, so I truly appreciate the time you spend here at Spoon & Ink.

And now, what you’ve all been waiting for: the carbs. Did you know that the first potatoes were found in southern Peru and northwestern Bolivia, some 7000-10,000 years ago? Me neither. Today, it’s the world’s fourth largest food crop, following maize, wheat, and rice. Ah, I love Wikipedia.

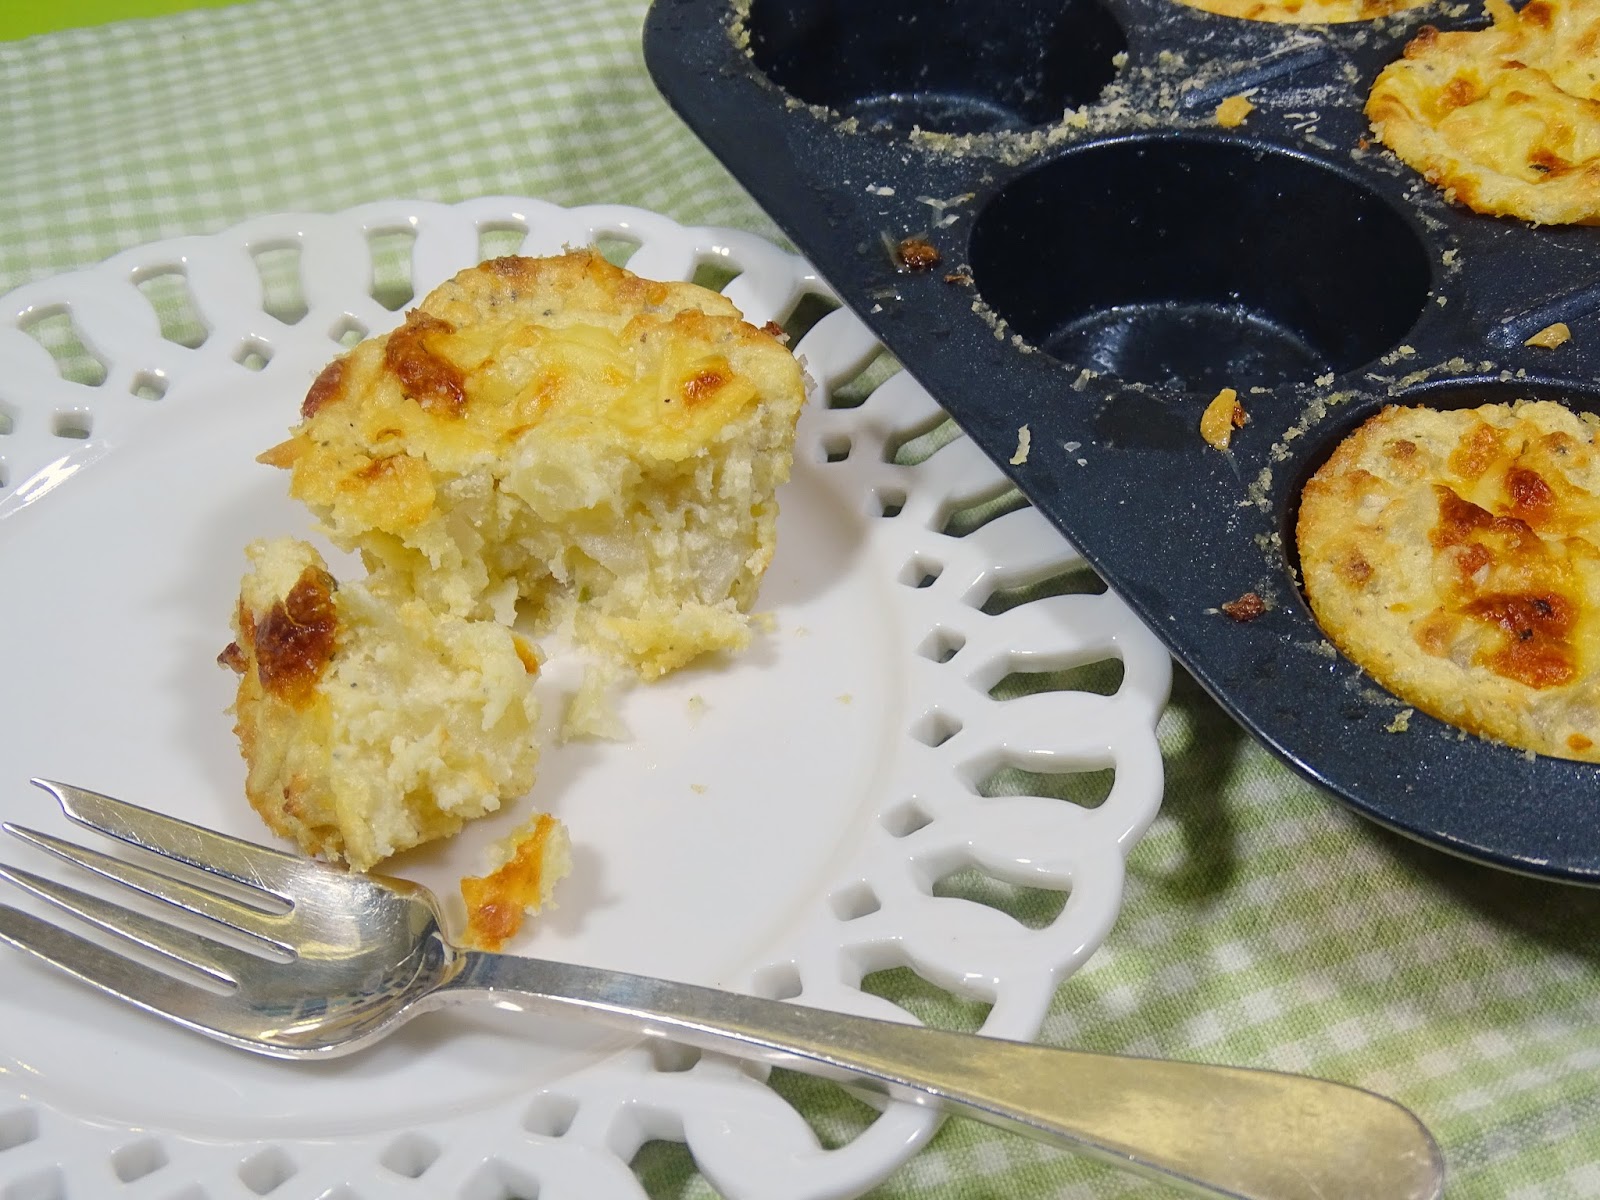
These potatoes, on the other hand, came not from South America but from Cook’s Country, an offshoot of America’s Test Kitchen. While I generally find their approach to cooking to be a bit tedious, I thought the idea of these individualized au gratin “cups” was very clever indeed. And not surprisingly, the taste is quite good. It’s hard to really screw up a potato-cheese combo, but there’s a lot to be said for getting one that doesn’t stick to the pan yet maintains that creaminess you can’t usually get without a big, goopy casserole and a whole lot of butter.

My potato cups didn’t get as brown and crispy as the Cook’s Country version, but perhaps with a thicker coating on the muffin tin, or perhaps more time in the oven... The Kitchen Goddess was  a bit pressed for time and needed to get this post finished. But she was gratified to notice that at least one other blogger who posted this recipe had even paler results.

The only other warning I will offer is that you find a casserole dish larger than the 1½-quart Pyrex dish I used for microwaving the potatoes with the half-and-half. I figured I just needed a dish that would hold the mixture. But it turns out that when you microwave cream continuously for a long time – 13-15 minutes – it boils furiously at some point and will make an unholy mess in your microwave when it boils over, even with a lid on the dish. The Kitchen Goddess felt vexed and humiliated. Grrrr...


Now, that unhappy part of the experience will not keep me from making these cups again. As I said, the taste is very good, and the convenience factor on serving them is outstanding. But next time, I’ll use a larger dish and stop the cooking every 3-4 minutes to stir the mixture down. It might take a bit more time in the microwave, but I won’t mind that. The Kitchen Goddess doesn’t like being vexed.

Kitchen Goddess notes: I know, most of this post seems like one long note, but this is about the choice of ingredients. So listen up.
(1) You want a potato that keeps its shape on the outside but cooks up dry and fluffy on the inside. Russets are ideal.
(2) Do not use pre-shredded cheese for this recipe. Or any other recipe, for that matter. Bagged cheese has additives – like potato starch, cellulose (wood pulp!) powder, and calcium sulfate – to keep it from clumping. The Kitchen Goddess cooks with pure cheese, and hopes you will do likewise.
(3) Grated Parmesan is a salty cheese-flavored substance that comes in cans, and also contains wood pulp. This recipe calls for grated Parmigiano-Reggiano, one of the world’s truly great cheeses. So buy some and grate it yourself. Or your grocer might grate it on site and sell it in plastic containers, and that’s ok, too.

So enough of the preachy stuff and on to the food. And have a glorious Thanksgiving!


Cheesy Scalloped Potato Cups

Adapted from Cook’s Country.

Serves 12.

Special equipment: non-stick muffin tin, and a microwaveable dish that holds at least 2 quarts

Ingredients
½ cup Panko bread crumbs
1 tablespoon unsalted butter, softened
2 pounds russet potatoes, peeled
1¼ cups half and half
1¼ teaspoon salt
¾ teaspoon freshly ground black pepper
5½ ounces (about 1⅓ cups) shredded sharp cheddar (Feel free to mix it up with this cheese – I used 4 ounces Welch cheddar and 1½ ounces Gloucester, and it was divine.)
1¼ ounces (about ⅔ cup) grated Parmigiano-Reggiano
2 teaspoons cornstarch
PAM, or other cooking oil spray

Directions
Preheat oven to 425º. Set a rack at the lowest position in the oven.

In the bowl of your food processor, pulse the Panko crumbs 4-5 times, to get a fine consistency.

Grease the muffin cups well with the butter, covering the sides and bottoms evenly. (A pastry brush works well.) Coat the cups with the ground Panko.


Slice the potatoes in half lengthwise. At this point, the Cook’s people would have you cut each half into thirds and then cut crosswise in ¼-inch slices, per the photo here. That’s all fine, but in my humble opinion, it is a bit precious. I think you could cut straight down in a grid, to get pieces that are still ¼-inch thick but closer to square shapes, which would be easier. It’s the ¼-inch thickness that’s important, for consistent doneness.


Combine the potatoes, half-and-half, salt, and pepper in a large, microwaveable bowl (covered), for 15 minutes, stopping every 3-4 minutes to gently stir the mixture and keep the cream from boiling over. If the potatoes are not tender after 15 minutes, run the mixture another 2-3 minutes.


While the potato-cream is cooking, stir together the cheeses and cornstarch in a bowl, and reserve ⅓ cup of the mix.

When the potatoes are tender, stir the cheeses into the potato-cream mixture until smooth. Spoon the mix into the muffin cups and top with the reserved ⅓ cup of cheese.


Cover the muffin tin with a sheet of aluminum foil that has been sprayed with cooking oil. Place the covered tin into the oven on the lowest rack, and bake at 425º for 10 minutes. Remove the foil and continue to bake for 13-15 minutes, or until golden brown.

Set the muffin tin on a rack and loosen the sides of the potato cups using a paring knife or icing spatula. Allow the cups to cool in the tin for 5 minutes. To remove the cups, place a rimmed baking sheet over the tin and invert the two. Tap the bottoms of the tin to release the cups. Let the cups cool 5 minutes on a wire rack before serving.


Monday, September 19, 2016

Getting Away from It All – The KG Goes to the Danube
What’s cooking? Styrian Potato Salad


Back when our children started going to summer camp, my prince and I decided to finally take a real vacation. The kind without kids. We’d talked about going to England, but whenever we started the planning part, we ran into trouble. Turns out neither of us has that vacation-planning gene. So I proposed what I thought sounded like a great solution.

“Let’s go without reservations,” I said. “We won’t have a plan – we’ll just get up every morning and decide where to go that day!” I thought it sounded exciting. Vacation with a spirit of adventure! A leap into the unknown! A gentle unknown, admittedly – we were only talking about The Cotswolds.

Nevertheless, my hubby the lawyer was horrified. Not know where we’re going?! Not know what we’d have to spend for lodging?! (“Yes, of course, we have a room, Mr. Hilton, but it’s a bit pricey at this late date,” he suggested.) Moreover, he’d spent his entire professional life helping clients eliminate risk, and the idea of running into the burning building seemed, well, insane.

In the end, we compromised. I promised to get reservations just outside of London for the first night, and more reservations at our destination in the Lake District. In between, we’d go the Daniel Boone route.

It turned out to be a great vacation. We saw places we’d never have planned on (“Look – if we turn right up ahead, there’s a 15th century manor house
we can go through”). And at every stop, the hotelier was happy to call ahead in the general direction we were pointed. But I think it’s the last vacation either of us “planned.” Ever since, we’ve relied on well-organized friends who decide where they want to go and what they want to do there, and we jump aboard. We are classic Type B vacation people.

Which is how we ended up on a cruise down the Danube in April. Friends who were already booked were telling us about their plans and I said, “I want a full report when you get back. That’s one of the places we’ve talked and talked about going.”

“Well, why don’t you just come with us,” she said. So we did.


What a trip. For starters, the cruise line, AmaWaterways, did a first-class job. Small boat, really comfortable accommodations, impeccable service, and terrific food. And really knowledgeable guides at each of the towns and cities we visited. We started with three days in Prague, the capital of the Czech Republic and the “City of 100 Spires” – a grand city of baroque architecture – then took a boat from Vilshofen (Germany) to Budapest over the next eight days. (This is only our second cruise, but I love that you only have to unpack once.)

Prague is one of Europe's most beautiful cities.

Heading down the Danube, I had a continuous feeling of being part of a Corot landscape.

Durnstein in the Wachau Valley features 16th century townhouses...
 
...and the blue facade of this church cloister tower is considered the most beautiful in Austria.

Tiny Cesky Krumlov looks like it hasn't changed a bit from its medieval origins.

Regensburg in Germany features 11th-12th century architecture.

Those castle walls in Cesky Krumlov (along the Czech-Austrian border) aren't stones;
 they're just painted to look that way. It’s a feast of trompe l’oeil (trick of the eye).

St. Stephan's cathedral in Passau houses one of the world's largest pipe organs, with 17,774 pipes.
 
Magnificent government buildings dot the downtown area of Vienna.

At night, Budapest's government buildings along the Danube are lit like Christmas trees.
Fortunately for all of us, this part of the world escaped the destruction of World War II. Most of the region is small towns many hundreds of years old, perched along the river’s banks, and even the larger cities – Vienna and Budapest – weren’t military targets. So the cathedrals and cobblestone streets are much as they’ve been for centuries.

In addition to the many grand structures, I love to focus on small architectural details, like doors and windows.


And then there’s the food. The Kitchen Goddess has developed a souvenir-buying philosophy designed to minimize the clutter at home: I buy whatever foods are produced locally that are allowed back in the U.S. (I learned my lesson when a customs agent confiscated the Amalfi lemon I’d carefully packed among my sweaters.) So on this trip, I bought chocolate-covered almonds in Prague (sorry – no photo – they’ve long ago been consumed by my friends and me); spicy mustard that’s the specialty of Regensburg, Germany; a bottle of wine from Austria’s Wachau Valley vineyards; and salted apricot kernels and apricot liqueur from the tiny town of Passau, in Germany. (Apparently, apricot trees thrive in the area, and are planted among the vineyards.)

A farmers' market in Prague. Imagine that!
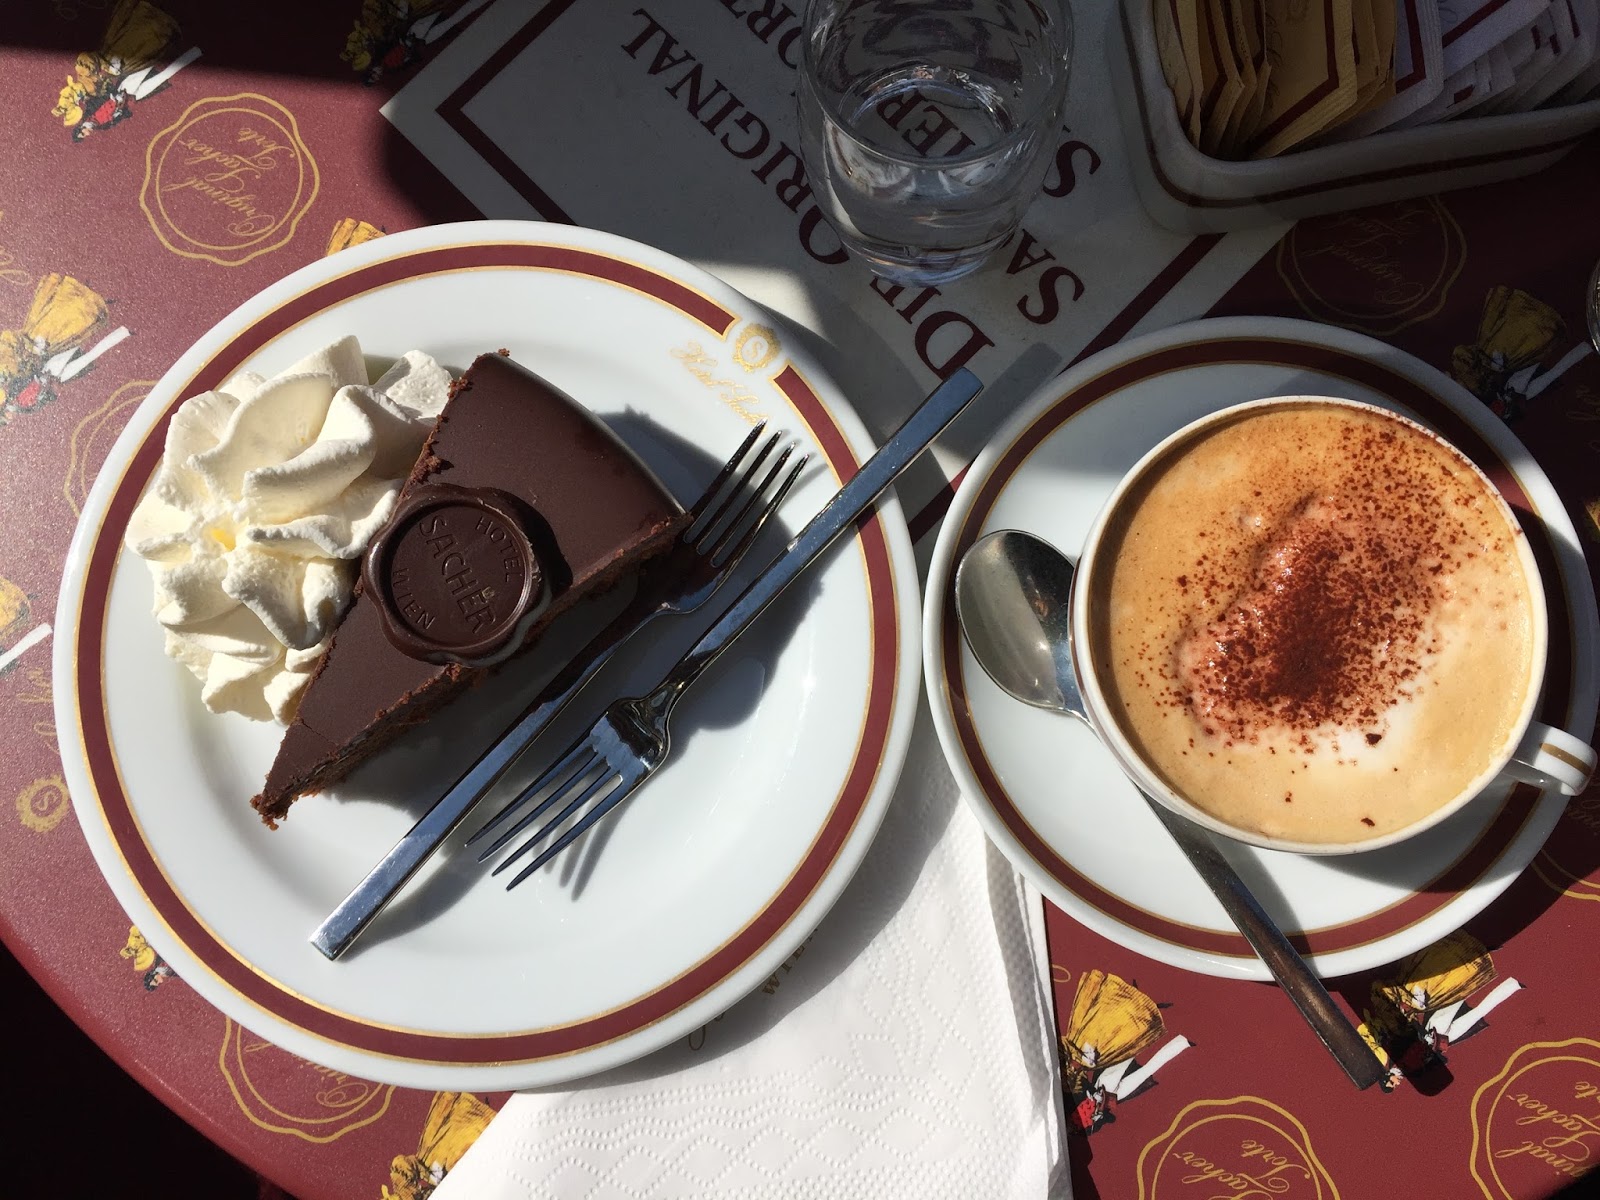
The Kitchen Goddess could not resist a stop at the Hotel Sacher, home of the original sachertorte.
As I said, the food aboard our boat was quite good. Using all her powers of persuasion, the Kitchen Goddess got our boat’s Executive Chef to share the recipe for one of her favorite items from the luncheon service. It’s ridiculously simple, relying for much of its flavor on the pumpkin seed oil. And because this dish doesn’t have any mayonnaise, it needn’t be refrigerated. So it’s a great addition to an end-of-summer grillfest. Also, the proportions are easy to adjust – what you see in my photos is a half recipe, since I was only feeding two people.

Please don’t be put off by the mention of pumpkin seed oil in this recipe. Styria is an area in Austria, and one of the region’s most famous food products is pumpkin seed oil. Luckily, you don’t have to go to Austria to get some, as many grocery stores with a good selection of cooking oils will carry it; and in a pinch, you can find it at amazon.com. In addition to its use in this recipe, it’s apparently good drizzled on butternut squash soup.


Kitchen Goddess note on Pumpkin Seed Oil: Because the color of the oil ranges from dark green to almost black, it’s called Styria’s “black gold.” To get the oil, the pumpkin seeds are dried, ground up and roasted, a process that creates a distinct walnut flavor. According to Wikipedia, it is also rich in polyunsaturated fatty acids. The color comes from the chlorophyll and carotene in the seed pods. Use it only as a flavoring  you don't want to cook with it, as heat destroys the essential fatty acids.


Styrian Potato Salad


Adapted from Executive Chef Daniel Tanase on AmaWaterways’ ship AmaBella.

Serves 6.

6 medium Yukon Gold potatoes (can substitute red-skinned potatoes or white potatoes)
1 small red onion, minced
¼ cup white wine vinegar or white Balsamic vinegar
¼ cup pumpkin seed oil
½ cup pumpkin seeds
Kosher salt and freshly ground pepper, to taste

Into a large, heavy saucepan, place the potatoes with water to cover by about an inch. Bring to a boil and cook about 30 minutes, or until the potatoes can be easily pierced with a sharp knife.

While the potatoes are cooking, mince the red onion and marinate it in a shallow bowl with the vinegar. Toast the pumpkin seeds in a small skillet over medium heat until they begin to brown, and set them aside.


When the potatoes are done, remove them from the water and allow them to cool until they can be handled. Remove the skins and cut the potatoes into a half-inch dice.

Toss the potatoes with the pumpkin seed oil. Add the marinated red onion and vinegar and mix well. Add salt and freshly ground pepper to taste, and sprinkle with the toasted pumpkin seeds.


Wednesday, August 15, 2012

Celebrating Julia Child
What’s cooking? Vichyssoise


Kitchen Goddess note to iPad fans: I’ve just purchased the Mastering the Art of French Cooking app, which I will review more extensively in another post. It’s only got 36 recipes, but each contains a complete clip – in color – of Julia herself cooking the recipe. So just for that, I give it 5 stars.