Monday, December 12, 2022

Ho, Ho, Ho! The Kitchen Goddess’s 2022 Gift Guide for Foodies

 What’s cooking? Are you kidding? Who has time to cook?


With Covid under some level of control and most people getting the vaccines, it seems like we’re all doing a bit more shopping this year. So your good friend, the Kitchen Goddess, has some ideas for that special foodie in your life – or at the least, the person who makes sure there’s a meal on the table every night. Naughty or nice, we all have to eat.

Kitchen Goddess note: As always, you should know that the KG has not received as much as a jingle bell for these recommendations. She is a wonder of ethical virtue.


Some Useful Things


The Kitchen Goddess loves champagne. But once you open a bottle, what do you do with the stuff that doesn’t get consumed that night? Admittedly, it doesn’t happen often that there’s champagne left over, but just in case... The solution? The Cilio Stainless Steel Champagne Sealer ($8.95 at Walmart, $13.95 at amazon.com). This attractive little gadget got a “highly recommended” status from none other than America’s Test Kitchen, which as you know has fairly demanding standards. ATK says, “This inexpensive sealer attaches with an easy one-handed motion and an affirming click. Wine saved with it was just as fresh as a newly opened bottle for two full days (a full week if left undisturbed) and still drinkable on day three.... Once on, it was almost flat against the top of the bottle and fit easily in the fridge.” The Kitchen Goddess bought two and loves them.


Sometimes the perfect tool isn’t expensive. The
La Tortilla Oven 10" Tortilla Warmer is priced under $10. Don’t ever pay more. This microwave pouch is the very best way – IMHO – to heat your tortillas; once heated, they can stay warm inside the little pouch until you’re ready for another. It’s on amazon.com in several designs for $7.96, or at the KG’s grocery store (H.E.B.) for $6.15.


Not long ago, a friend gave the Kitchen Goddess a pair of these darling Cuisinart Quilted Mini Oven Mitts. At 5½" x 7¼", they’re about half the size of standard oven mitts, so take up less space in whatever that place is where you keep your mitts. Yes, less protection, but also less bulk, and therefore a lot easier to manage when you are reaching into an oven. So maybe you don’t need as much protection. The ones from Cuisinart are $16.79 at amazon.com and come in a few different patterns; KitchenAid makes a similar product in lots of plain colors ($15.28 at amazon.com).


Some Things to Wear


The KG hates aprons. But how to keep the spills and spatters from ruining your good clothes? KG’s answer is not to wear those good clothes when you’re cooking. Try a chef’s coat instead. First off, the coolness factor is very high, so you feel like a chef, which is half the battle, in my less-than-humble opinion. Second, they’re incredibly comfortable. Third, they’re a twill blend, which, in addition to being soft is washable, bleachable, and doesn’t need ironing. And, finally, they’re cheap: $12-29 at webstaurant.com, and similarly priced at your local restaurant supply store, where you can try one on. In addition to white, they come in black, gray, red, and blue (though probably not bleachable in non-white.)


Comfortable footwear is essential in the kitchen. Which is a problem for the Kitchen Goddess, who is addicted to “cute shoes.” At last, Rothy’s has come to the rescue, with these cute, thick-soled (i.e., supportive) and comfy slip-ons: Rothy’s Slip-On Sneakers. Like the chef’s coat, what makes them so fab is that you can throw them in the washer! Rothy’s shoes are knit from OceanCycle certified plastic, meaning it was collected within 30 miles proximity to the coastline. So they don’t stain and they’re good for the environment. Lots of fun colors, too. ($119 at rothys.com)


Some Things to Read


The KG recently had friends over for dinner and served her somewhat famous fromage fort, a cheese spread she got from this book: Cheese Primer, by Steven Jenkins. Published in 1996, it’s still relevant, and remains the KG’s go-to source for cheesy info. My friends suggested I give them the book for Christmas. I suggested they get someone else to give it to them. Lucky for us all, it’s still available ($18.95 at amazon.com). So you can give it, too. Or get it as a special gift for yourself. It features excellent descriptions of the cheeses of the world, divided by region, with some of the more widely regarded brands. You’ll also find easy instructions on assembling various types of cheese boards with accompanying meats/fruits. And Jenkins’s writing isn’t overly jargon-y. All in all, a helpful and enjoyable read.


Periodically, the KG strolls around the interweb looking for recipes. One of the sites she frequents is Deb Perelman’s blog, “Smitten Kitchen.” Ms. Perelman is well-known among food bloggers and home chefs as a writer with a fresh approach and a quirky sense of humor. Which is why her blog is listed here on the sidebar under “Food Blogs I follow.” Now, she has published her third cookbook, which makes the KG pea green (spinach green? cantaloupe orange? radish red?...) with jealousy, but so it goes. According to the author, this book, Smitten Kitchen Keepers: New Classics for Your Forever Files, is “the book I was always meant to write... a place where I could collect all of the recipes worth repeating... my own forever files.” ($23.80 on amazon.com) KG has only flipped through the pages of her own copy, but already has found a couple of dishes that call to her.


Stanley Tucci is a man of many talents. In addition to his extensive acting career, he has ample credits – and awards – as a producer, director, and screenwriter, for stage, screen, and television. Last year, he published his first memoir, Taste: My Life Through Food, with food in a starring role. And while the writing smacks a bit of a parochial school assignment, the show biz anecdotes are fun and funny, and the story moves along well enough to be enjoyable. Call it a wintertime beach read, with a few recipes. The KG’s book group gave it a B+.


The Kitchen Goddess’s wish for the holidays and the year to come: Please remember to be kind to each other and to the many others that you encounter – workers you interact with and other people in general. It’s the season of peace and good will. Our country is in such a strange place of polarization and we are in very great need of thoughtful consideration, even to those we don’t agree with.

Happy holidays!!


Wednesday, November 30, 2022

Enough with the Leftovers!

What’s cooking? Sheet Pan Shrimp Scampi


So are you tired of Turkey Day leftovers yet? I’ve now had stuffing for lunch three days in a row, and turkey soup for the past two dinners. Thanksgiving is the gift that keeps on giving, even when you want it to stop.

How about something light? Anyone for shrimp? Fresh, wild-caught shrimp are a delicacy I don’t often get in the summer, mostly because we spend that time in New Jersey, where scallops are the fresher, more plentiful alternative. Not that you can’t get good, fresh-frozen shrimp at the better grocery stores there, but if you want truly fresh, wild-caught shrimp, your best bet is to be near the Gulf or the southern Atlantic coast.

As it happens, the Kitchen Goddess has a private source for shrimp. My brother, who lives in the tiny coastal town of Port Aransas, Texas, periodically heads down to the wharves when the shrimpers are coming in and bags a few pounds that he then ships overnight to me. I know, I know – I don’t deserve such largess. So I send him the occasional tin of my rollout cookies, and he seems to think it’s an acceptable trade: cookies for shrimp.

According to The New York Times, some large chains, like Wegman’s and some regional Whole Foods Markets, as well as upscale markets like Eataly and the Lobster Place in New York, also carry fresh shrimp, albeit at a premium price. But most wild shrimp is frozen and shipped around the country, where it shows up either in bags in supermarket freezers, or thawed and piled on ice. The quality varies widely, depending on how the shrimp was processed after catching. The best quality wild shrimp have been frozen without chemicals, either onshore soon after harvesting, or on plate freezers while still on the boat. You can find this shrimp at upscale supermarkets and fish shops; ask for chemical-free wild shrimp.

Good shrimp have such wonderful flavor that the simplest preparations are the best. The one here is so simple it seems like hardly any trouble at all. And the Kitchen Goddess loves any recipe that lets her avoid stove-top cooking in favor of a sheet pan.

The garlicky, lemony flavors are the same as in classic shrimp scampi, but cooking the whole thing on a sheet pan is even simpler than in a skillet, and roasting the lemon slices adds caramelization and a deep, concentrated lemon flavor that you don’t get as strongly with the skillet method. Surrounding the lemon slices with the wine produces a sauce you don’t even have to think about. And then there’s the butter... 

Need I say more? Serve it with crusty bread for dipping, or over pasta or rice to absorb the sauce. A bonus spritz of lemon juice and red pepper flakes or Aleppo pepper add a final flourish. And the whole process takes less than half an hour, so get that parsley chopped before you start. Your family and your guests will love you for the change of pace.


Sheet Pan Shrimp Scampi

Adapted from Melissa Clark in The New York Times.


Serves 2-3.


Ingredients

2 lemons (one for cooking, one for serving)
Extra-virgin olive oil
1 teaspoon fine sea salt, plus more as needed
1 cup dry white wine
3 tablespoons unsalted butter
1 pound peeled large or extra-large shrimp
2-3 garlic cloves, thinly sliced
¼ teaspoon Aleppo pepper or ⅛ teaspoon red pepper flakes
Freshly ground black pepper
¼-½ cup fresh parsley, chopped


Directions

Note: In some stoves, the broiler is separate from the oven; in others, the difference between broiling and baking/roasting is merely a setting. These directions attempt to accommodate that difference.

Preheat your oven to broil, with a rack set about 4 inches from the heating element. If your oven is separate from your broiler, also heat the oven to 450º.

Slice one of the lemons into ¼-inch thick slices. Remove the seeds. Arrange the lemon slices in a single layer on a rimmed baking sheet.


Brush the lemon slices generously with oil and sprinkle lightly with salt. Carefully pour the wine onto the baking sheet, without pouring it directly onto the lemon slices.

Broil the lemons and wine until the tops of the lemon slices are caramelized and charred in spots, and the wine has reduced by half. This can take anywhere from 6 to 12 minutes, depending on the intensity of your broiler, so watch carefully.

Once the lemons are caramelized and the wine is reduced, remove the pan from the heat. (If your broiler is in your oven, switch the setting from broiler to baking/roasting at 450º.)

Meanwhile, in a medium pot over medium heat, melt the butter. Off the heat, combine the raw shrimp, garlic, ¾ teaspoon salt, the Aleppo pepper (or red-pepper flakes) and black pepper, then toss with the butter to coat the shrimp well.


Transfer the shrimp mixture to the baking sheet, arranging the shrimp in an even layer on top of the lemon slices. Roast at 450º for 3-5 minutes, until the shrimp are cooked through. Remove the pan from the oven and toss the lemons and shrimp together; taste, and add more salt if needed. 

Move the shrimp, lemons and any pan juices to a serving platter and sprinkle with parsley and more Aleppo pepper (or red-pepper flakes).


Serve immediately, with thick, crusty bread or pasta or rice to soak up the juices. Serve wedges from the reserved lemon for squeezing.


Thursday, October 27, 2022

Throwback Thursday

What’s cooking? Sheet-Pan Skirt Steak with Broccoli and White Beans


It occurred to me the other day – as I was thinking about dinner – that I have been writing this blog for 13 years. Yes, just the 13 years. That’s a lot of recipes... almost 400, if you’re counting. But who’s counting?

In any case, while not every recipe has been a winner, many of them are really excellent, if I do say so myself. Quite a few that even the Kitchen Goddess has forgotten about. So I’m going to toss a few of those your way, on a somewhat regular basis, and hope that you will re-discover a winner. And if you haven’t been paying super-great attention for all this time, you might discover one for the first time.

Today’s “throwback” dish was posted Friday, December 9, 2016. I made it just the other night for my prince, and we were both struck at how tasty – and easy – it was. Then I mentioned the dish to a neighbor, and she liked the sound of it so much that she made it, too. And loved it. And her family loved it. So that was enough encouragement for me. And we both like that it was a single sheet-pan dinner.

Back when I posted this recipe, I had seriously overbought in the balsamic vinegar section of my grocery store. So I needed a way to use it. And the fact that this recipe uses a half cup of the stuff weighed heavily in its favor. That combination of sweet from the balsamic vinegar and pungent tang from the mustard act like magic with the flavor of the meat. Here’s what else I noted in the post:

■ The whole meal cooks in one pan. Get that? The whole meal. One pan. (Okay, you’ll also want a big bowl for tossing the broccoli and a small bowl or jar for the dressing/marinade, but let’s not quibble over numbers.)

■ The process – which included trimming and slicing the broccoli – took less than an hour. (Kitchen Goddess aside: The sweetness of those big, thick broccoli stems, when trimmed of the tough outer layer, will surprise you.)

■ The deliciousness factor is way high because the meat juices drip down to flavor the beans and broccoli as they cook. For maximum flavor, do yourself a favor – a flavor favor! – and get fresh oregano.

■ The concept is terrifically flexible: the meat can be hanger steak or skirt steak or flank steak, the veggies can be broccoli or broccolini or (according to reviews) brussels sprouts or asparagus. And the beans can be any canned white beans: Great Northern, navy, cannellini. (Just FYI, the Kitchen Goddess’s faves are the large white cannellini, but she has used navy beans and even black-eyed peas in a pinch. Don’t make another trip to the store just for the beans.)

The nitpickers  more astute observers among you will note that the headline says “skirt steak,” and yet the photos are all of hanger steak. You work with what you’ve got – or, rather, what your butcher has to offer. I make this point to prove that it doesn't really make any difference which of these cuts you find. Most recently, we had skirt steak, and loved every bite.  

Kitchen Goddess note on meat: The three beef cuts that are best for this type of cooking – skirt steak, hanger steak, and flank steak – are all what used to be known as “butcher’s steaks,” because butchers would often keep it for themselves rather than offer it for sale. Hanger and skirt steak come from the diaphragm, while flank steak comes from an area behind the diaphragm. They’re not pretty, and they’re not sliced from a larger part of the cow, so they are the shape and size they are. But they’re very flavorful. They need to be marinated, to tenderize them, then cooked quickly and at high heat. Before serving, you should slice them thinly and against the grain of the beef.

Skirt steak and hanger steak come from the diaphragm. Both are prized for their flavor, but both need marinating for a good hour. If you get skirt steak, ask your butcher to remove any traces of the tough membrane that surrounds it. Flank steak is leaner and not quite as flavorful, but responds well to marinating. Flank steak and skirt steak are popular as fajita meat; hanger steak is mostly used in French restaurants for steak frites. All three – hanger, skirt, and flank meat – should be cooked quickly and at high heat. 


Sheet-Pan Skirt Steak with Broccolini and White Beans

Adapted from Rhoda Boone in epicurious.com, August 2015


Serves 4.


Ingredients
4 large garlic cloves, divided
½ cup balsamic vinegar
3 tablespoons Dijon mustard
2 tablespoons chopped fresh oregano leaves, divided
1½ teaspoons kosher salt, divided
¾ teaspoon freshly ground black pepper, divided
½ cup plus 2 tablespoons extra-virgin olive oil, divided
1½ pounds skirt steak (or hanger steak or flank steak – see note above.If you use skirt steak, which is long and thin, cut it into two short pieces, for more even access to the heat)
1 pound broccoli or broccolini
1 can (15-ounce) white beans, drained and rinsed

Special equipment: An ovenproof wire rack that fits inside an 18x13-inch rimmed baking sheet


Directions
Make the vinaigrette marinade: Mince 2 of the garlic cloves and put them into a large jar or medium bowl. Add the vinegar, mustard, 1 tablespoon of the oregano, 1 teaspoon of the salt, and ½ teaspoon of the pepper, whisking to combine well. Slowly drizzle in ½ cup of the oil, whisking constantly to emulsify the mixture. Set aside ¼ cup of the vinaigrette for serving.

Place the steak into a half-gallon zip-lock bag and pour in the remaining vinaigrette. Seal the bag and massage to coat the meat with the vinaigrette. (Alternatively, you can place the meat in a shallow glass dish and pour the marinade over it. But that would mean dirtying another dish, wouldn’t it?) Let the meat marinate at least 30 minutes or up to 1 hour.


While the meat is marinating, use a vegetable peeler to remove the tough outer layer of the broccoli stems, and slice the broccoli lengthwise in pieces about ¼ inch thick. (If you have broccolini instead, slice only the thickest of the stems.)

Preheat the broiler and thinly slice the remaining 2 garlic cloves.


In a large bowl, toss the broccolini with the remaining 2 tablespoons of oil, 1 tablespoon of oregano, ½ teaspoon of salt, and ¼ teaspoon of pepper. Lay the broccoli out on a rimmed baking sheet, and broil it about 4 inches from the heat for 5 minutes, then remove the pan from the oven. Spoon the beans around the broccoli and scatter the sliced garlic on top. Set the wire rack on top of the beans and broccoli. Remove the steak from the marinade and allow excess to drip off. Place the steak on the rack and discard the marinade.

Broil the steak about 3 minutes per side for medium-rare. (If you use hanger steak, which is thicker, let it cook an extra minute per side.) Remove the pan from the oven and let the steak rest 5 minutes before slicing.

Hanger steak, which is thicker than skirt steak.

Meanwhile, divide the broccoli-bean mixture among four plates. Thinly slice the steak against the grain (i.e., perpendicular to the long thin strips of muscle) and serve with the reserved vinaigrette alongside.

If you are more organized than the Kitchen Goddess, you can make the vinaigrette up to 3 days ahead.

And a Happy Halloween to you all!


Monday, October 17, 2022

My Half-Full Glass of Lemonade

What’s cooking? Crunchy Baked Pesto Chicken Thighs


I’m supposed to be in Arizona today, enjoying the magnificence of the Grand Canyon with a couple of good friends. But an hour before the car that would take us to the airport arrived, we got a call from the husband in that couple, saying that his wife was having horrible back pain, and they wouldn't be able to go on the trip. That was Wednesday.


We took a few moments to assess the situation. We could go anyhow – plane and hotel reservations were still intact, our bags were packed, and we had no health issues. But the major point of the trip was to see this other couple – the Grand Canyon was just a vehicle for the get together – and we wouldn’t enjoy the experience nearly as well without them.

So we canceled, too. And then we worked on making lemonade out of these lemons.

It wasn’t as hard as you’d imagine. After all, the Grand Canyon will still be there when we get around to setting up another trip, and the airline cheerfully saved the tickets for another time. So we called off the car, unpacked our bags, and poured a glass of wine to help us think.

Then we realized: we had nothing to do for a week. NOTHING. No doctor or dentist appointments, no PT or chiropractic sessions, no meetings, no lunch/dinner dates, no hair appointments, no need for manicure/pedicure, ...Well, the list just goes on. When’s the last time you had that kind of freedom? After a while, we caved to the most immediate impulse and called friends to go to dinner; but by and large, we’re just “chillin’.” And it’s been a great week. I’m thinking we should schedule this sort of “vacation” more often. Just tell everyone we’ll be out of town, and hang out at home.

Plus, here I am with time for a post. Something for you and something for me!

I’ve been loving this recipe so much – soooo easy – that I’ve probably made it too often, but my prince hasn’t complained even once. It’s fast and flavorful and – except for the pesto – doesn’t use a lot of weird ingredients. Of course, the Kitchen Goddess doesn't think pesto is weird. She always has pesto on hand – she can’t seem to resist the urge to make it anytime she has enough herbs. (Check out this post on four kinds of pesto: It’s a Pesto Party!) These days, lots of grocery stores will sell pesto they make in-house. So find some pesto, make some pesto,... whatever. But definitely try this recipe.

Kitchen Goddess note on panko versus regular breadcrumbs: For starters, panko is not a weird ingredient. Au contraire, panko is a Japanese style of breadcrumb – available in most grocery stores – made from a crustless white bread that is processed into flakes and then dried. Because the consistency is drier and flakier than regular breadcrumbs, panko absorbs less oil than traditional breadcrumbs, producing a lighter, more delicate crunch. You can always use breadcrumbs instead, but you won’t get that delicate crunch.


Crunchy Baked Pesto Chicken Thighs

Adapted from RainbowJewels on allrecipes.com.


Servings: 4


Ingredients

2 pounds boneless, skinless chicken thighs
¼ cup prepared pesto
2 tablespoons olive oil plus 1½ teaspoons, divided
½ cup panko bread crumbs
½ cup Parmigiano-Reggiano cheese, finely grated
½ teaspoon salt
¼ teaspoon pepper

Optional garnish: 2-3 tablespoons chopped parsley

Directions

Preheat the oven to 450º. Line a baking sheet with parchment paper or use a Pyrex-type dish.

In a small bowl, thin the pesto with 2 tablespoons of olive oil and mix well. Using a Ziploc bag or glass dish, marinate the chicken thighs with the olive oil/pesto mix for 30-45 minutes. 


When ready to cook, combine the panko, Parmesan cheese, 1½ teaspoons olive oil, salt, and pepper in a bowl. Mix well and set aside. Move the chicken onto the prepared baking sheet and spread the pesto marinade on top. Sprinkle the panko/parmesan mixture on the chicken and lightly press it onto the chicken.


Bake in the preheated oven until chicken is no longer pink in the center and the juices run clear, about 20 minutes. An instant-read thermometer inserted into the center should read at least 165º F. (That 20 minutes is just a guideline. The thickness of chicken thighs these days varies wildly, so the Kitchen Goddess recommends either a thermometer or – what she does – slice into one of the thicker ones and see if the juices run clear.)


Garnish with chopped parsley, if desired. All else you need is a veggie or salad.


Saturday, September 10, 2022

On the Road Again...

 What’s cooking? Broken Phyllo Cake with Orange Spiced Syrup


Three college graduates – one a PhD – with long and successful careers behind them set out to drive to a friend’s house 35 miles away. I was one of them. (Not the PhD.) Because it’s mostly hill country driving, and because I’d actually looked it up on my phone, I knew it would be about 45-50 minutes.

I entered the address into the GPS on my phone, and off we went. I’d been to this woman’s house once, and thought we’d be heading down one of the back roads I knew, but I always trust WAZE to get me there without terrible traffic, so when we headed down I35, I thought, “Hmmm. Maybe an accident or construction on the other route.” We were moving in the right general direction, at least. Maybe this was just a different approach.

An hour later, we found ourselves in a dead end. I called our hostess, and she confirmed the address... sort of. “We live on Riverbend Road,” she said. “Not Riverbend Avenue.” This is perhaps a problem with lots of Texas roads – not enough original names.

“I’ve got it on my phone,” said the PhD. “Just head out this direction and turn left.”

“Don’t worry,” I said to the hostess. “We’ll be there soon.”

Well, “soon,” we had to call her back.

“What’s the address in your phone?” she asked the PhD. Turns out this time, we had the wrong town. (Lots of small towns in this area of Texas.)

Eventually, we got to our intended destination, but it had taken almost two hours.

So any time you are feeling cocky about how smart you are, stop for a minute and think about this story.

* * *


The reason our hostess wasn’t especially upset about our tardiness is that we were bringing the dessert. Of course. I was upset because we’d actually started out on time, and as a person who is “punctually challenged,” I find it especially irritating to be ambushed by circumstances out of my control. Yes, I know the Road/Avenue thing wasn’t technically out of my control, but still...

In any case, all was forgiven when they saw the dessert. This cake, known as portokalopita in Greece, where it originated, is a spongy marvel soaked in spiced orange syrup.


So, how many ways do I love this cake?

1. The texture. The “flour” comes only from phyllo pastry that has been cut into strips and baked to a crisp before being folded into the batter. The resulting structure looks much like a sponge and has a delightful chewyness.

2. The syrup. That structure doesn’t just look like a sponge, it also acts like one, soaking up the syrup which has been infused with cinnamon, cardamom and bay for added dimensions of flavor then poured over the cake right out of the oven. And although the flavor of the cake has a whiff of orange before the pourover, the syrup fills every nook and cranny with spiced orange goodness.

3. The crust. Before the pourover, you poke holes in the crust with a toothpick. So the syrup doesn’t sit on top of the cake but funnels right to the inside, leaving the top crust nice and crunchy.

4. The efficiency. You’ll find that this cake – which is baked in a regular 9-inch cake pan – is sweet enough and rich enough to satisfy 10-12 guests. So it’s a great cake to take to a party – easy to make, no icing to labor over, and it travels well. A thin slice, served with a dollop of whipped cream or whipped cream mixed with plain Greek yogurt, is the perfect end to a meal.

I imagine that – much like the origins of Italian burrata cheese and the French fromage fort – this is one of those dishes that came out of some thoughtful cook saying “I must be able to do something with all these leftover bits of phyllo...”


Broken Phyllo Cake with Orange and Bay Leaves

Adapted from Rose Hattabaugh for Christopher Kimball's Milk Street Magazine


Serves: 10-12

Kitchen Goddess note on the oranges: You’ll need two whole oranges for the recipe: one for the grated zest in the cake, and one for the zest strips in the syrup. And it’s easier to zest both before juicing them. (You’ll likely need both oranges to get ½ cup of juice.) Use a rasp to grate the orange for the cake, and a regular veggie peeler to get strips for the syrup. The key with the strips is to get as little of the white pith as you can.

Ingredients

For the cake:

8 ounces (227 grams) phyllo, thawed
1 cup (214 grams) white sugar
1 large orange 
1 cup (240 grams) whole-milk Greek yogurt (the KG has used both whole-milk and non-fat yogurt, with no discernible difference)
1 cup grapeseed oil or other neutral oil (canola, corn, peanut, sunflower, safflower, vegetable)
5 large eggs
1 tablespoon baking powder
¼ teaspoon kosher salt

Equipment: 1. a 9-inch cake pan whose sides are at least 2 inches high. (If the sides aren’t high enough, the syrup will overflow the pan.) 2. A half-sheet baking pan with a rim.

For the syrup:

1 cup (214 grams) white sugar
4 three-inch strips orange zest (or three 4-inch strips, or... you know)
½ cup orange juice
3-inch cinnamon stick (or ½ teaspoon ground cinnamon)
2 cardamom pods, lightly smashed (or ½ teaspoon ground cardamom)
3 whole bay leaves


Directions

For the cake: 

Heat the oven to 350°F with a rack in the middle position.


Roll the thawed phyllo lengthwise, then slice the roll crosswise in ½-inch wide strips.


Transfer the phyllo strips to the rimmed baking sheet, using your hands to unfurl and separate the strips. Distribute the strips in an even layer and bake until brittle and light golden brown, 15 to 18 minutes, gently flipping the phyllo about halfway through. (You’ll need a spatula and your hands to do the turning – just try to rotate the bottom pieces to the top. And don’t worry if pieces break as they’re turning.) Cool to room temperature on the baking sheet.

Phyllo strips before baking.

Phyllo strips after baking

While the phyllo is baking, mist the cake pan with cooking spray (or grease it with vegetable oil), line the bottom with a round of baker’s parchment, then mist/grease the parchment.

In the bowl of a stand mixer, place the sugar. Grate the orange over the sugar. (By grating the orange into the sugar, you get the maximum impact from the fragrant oils in the peel.) Using the paddle attachment to the mixer, beat the sugar and grated orange zest together at medium speed until fragrant, about 30 seconds. Reduce the mixing speed to low, and add the yogurt, oil, eggs (one at a time, making sure each is fully incorporated before adding the next), baking powder, and salt. Increase the speed to medium and beat  about a minute, until the batter is well combined. Use a spatula to scrape the bowl as needed.

Remove the bowl from the mixer. Add half of the cooled phyllo to the batter base and, using a spatula, fold until the phyllo is well coated with the batter and almost evenly moistened. Add the remaining phyllo and continue to fold until no dry patches of phyllo remain.


Pour the batter into the prepared pan and use your spatula to gently spread (without compressing) the batter in an even layer. Bake until deep golden brown and a toothpick inserted at the center of the cake comes out clean, 45 to 50 minutes.

While the cake bakes, make the syrup.

For the syrup:


In a small saucepan, combine the sugar, orange zest strips and juice, cinnamon, cardamom, bay leaves and ½ cup water. Bring the mixture to a simmer over medium-high, stirring to dissolve the sugar, then transfer to a 2-cup liquid measuring cup or small bowl. You should have 1½-1⅔ cups. Cool to room temperature. (The KG sets the cup/bowl into an ice bath and stirs the syrup occasionally, to make sure it’s cool enough by the time the cake is done.)


When the cake is almost done, strain the syrup, discarding the zest strips, cinnamon stick, cardamom pods, and bay leaves.

Set the cake – still in its pan – on a wire rack and, using a toothpick, immediately poke holes (30-40) down deeply into the cake every inch or so. Slowly pour half the syrup evenly onto the warm cake, then let it stand for about 5 minutes to let the syrup soak in. After 5 minutes, slowly pour on the remaining syrup. Not all of the syrup will soak in immediately, and the excess liquid may flood the pan. Do not fret. Let the cake cool to room temperature and until all (or most) of the syrup has been absorbed, at least 2 hours or even overnight.

To serve, run a thin knife around the inside edge of the pan to loosen the cake, then invert the cake onto a platter. Lift off the pan and peel off the parchment, then re-invert the cake onto a serving plate. This part is best done over a sink or large pan, so that any remaining syrup doesn’t drip where you don’t want it to.


Serve slices slightly chilled or at room temperature, with a dollop of whipped cream, or whipped cream mixed with plain Greek yogurt. Leftovers will keep well wrapped in the refrigerator for up to four days.


Sunday, May 29, 2022

A Culinary Salute to Our Armed Forces

 What’s cooking? Grilled Pork Tenderloin with Orange Marmalade Glaze


A terrible photo of my Dad but I love the determination and excitement in his face.

Memorial Day.

It was always a special day for my dad, who was a pilot in World War II and treasured his memories of the men and women who served with him but never made it home. He was a big crier, so we never really got many stories about his experiences in the service. He’d start a story, then tear up, and never get finished. Start again, tear up again, and ... you get the picture. He spent time in Marrakesh, flying reconnaissance missions, and back in the U.S., he taught Chinese pilots to improve their skills on U.S. aircraft. I have a wonderful letter from one of those pilots, saying how honored he and his fellow pilots were to be taught by my Dad. So I think of Memorial Day as a day to honor him, too.

My father also enjoyed grilling anything, so I think he’d love today’s pork tenderloin recipe I discovered. As in many aspects of his life, Dad lived large, so his enthusiasm for grilling usually produced meat with a bit of char. “A little charcoal is good for you,” he’d always claim. But I don’t recommend that approach with this recipe.


In fact, the best thing you can do with this recipe is to avoid cooking the pork too long. According to the National Pork Board, today’s pigs are bred to be much leaner than in the past, so that medium-rare is now a preferred doneness for tenderloins if you want to maximize juiciness and flavor. Those qualities come at an internal temperature of 145-150º. So you are well advised to use a good meat thermometer.

I found this recipe in a search for something simple to do with the pork tenderloins my prince brought home from Costco one day. As a little unsolicited plug for that store, I will say that their meat and fish tend to be exceptional without regard to the price. That’s because they do such volume that both meat and fish are very fresh. Of course, you have to be willing to buy more than you might otherwise, but it’s worth sticking some of it into the freezer.

So back to the recipe. You will not believe how flavorful is this sweet-salty marriage of marmalade and honey with the soy sauce. Very umami. And I don’t know of an easier sauce to make – no chopping or slicing or grinding, so it’s ready in 10-15 minutes. You likely have the major ingredients already: marmalade, honey, soy sauce. When I make it for my hubby, we practically fight over the leftovers. To be truthful, we don’t actually fight over the leftovers because I put them in a plastic container and don’t remind him about them. But if I told him about them, we’d have to have a serious discussion about sharing.

My friend, Gail, offered to make this pork dish for a ladies’ luncheon that I was hosting... Ok, so she didn’t offer. But when I asked, she was very gracious. (My friends are so kind that when I have what I call “a suggestion,” they just smile and say “fine.”) The instructions on the original recipe included a note to coat the meat with olive oil before grilling, but Gail forgot that part, recalling it in one of those “OMG!” moments only as she and her hubby were already grilling. Her husband suggested she not tell me. And when she mentioned it to another of the women coming to lunch, that woman also said, “Don’t tell Lee.” So, of course, she told me. This is the problem of being friends with the Kitchen Goddess.

But as it happens, the Kitchen Goddess had made this recipe and also forgot to oil the meat before grilling, and she decided it didn’t really matter, unless you’re really into keeping your grill clean. So I’ll leave that part of the instructions in the writing, but you have now been alerted.

Kitchen Goddess note: If you don’t have a grill, this pork can roast in the oven. The author suggests searing it on the stovetop in a frying pan, to develop a nice Maillard crust on all sides, then putting it in the oven for 15-20 minutes at 400º.  Let it rest about 10 minutes before slicing.


Grilled Pork Tenderloin with Orange Marmalade Glaze

Adapted from Elise Bauer at Simply Recipes 


Total time: 90 minutes, including the marinade time, and you can even cut that short.

Serves 2-3. (Who am I kidding? It serves 2, with enough left over for a small lunch.)

Ingredients

⅓ cup soy sauce (use gluten-free soy sauce for gluten-free version)
⅓ cup orange marmalade (or lemon, store-bought or homemade)*
⅓ cup honey
1 tablespoon plus 1 teaspoon rice wine vinegar 
Pinch of crushed red pepper flakes, or Aleppo pepper
1 pound pork tenderloin
2 scallions, thinly sliced (optional)
Olive oil for the grill (and you’ll remember that this is optional)


*Kitchen Goddess note: You know the Kitchen Goddess already had homemade marmalade. Two flavors, in fact. You are welcome to go buy a nice brand, but if you are so inclined, here are links to two of my faves: Triple Citrus Marmalade and Green Tomato & Lemon Marmalade. You don’t even have to go through the canning process unless you want to make a big batch to store. Make it, put it in jars, then refrigerate what you think you’ll use and give the rest to friends. Trust me, they’ll love you for it.


Directions

First, make the marinade. In a small saucepan, stir together the soy sauce, marmalade, honey, rice wine vinegar, and red pepper flakes. Bring the mixture to a simmer over medium heat. Remove the sauce from the heat and let it cool to almost room temperature. If you are in a hurry – which I always am – you can set the pan in an ice bath for a few minutes and stir until the sauce is just warm.

Set aside half of the marinade to use as a sauce with the finished tenderloin.

Use the remaining half of the marinade to marinate the tenderloin for 1 hour. (Comments on the website suggest that you can reduce the time – if you’re in a hurry – to as little as a half hour.)


Kitchen Goddess note: The Kitchen Goddess prefers the ziploc bag method of marinating: place the meat inside a large ziploc bag, pour the marinade over it, and close the bag, removing as much air as possible in the process. This methodology practically eliminates the mess factor (no cleanup!), reduces the chance of contamination from bacteria in the area (the bags are nonreactive), and it saves room in the fridge.

While the meat marinates, prepare your grill for high direct heat on one side, and low heat on the other.

Remove the tenderloin from the marinade and toss the used marinade. Coat the meat lightly with olive oil. (Or not, remember?) To sear the meat, lay it across the grill, with the larger end of the tenderloin on the hot side of the grill, and the narrower end toward the cool side. After 1-2 minutes, when the grill marks are good on the first side, then roll the meat to another side for another 1-2 minutes. Keep rolling the meat until all sides have been lightly seared.

Once the meat is fully seared, move the entire piece to the low heat side of the grill. Cover and cook a few minutes more, until the internal temperature of the tenderloin reaches 140-145º F (using 145º if you like your meat more well done). I would give you a time frame for this part, but much depends on the heat of your grill, the thickness of your meat, and the skill of your grillmeister.

When the meat has reached the proper temperature, transfer it to a platter or cutting board. Tent the meat with foil and let it rest 5-10 minutes. The meat continues to cook under its little foil tent, so if you’ve gotten the temperature above 140º, go for less resting time.

Slice the meat in ½-inch slices, drizzle on some of the remaining glaze, and sprinkle with the scallions, if you are using them. Serve with rice and a pitcher of the glaze on the side.

And have a happy Memorial Day weekend!


Friday, May 6, 2022

It’s a Cookie! No, a Cake!... Wait – It’s a Cookie Cake for Mother’s Day!!

What’s cooking? Parisian Cookie Cake 


Several days before my very first Mother’s Day, I told my husband I did not want one of those ultra-sweet cards, like the ones with the flowers and lace that his mother always enjoyed. I just wanted something simple, ...but I didn’t say that part. And thus began another early lesson in husband-wife communications.

I thought: Maybe now, I’ll just get a nice, simple card... and maybe some flowers.
He thought: Ok, so she doesn’t want a card. Maybe she doesn’t want anything.

You can imagine how this worked out, can’t you? All I will say is that it involved tears on my part and a rant on his about how Mother’s Day and Valentine’s Day were just traps for guys, and a conspiracy on the part of the card and flower and candy companies. And every year since then, he has reminded me that I’m not his mother.

Then more recently, I actually forgot his birthday. Sort of. I had presents – not yet wrapped – but waiting to be wrapped. And while I always remember his birth date, we had so much going on in our lives that I didn’t realize the date had arrived. We were at a reunion of his college friends, and one of them gleefully announced that it was my prince’s birthday, while I sat slack-jawed at the news that I had missed the boat.

He was more than kind about it – actually thought it was funny – but of course, I was mortified. So I have given him a permanent pass for Mother’s Day.

* * *

If you’re looking around for an easy dessert to make for Mother’s Day, you have come to the right place. This one feels so much like an art project that I’m sure my own mother would have loved it. Very “hands-on.” Also elegant – the original recipe comes from Le Comptoir, the pastry shop at Paris’s legendary Ritz Hotel on the Place Vendôme.  (Of course it’s French. You know, chocolate.)

 And the whole process takes me little more than an hour.

What makes this cookie cake so good?
  • The texture is a mix of soft and crunchy – soft from the underlying cookie part that tastes very much like shortbread, and crunchy from the nuts on top.
  • Complex flavors. Instead of white sugar, the shortbread contains turbinado sugar, which is only partially refined so as to retain some of the original molasses from the sugarcane. Thus the subtle caramel flavor. And then there’s almond butter, that contributes a light nuttiness to the dough.
  • The shortbread bakes in a form that sits directly on the baking sheet, so the bottom of the cookie gets a little extra crispy caramelizing from the more direct contact with the sheet.
  • The topping is a riot of chocolate, almonds, and caramel (or butterscotch), with a finish of sea salt. I mean, what’s not to like?
    Kitchen Goddess note: The original of this cookie cake featured hazelnut purée instead of the almond butter, and chopped raw hazelnuts on top instead of almonds. Chef Greenspan suggested the almond butter/almonds. I’ve made it twice that way, and it’s fabulous. But I want to try it with the original flavors, using Nutella or Italian hazelnut purée and hazelnuts. I’ll let you know how it goes.

    The first time I made this dish was in December. Can you tell?


    Parisian Cookie Cake

    Adapted from Dorie Greenspan in The New York Times.

    Serves 8-12, depending on how generous you are with the pieces.

    Special equipment: 9-inch springform cake pan, baker’s parchment

    Ingredients

    1⅓ cups(170 grams) all-purpose flour
    1 teaspoon baking powder
    ¼ teaspoon baking soda
    4 ounces (1 stick/113 grams) very soft unsalted butter
    ¾ cup (150 grams) turbinado sugar (e.g., Sugar in the Raw)
    ½ teaspoon fine sea salt
    3 tablespoons (54 grams) of pure almond butter (i.e., without added sugar or other ingredients), well stirred 
    1 large egg, at room temperature and lightly beaten
    4 ounces (113 grams) semisweet or bittersweet chocolate, coarsely chopped
    ⅓ cup (48 grams) raw almonds, coarsely chopped
    3 tablespoons (60 grams) caramel (or butterscotch) topping, for finishing (use more or less depending on your taste for caramel)
    Fleur de sel, for finishing (I use Maldon salt, which is less expensive and easier to find). Do not leave out this salt: it adds crunch and that famous sweet-salty thing.

    Directions

    Preheat your oven to 350º. Line a baking sheet with baker’s parchment. Set the ring of a 9-inch springform pan (without its base) upside down on the prepared sheet. The ridge in the ring should be at the top.

    In a medium mixing bowl, use a fork or a whisk to stir together the flour, baking powder and baking soda, being sure to aerate the mix. Set the dry ingredients aside.

    In the bowl of a mixer fitted with the paddle attachment, cream together the butter, sugar and salt on medium-low for 2-3 minutes, or until the texture is smooth.

    Add the almond butter and continue mixing for another 2 minutes.

    Spoon in about a third of the flour mixture and beat – still on medium-low – until it’s absorbed into the butter mixture.

    Pour in the egg and mix on low speed until well incorporated.

    Add the rest of the dry ingredients and continue mixing on low until the dry ingredients are completely absorbed.


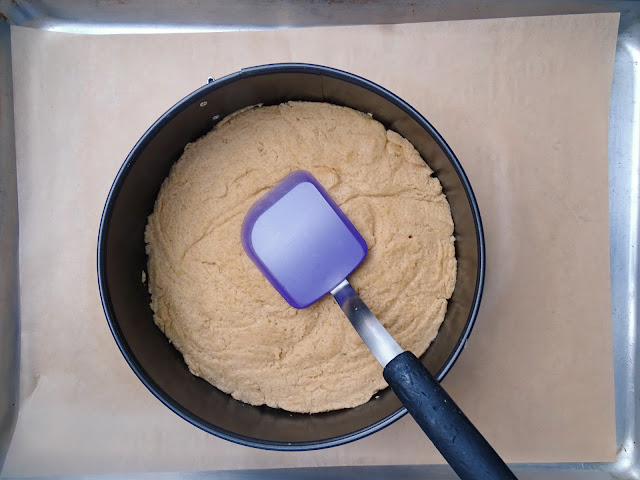
    Transfer the dough into the center of the springform ring. Use your fingers (or the back of a large spoon or an offset spatula) to get the dough pushed to the edges of the ring and evenly thick. Again using your fingers/spoon/offset spatula, gently smooth the surface of the cookie (no mashing down, please!).

    Ready for the oven.


    Scatter the chocolate and then the almonds across the surface of the cookie, and bake 22-26 minutes. (I have made this dessert twice in different ovens and needed almost 28 minutes the first time, 25 minutes the second time.) To test, insert a toothpick or other cake tester into an area of the cookie not covered by chocolate. If it comes out clean, the cookie is done.

    Move the baking sheet to a rack and immediately – but carefully – open and lift off the springform rim. Do not move the cookie. Once the cookie has cooled to room temperature, drizzle or dot the surface with caramel. Sprinkle the top lightly with sea salt. Don’t cut the cookie until it is completely cooled, as it tends to crumble while it’s still warm.

    Ready for the caramel and finishing salt.


    You could serve the finished product in 10-12 wedges, as Ms Greenspan suggests; but I find that people are happier with a dessert this rich if they can have something closer to bite-sized pieces. So I like to cut it in a lattice pattern with strips about an inch wide (see the diagram at left). This allows for smaller portions and even some oddly shaped pieces on the edge. The dessert goes well with vanilla ice cream.

    Wrapped in plastic wrap or in a sealed container, the cookie will keep for about 4 days at room temperature. 

     And a happy Mother’s Day to you all!