Saturday, September 10, 2022

On the Road Again...

 What’s cooking? Broken Phyllo Cake with Orange Spiced Syrup


Three college graduates – one a PhD – with long and successful careers behind them set out to drive to a friend’s house 35 miles away. I was one of them. (Not the PhD.) Because it’s mostly hill country driving, and because I’d actually looked it up on my phone, I knew it would be about 45-50 minutes.

I entered the address into the GPS on my phone, and off we went. I’d been to this woman’s house once, and thought we’d be heading down one of the back roads I knew, but I always trust WAZE to get me there without terrible traffic, so when we headed down I35, I thought, “Hmmm. Maybe an accident or construction on the other route.” We were moving in the right general direction, at least. Maybe this was just a different approach.

An hour later, we found ourselves in a dead end. I called our hostess, and she confirmed the address... sort of. “We live on Riverbend Road,” she said. “Not Riverbend Avenue.” This is perhaps a problem with lots of Texas roads – not enough original names.

“I’ve got it on my phone,” said the PhD. “Just head out this direction and turn left.”

“Don’t worry,” I said to the hostess. “We’ll be there soon.”

Well, “soon,” we had to call her back.

“What’s the address in your phone?” she asked the PhD. Turns out this time, we had the wrong town. (Lots of small towns in this area of Texas.)

Eventually, we got to our intended destination, but it had taken almost two hours.

So any time you are feeling cocky about how smart you are, stop for a minute and think about this story.

* * *


The reason our hostess wasn’t especially upset about our tardiness is that we were bringing the dessert. Of course. I was upset because we’d actually started out on time, and as a person who is “punctually challenged,” I find it especially irritating to be ambushed by circumstances out of my control. Yes, I know the Road/Avenue thing wasn’t technically out of my control, but still...

In any case, all was forgiven when they saw the dessert. This cake, known as portokalopita in Greece, where it originated, is a spongy marvel soaked in spiced orange syrup.


So, how many ways do I love this cake?

1. The texture. The “flour” comes only from phyllo pastry that has been cut into strips and baked to a crisp before being folded into the batter. The resulting structure looks much like a sponge and has a delightful chewyness.

2. The syrup. That structure doesn’t just look like a sponge, it also acts like one, soaking up the syrup which has been infused with cinnamon, cardamom and bay for added dimensions of flavor then poured over the cake right out of the oven. And although the flavor of the cake has a whiff of orange before the pourover, the syrup fills every nook and cranny with spiced orange goodness.

3. The crust. Before the pourover, you poke holes in the crust with a toothpick. So the syrup doesn’t sit on top of the cake but funnels right to the inside, leaving the top crust nice and crunchy.

4. The efficiency. You’ll find that this cake – which is baked in a regular 9-inch cake pan – is sweet enough and rich enough to satisfy 10-12 guests. So it’s a great cake to take to a party – easy to make, no icing to labor over, and it travels well. A thin slice, served with a dollop of whipped cream or whipped cream mixed with plain Greek yogurt, is the perfect end to a meal.

I imagine that – much like the origins of Italian burrata cheese and the French fromage fort – this is one of those dishes that came out of some thoughtful cook saying “I must be able to do something with all these leftover bits of phyllo...”


Broken Phyllo Cake with Orange and Bay Leaves

Adapted from Rose Hattabaugh for Christopher Kimball's Milk Street Magazine


Serves: 10-12

Kitchen Goddess note on the oranges: You’ll need two whole oranges for the recipe: one for the grated zest in the cake, and one for the zest strips in the syrup. And it’s easier to zest both before juicing them. (You’ll likely need both oranges to get ½ cup of juice.) Use a rasp to grate the orange for the cake, and a regular veggie peeler to get strips for the syrup. The key with the strips is to get as little of the white pith as you can.

Ingredients

For the cake:

8 ounces (227 grams) phyllo, thawed
1 cup (214 grams) white sugar
1 large orange 
1 cup (240 grams) whole-milk Greek yogurt (the KG has used both whole-milk and non-fat yogurt, with no discernible difference)
1 cup grapeseed oil or other neutral oil (canola, corn, peanut, sunflower, safflower, vegetable)
5 large eggs
1 tablespoon baking powder
¼ teaspoon kosher salt

Equipment: 1. a 9-inch cake pan whose sides are at least 2 inches high. (If the sides aren’t high enough, the syrup will overflow the pan.) 2. A half-sheet baking pan with a rim.

For the syrup:

1 cup (214 grams) white sugar
4 three-inch strips orange zest (or three 4-inch strips, or... you know)
½ cup orange juice
3-inch cinnamon stick (or ½ teaspoon ground cinnamon)
2 cardamom pods, lightly smashed (or ½ teaspoon ground cardamom)
3 whole bay leaves


Directions

For the cake: 

Heat the oven to 350°F with a rack in the middle position.


Roll the thawed phyllo lengthwise, then slice the roll crosswise in ½-inch wide strips.


Transfer the phyllo strips to the rimmed baking sheet, using your hands to unfurl and separate the strips. Distribute the strips in an even layer and bake until brittle and light golden brown, 15 to 18 minutes, gently flipping the phyllo about halfway through. (You’ll need a spatula and your hands to do the turning – just try to rotate the bottom pieces to the top. And don’t worry if pieces break as they’re turning.) Cool to room temperature on the baking sheet.

Phyllo strips before baking.

Phyllo strips after baking

While the phyllo is baking, mist the cake pan with cooking spray (or grease it with vegetable oil), line the bottom with a round of baker’s parchment, then mist/grease the parchment.

In the bowl of a stand mixer, place the sugar. Grate the orange over the sugar. (By grating the orange into the sugar, you get the maximum impact from the fragrant oils in the peel.) Using the paddle attachment to the mixer, beat the sugar and grated orange zest together at medium speed until fragrant, about 30 seconds. Reduce the mixing speed to low, and add the yogurt, oil, eggs (one at a time, making sure each is fully incorporated before adding the next), baking powder, and salt. Increase the speed to medium and beat  about a minute, until the batter is well combined. Use a spatula to scrape the bowl as needed.

Remove the bowl from the mixer. Add half of the cooled phyllo to the batter base and, using a spatula, fold until the phyllo is well coated with the batter and almost evenly moistened. Add the remaining phyllo and continue to fold until no dry patches of phyllo remain.
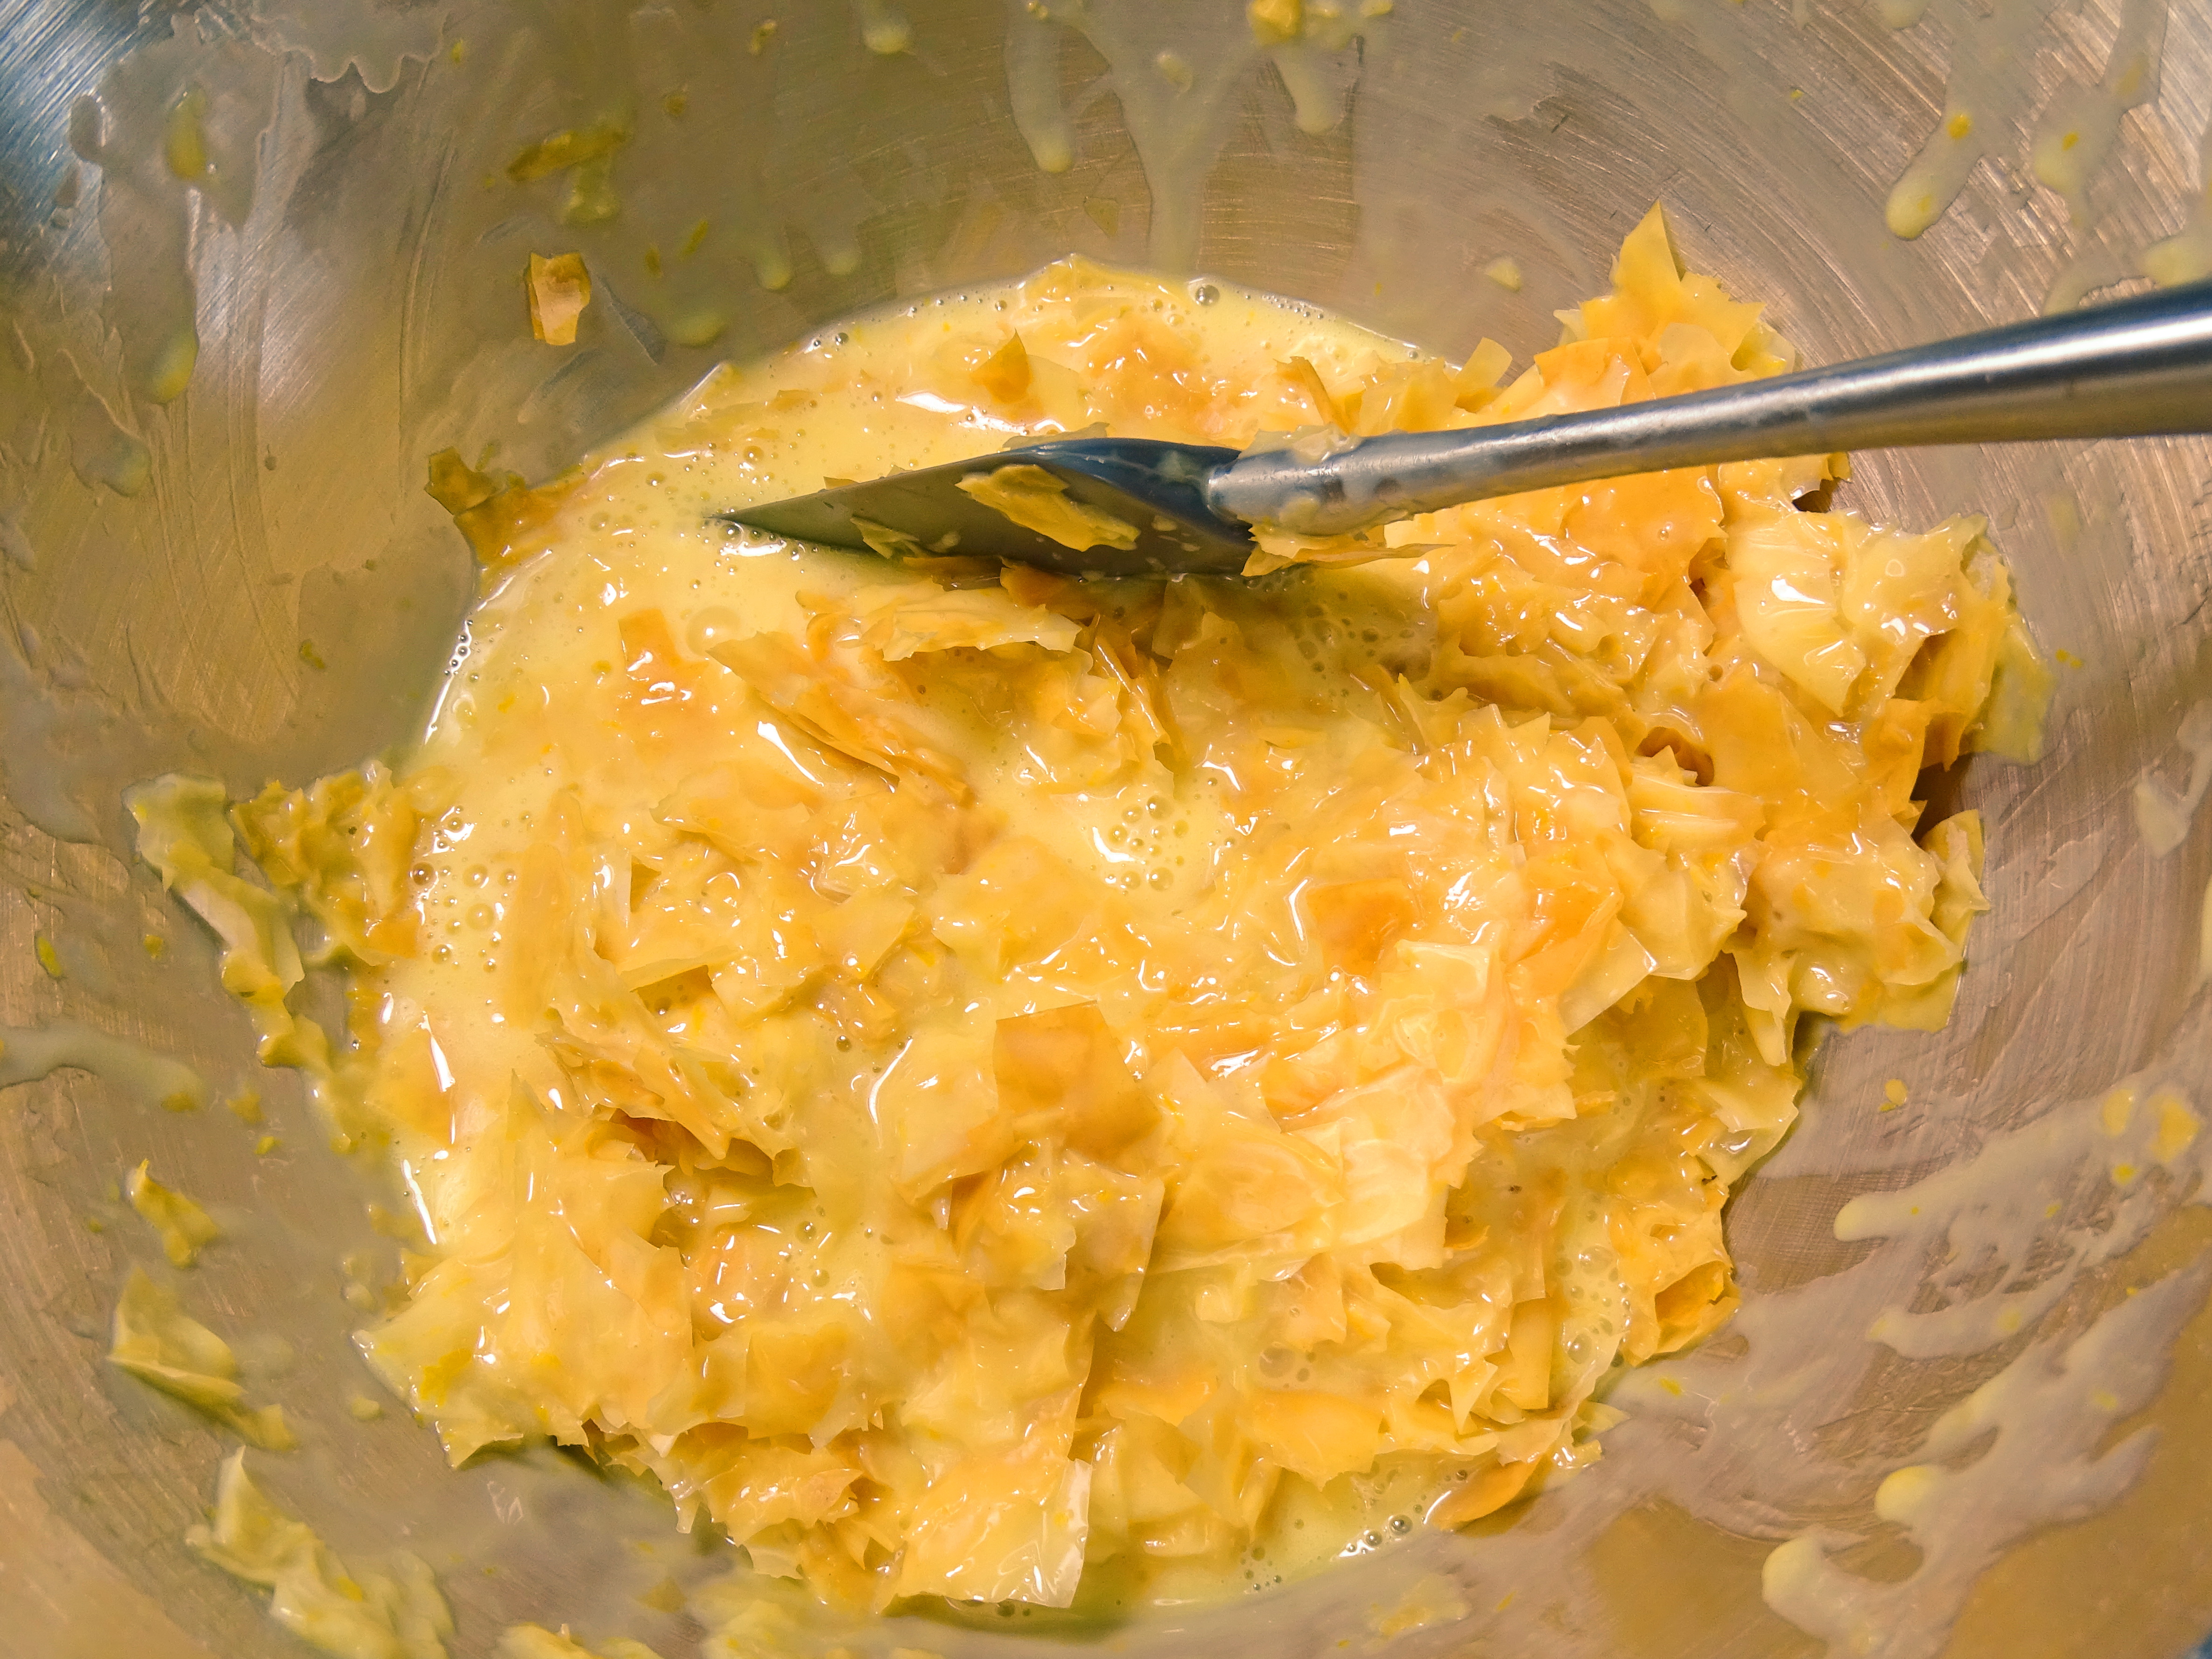

Pour the batter into the prepared pan and use your spatula to gently spread (without compressing) the batter in an even layer. Bake until deep golden brown and a toothpick inserted at the center of the cake comes out clean, 45 to 50 minutes.

While the cake bakes, make the syrup.

For the syrup:


In a small saucepan, combine the sugar, orange zest strips and juice, cinnamon, cardamom, bay leaves and ½ cup water. Bring the mixture to a simmer over medium-high, stirring to dissolve the sugar, then transfer to a 2-cup liquid measuring cup or small bowl. You should have 1½-1⅔ cups. Cool to room temperature. (The KG sets the cup/bowl into an ice bath and stirs the syrup occasionally, to make sure it’s cool enough by the time the cake is done.)


When the cake is almost done, strain the syrup, discarding the zest strips, cinnamon stick, cardamom pods, and bay leaves.

Set the cake – still in its pan – on a wire rack and, using a toothpick, immediately poke holes (30-40) down deeply into the cake every inch or so. Slowly pour half the syrup evenly onto the warm cake, then let it stand for about 5 minutes to let the syrup soak in. After 5 minutes, slowly pour on the remaining syrup. Not all of the syrup will soak in immediately, and the excess liquid may flood the pan. Do not fret. Let the cake cool to room temperature and until all (or most) of the syrup has been absorbed, at least 2 hours or even overnight.

To serve, run a thin knife around the inside edge of the pan to loosen the cake, then invert the cake onto a platter. Lift off the pan and peel off the parchment, then re-invert the cake onto a serving plate. This part is best done over a sink or large pan, so that any remaining syrup doesn’t drip where you don’t want it to.


Serve slices slightly chilled or at room temperature, with a dollop of whipped cream, or whipped cream mixed with plain Greek yogurt. Leftovers will keep well wrapped in the refrigerator for up to four days.


Sunday, May 29, 2022

A Culinary Salute to Our Armed Forces

 What’s cooking? Grilled Pork Tenderloin with Orange Marmalade Glaze


A terrible photo of my Dad but I love the determination and excitement in his face.

Memorial Day.

It was always a special day for my dad, who was a pilot in World War II and treasured his memories of the men and women who served with him but never made it home. He was a big crier, so we never really got many stories about his experiences in the service. He’d start a story, then tear up, and never get finished. Start again, tear up again, and ... you get the picture. He spent time in Marrakesh, flying reconnaissance missions, and back in the U.S., he taught Chinese pilots to improve their skills on U.S. aircraft. I have a wonderful letter from one of those pilots, saying how honored he and his fellow pilots were to be taught by my Dad. So I think of Memorial Day as a day to honor him, too.

My father also enjoyed grilling anything, so I think he’d love today’s pork tenderloin recipe I discovered. As in many aspects of his life, Dad lived large, so his enthusiasm for grilling usually produced meat with a bit of char. “A little charcoal is good for you,” he’d always claim. But I don’t recommend that approach with this recipe.


In fact, the best thing you can do with this recipe is to avoid cooking the pork too long. According to the National Pork Board, today’s pigs are bred to be much leaner than in the past, so that medium-rare is now a preferred doneness for tenderloins if you want to maximize juiciness and flavor. Those qualities come at an internal temperature of 145-150º. So you are well advised to use a good meat thermometer.

I found this recipe in a search for something simple to do with the pork tenderloins my prince brought home from Costco one day. As a little unsolicited plug for that store, I will say that their meat and fish tend to be exceptional without regard to the price. That’s because they do such volume that both meat and fish are very fresh. Of course, you have to be willing to buy more than you might otherwise, but it’s worth sticking some of it into the freezer.

So back to the recipe. You will not believe how flavorful is this sweet-salty marriage of marmalade and honey with the soy sauce. Very umami. And I don’t know of an easier sauce to make – no chopping or slicing or grinding, so it’s ready in 10-15 minutes. You likely have the major ingredients already: marmalade, honey, soy sauce. When I make it for my hubby, we practically fight over the leftovers. To be truthful, we don’t actually fight over the leftovers because I put them in a plastic container and don’t remind him about them. But if I told him about them, we’d have to have a serious discussion about sharing.

My friend, Gail, offered to make this pork dish for a ladies’ luncheon that I was hosting... Ok, so she didn’t offer. But when I asked, she was very gracious. (My friends are so kind that when I have what I call “a suggestion,” they just smile and say “fine.”) The instructions on the original recipe included a note to coat the meat with olive oil before grilling, but Gail forgot that part, recalling it in one of those “OMG!” moments only as she and her hubby were already grilling. Her husband suggested she not tell me. And when she mentioned it to another of the women coming to lunch, that woman also said, “Don’t tell Lee.” So, of course, she told me. This is the problem of being friends with the Kitchen Goddess.

But as it happens, the Kitchen Goddess had made this recipe and also forgot to oil the meat before grilling, and she decided it didn’t really matter, unless you’re really into keeping your grill clean. So I’ll leave that part of the instructions in the writing, but you have now been alerted.

Kitchen Goddess note: If you don’t have a grill, this pork can roast in the oven. The author suggests searing it on the stovetop in a frying pan, to develop a nice Maillard crust on all sides, then putting it in the oven for 15-20 minutes at 400º.  Let it rest about 10 minutes before slicing.


Grilled Pork Tenderloin with Orange Marmalade Glaze

Adapted from Elise Bauer at Simply Recipes 


Total time: 90 minutes, including the marinade time, and you can even cut that short.

Serves 2-3. (Who am I kidding? It serves 2, with enough left over for a small lunch.)

Ingredients

⅓ cup soy sauce (use gluten-free soy sauce for gluten-free version)
⅓ cup orange marmalade (or lemon, store-bought or homemade)*
⅓ cup honey
1 tablespoon plus 1 teaspoon rice wine vinegar 
Pinch of crushed red pepper flakes, or Aleppo pepper
1 pound pork tenderloin
2 scallions, thinly sliced (optional)
Olive oil for the grill (and you’ll remember that this is optional)


*Kitchen Goddess note: You know the Kitchen Goddess already had homemade marmalade. Two flavors, in fact. You are welcome to go buy a nice brand, but if you are so inclined, here are links to two of my faves: Triple Citrus Marmalade and Green Tomato & Lemon Marmalade. You don’t even have to go through the canning process unless you want to make a big batch to store. Make it, put it in jars, then refrigerate what you think you’ll use and give the rest to friends. Trust me, they’ll love you for it.


Directions

First, make the marinade. In a small saucepan, stir together the soy sauce, marmalade, honey, rice wine vinegar, and red pepper flakes. Bring the mixture to a simmer over medium heat. Remove the sauce from the heat and let it cool to almost room temperature. If you are in a hurry – which I always am – you can set the pan in an ice bath for a few minutes and stir until the sauce is just warm.

Set aside half of the marinade to use as a sauce with the finished tenderloin.

Use the remaining half of the marinade to marinate the tenderloin for 1 hour. (Comments on the website suggest that you can reduce the time – if you’re in a hurry – to as little as a half hour.)


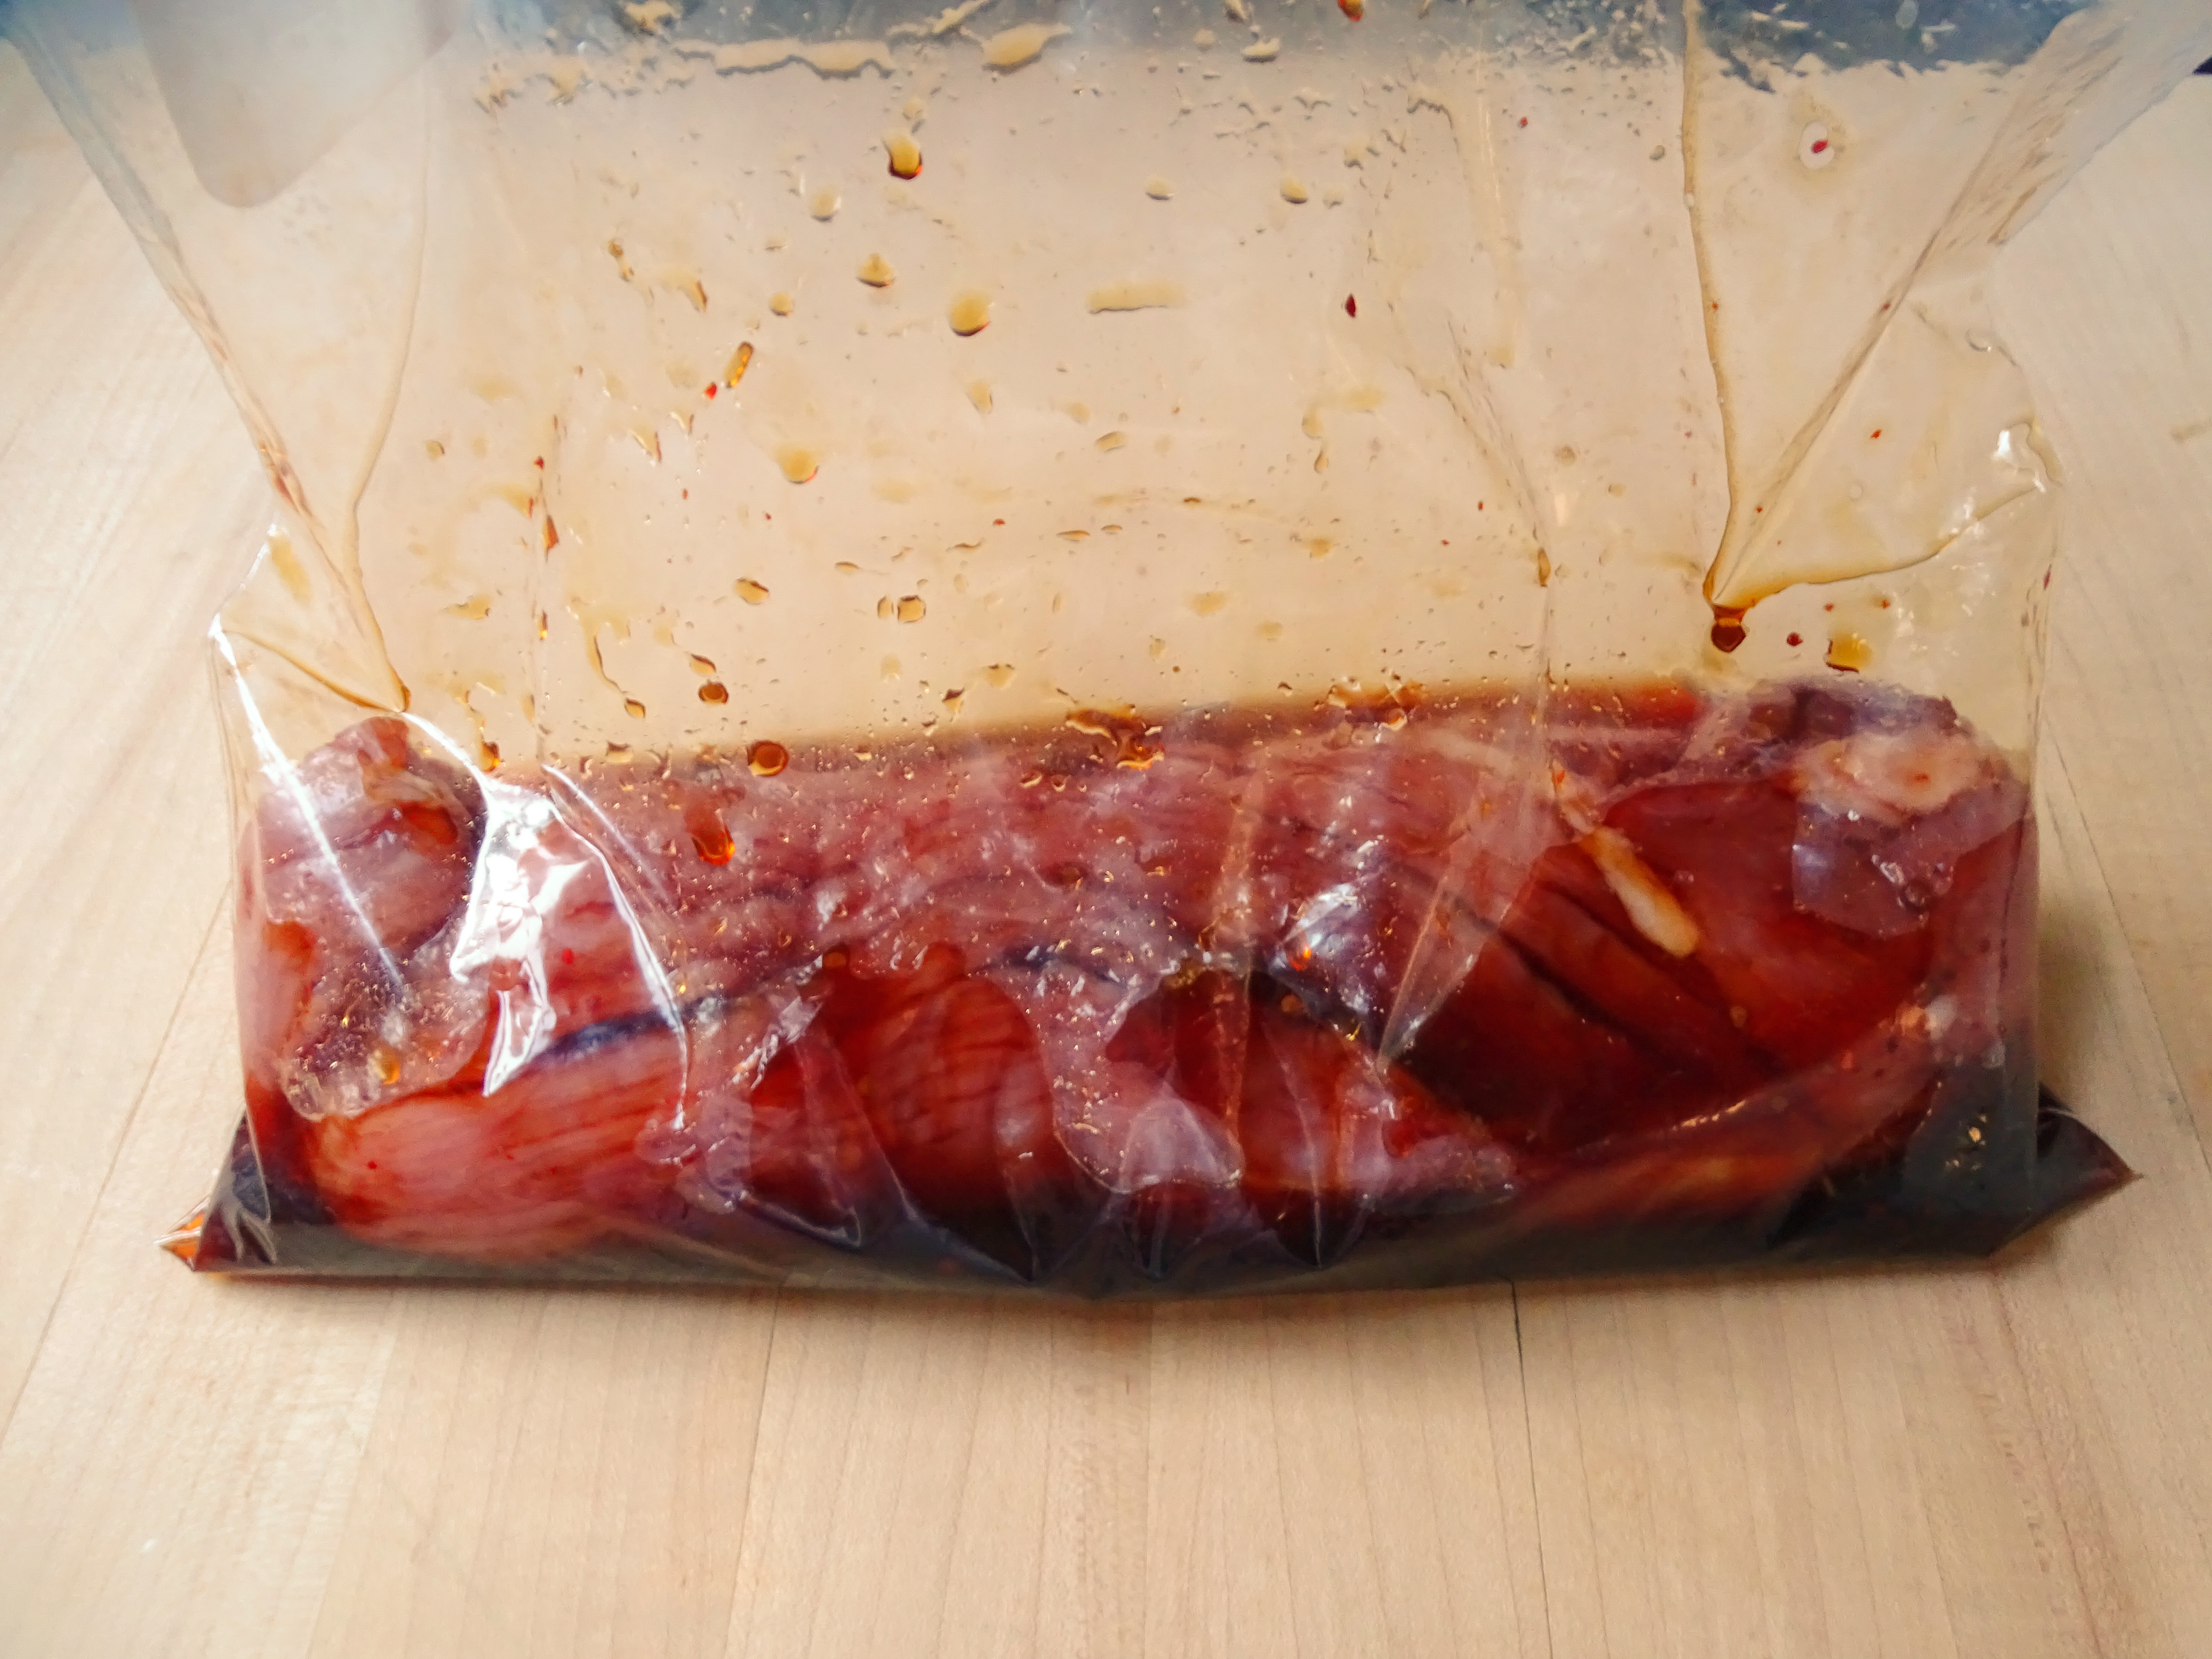
Kitchen Goddess note: The Kitchen Goddess prefers the ziploc bag method of marinating: place the meat inside a large ziploc bag, pour the marinade over it, and close the bag, removing as much air as possible in the process. This methodology practically eliminates the mess factor (no cleanup!), reduces the chance of contamination from bacteria in the area (the bags are nonreactive), and it saves room in the fridge.

While the meat marinates, prepare your grill for high direct heat on one side, and low heat on the other.

Remove the tenderloin from the marinade and toss the used marinade. Coat the meat lightly with olive oil. (Or not, remember?) To sear the meat, lay it across the grill, with the larger end of the tenderloin on the hot side of the grill, and the narrower end toward the cool side. After 1-2 minutes, when the grill marks are good on the first side, then roll the meat to another side for another 1-2 minutes. Keep rolling the meat until all sides have been lightly seared.

Once the meat is fully seared, move the entire piece to the low heat side of the grill. Cover and cook a few minutes more, until the internal temperature of the tenderloin reaches 140-145º F (using 145º if you like your meat more well done). I would give you a time frame for this part, but much depends on the heat of your grill, the thickness of your meat, and the skill of your grillmeister.

When the meat has reached the proper temperature, transfer it to a platter or cutting board. Tent the meat with foil and let it rest 5-10 minutes. The meat continues to cook under its little foil tent, so if you’ve gotten the temperature above 140º, go for less resting time.

Slice the meat in ½-inch slices, drizzle on some of the remaining glaze, and sprinkle with the scallions, if you are using them. Serve with rice and a pitcher of the glaze on the side.

And have a happy Memorial Day weekend!


Friday, May 6, 2022

It’s a Cookie! No, a Cake!... Wait – It’s a Cookie Cake for Mother’s Day!!

What’s cooking? Parisian Cookie Cake 


Several days before my very first Mother’s Day, I told my husband I did not want one of those ultra-sweet cards, like the ones with the flowers and lace that his mother always enjoyed. I just wanted something simple, ...but I didn’t say that part. And thus began another early lesson in husband-wife communications.

I thought: Maybe now, I’ll just get a nice, simple card... and maybe some flowers.
He thought: Ok, so she doesn’t want a card. Maybe she doesn’t want anything.

You can imagine how this worked out, can’t you? All I will say is that it involved tears on my part and a rant on his about how Mother’s Day and Valentine’s Day were just traps for guys, and a conspiracy on the part of the card and flower and candy companies. And every year since then, he has reminded me that I’m not his mother.

Then more recently, I actually forgot his birthday. Sort of. I had presents – not yet wrapped – but waiting to be wrapped. And while I always remember his birth date, we had so much going on in our lives that I didn’t realize the date had arrived. We were at a reunion of his college friends, and one of them gleefully announced that it was my prince’s birthday, while I sat slack-jawed at the news that I had missed the boat.

He was more than kind about it – actually thought it was funny – but of course, I was mortified. So I have given him a permanent pass for Mother’s Day.

* * *

If you’re looking around for an easy dessert to make for Mother’s Day, you have come to the right place. This one feels so much like an art project that I’m sure my own mother would have loved it. Very “hands-on.” Also elegant – the original recipe comes from Le Comptoir, the pastry shop at Paris’s legendary Ritz Hotel on the Place Vendôme.  (Of course it’s French. You know, chocolate.)

 And the whole process takes me little more than an hour.

What makes this cookie cake so good?
  • The texture is a mix of soft and crunchy – soft from the underlying cookie part that tastes very much like shortbread, and crunchy from the nuts on top.
  • Complex flavors. Instead of white sugar, the shortbread contains turbinado sugar, which is only partially refined so as to retain some of the original molasses from the sugarcane. Thus the subtle caramel flavor. And then there’s almond butter, that contributes a light nuttiness to the dough.
  • The shortbread bakes in a form that sits directly on the baking sheet, so the bottom of the cookie gets a little extra crispy caramelizing from the more direct contact with the sheet.
  • The topping is a riot of chocolate, almonds, and caramel (or butterscotch), with a finish of sea salt. I mean, what’s not to like?
    Kitchen Goddess note: The original of this cookie cake featured hazelnut purée instead of the almond butter, and chopped raw hazelnuts on top instead of almonds. Chef Greenspan suggested the almond butter/almonds. I’ve made it twice that way, and it’s fabulous. But I want to try it with the original flavors, using Nutella or Italian hazelnut purée and hazelnuts. I’ll let you know how it goes.

    The first time I made this dish was in December. Can you tell?


    Parisian Cookie Cake

    Adapted from Dorie Greenspan in The New York Times.

    Serves 8-12, depending on how generous you are with the pieces.

    Special equipment: 9-inch springform cake pan, baker’s parchment

    Ingredients

    1⅓ cups(170 grams) all-purpose flour
    1 teaspoon baking powder
    ¼ teaspoon baking soda
    4 ounces (1 stick/113 grams) very soft unsalted butter
    ¾ cup (150 grams) turbinado sugar (e.g., Sugar in the Raw)
    ½ teaspoon fine sea salt
    3 tablespoons (54 grams) of pure almond butter (i.e., without added sugar or other ingredients), well stirred 
    1 large egg, at room temperature and lightly beaten
    4 ounces (113 grams) semisweet or bittersweet chocolate, coarsely chopped
    ⅓ cup (48 grams) raw almonds, coarsely chopped
    3 tablespoons (60 grams) caramel (or butterscotch) topping, for finishing (use more or less depending on your taste for caramel)
    Fleur de sel, for finishing (I use Maldon salt, which is less expensive and easier to find). Do not leave out this salt: it adds crunch and that famous sweet-salty thing.

    Directions

    Preheat your oven to 350º. Line a baking sheet with baker’s parchment. Set the ring of a 9-inch springform pan (without its base) upside down on the prepared sheet. The ridge in the ring should be at the top.

    In a medium mixing bowl, use a fork or a whisk to stir together the flour, baking powder and baking soda, being sure to aerate the mix. Set the dry ingredients aside.

    In the bowl of a mixer fitted with the paddle attachment, cream together the butter, sugar and salt on medium-low for 2-3 minutes, or until the texture is smooth.

    Add the almond butter and continue mixing for another 2 minutes.

    Spoon in about a third of the flour mixture and beat – still on medium-low – until it’s absorbed into the butter mixture.

    Pour in the egg and mix on low speed until well incorporated.

    Add the rest of the dry ingredients and continue mixing on low until the dry ingredients are completely absorbed.


    Transfer the dough into the center of the springform ring. Use your fingers (or the back of a large spoon or an offset spatula) to get the dough pushed to the edges of the ring and evenly thick. Again using your fingers/spoon/offset spatula, gently smooth the surface of the cookie (no mashing down, please!).

    Ready for the oven.


    Scatter the chocolate and then the almonds across the surface of the cookie, and bake 22-26 minutes. (I have made this dessert twice in different ovens and needed almost 28 minutes the first time, 25 minutes the second time.) To test, insert a toothpick or other cake tester into an area of the cookie not covered by chocolate. If it comes out clean, the cookie is done.

    Move the baking sheet to a rack and immediately – but carefully – open and lift off the springform rim. Do not move the cookie. Once the cookie has cooled to room temperature, drizzle or dot the surface with caramel. Sprinkle the top lightly with sea salt. Don’t cut the cookie until it is completely cooled, as it tends to crumble while it’s still warm.

    Ready for the caramel and finishing salt.


    You could serve the finished product in 10-12 wedges, as Ms Greenspan suggests; but I find that people are happier with a dessert this rich if they can have something closer to bite-sized pieces. So I like to cut it in a lattice pattern with strips about an inch wide (see the diagram at left). This allows for smaller portions and even some oddly shaped pieces on the edge. The dessert goes well with vanilla ice cream.

    Wrapped in plastic wrap or in a sealed container, the cookie will keep for about 4 days at room temperature. 

     And a happy Mother’s Day to you all!

    Monday, January 10, 2022

    Wait a Minute – Christmas Is Over?!

    What’s cooking? Mamo’s Apricot Tarts


    You say Santa has come and gone?! But I have these tarts for him! Well, “Qué será, será.” What this really means is that I started this post before Christmas, and then... well, you know,... Christmas. So a few things got lost in the shuffle. But these delightful little pastries are so easy and fun that I felt sure you wouldn’t really care if they’re too late to be Santa treats. Make them now, and then again in December for Santa.

    My maternal grandmother was not known for her cooking. But she had two recipes at which she succeeded magnificently: brownies and apricot tarts. One of these days, I will divulge the secret recipe for her brownies – known to all of my friends as “Mamo’s Brownies” – but today is the day for her apricot tarts.

    She sent me shoe boxes of them when I was away at college, and my suitemates would fall on them like thirsty men at an oasis in the desert. (Do you ever wonder why it was always men dying of thirst in the desert? Personally, I think women are much too smart to strike out on their own in unforgiving climes. But I digress.) Anyway, those little nibbles were that good. Not overly sweet, with a flaky crust dusted with powdered sugar, and a tiny surprise of stewed apricots inside.

    I recently decided to try making them myself. I had plans to see my grandchildren over Thanksgiving, and we always enjoy baking together.

    The first challenge was to adapt the recipe. For instance, hers called for three 3-ounce packages of cream cheese, which now only comes in 8-ounce packages. The second ingredient was two sticks of margarine. Margarine? As a committed butter user, I had to work my way around that one. Then there was no indication of the size of the “one package” of dried apricots. And on it went. To call the instructions minimalist would be a vast understatement. But the Kitchen Goddess forged ahead.

    This project was especially fun because there’s a lot the grandchildren could do themselves. Once I got the dough rolled out, the 9-year-old cut out her own circles of dough, loaded them with the stewed apricots, and pinched the sides together herself. The 7-year-old didn’t like the icky way the dough felt on his hands, so I held the round of dough while he spooned apricots into it; then I folded it over and he pinched it shut. We managed this and another easy cookie (for another post), and we only took about 5 hours. It turns out that every project takes extra time when you’re baking with kids.

    So here they are. I will give you the recipe the way I made them, which was by stewing apricots. My cousin Helen goes the simpler route and fills them with really good, really thick apricot preserves. I will leave you to make your own choice – including that of using a different fruit altogether – and you don’t have to tell me which direction you went.

    Kitchen Goddess note: In the recipe below, the KG uses a combination of unsalted butter and Crisco – a technique she borrowed from her rollout cookies. You can just use 2 sticks of butter if you prefer, but Crisco’s higher melting point means it keeps the pastry layers separate longer as the dough bakes, which increases the flakiness/tenderness of the pastry and helps the tarts hold their shape in the oven.


    Mamo’s Apricot Tarts

    Makes about 3 dozen.

    Ingredients

    For the filling:
    8 ounces dried apricots, cut in ¼-inch dice
    ½ cup sugar
    about 2 cups of water

    For the crust:
    2 cups (250 grams) all-purpose flour
    Rounded ¼ teaspoon kosher salt
    One 8-ounce package cream cheese, chilled and cut into about 8 portions
    10 tablespoons cold unsalted butter, cut in ½-inch dice
    6 tablespoons Crisco

    For the finished pies:
    ¼-½ cup powdered sugar

    Special equipment: biscuit cutter, 3½-4 inches in diameter (I used a scalloped biscuit cutter because I thought it would look pretty, which it did, but – obviously – you can also use one with a plain edge. My grandmother used the lid to her percolator, so who knows what the original dimensions were.)

    Directions

    Start the stewed apricots first. In a small saucepan, stir together the apricots, the sugar, and 1 cup of water. Bring the mixture to a low boil and stir occasionally as the apricots absorb the water and become softer.

    As the mixture becomes jammier, add more water in ½-cup increments. Continue to stir occasionally until the apricot pieces begin to lose their form, and the mixture becomes truly jammy. Periodically, you may want to adjust the heat to keep the apricots from burning. Stop cooking when it reaches a degree of jamminess you like. (The Kitchen Goddess tends to cook hers for about 2 hours.) Set aside to cool. 


    Almost forgot to take this photo -- it’s what I had left after two batches of tarts. But you can see
    the consistency of my stewed apricots. Pretty jammy.

    Kitchen Goddess note: This recipe will make more apricot mixture than you need for one batch of tarts, but it freezes well in a plastic container, so you can make another batch at a moment’s notice!

    While the apricots are cooking, make the dough.

    Kitchen Goddess note: You can go the traditional route – mixing the dough by hand, using a pastry blender – but why would you? My grandmother mixed her dough by hand, but she was younger than I am now, and had no food processor. The KG uses her handy food processor, and has been delighted with the results. It takes almost no time at all, and it keeps the butter and shortening cold, which is key to producing flaky pastry. And the grandchildren enjoy taking turns at pulsing the machine.

    Measure your flour and salt into the bowl of a food processor and pulse 3-4 times, to aerate the flour. Scatter the cream cheese, Crisco, and cold butter evenly on top of the flour, and pulse until the dough begins to come together in a couple of large lumps. This will take 20-25 pulses, depending on how long your pulses are.

    Transfer the dough to waxed paper or cellophane wrap and refrigerate for 1-2 hours. A warning: You can actually refrigerate it overnight, but it becomes difficult to work with after only a couple of hours.

    Prepare a baking sheet (or two) with baker’s parchment, and preheat the oven to 375º. Prepare a small (custard-size) bowl with about ¼ cup of cold water.

    Divide the dough into halves, working one half at a time and refrigerating the other half. On a well-floured surface, roll the dough out to a ⅛-inch thickness. Use the biscuit cutter to cut circles you can hold on your open palm. Fill each circle of dough with about a teaspoon of the stewed apricots (or preserves), placing it slightly off-center so you have the other half to fold over. Dab a bit of the cold water around the edges of the circle, to help “glue” the two halves together. Fold the dough circles in half and use your fingers to gently press the rounded edges together.


    Ready for the oven.

    Ready for the powdered sugar!


    Place the completed tarts at least an inch apart on the baking sheet and bake 23-25 minutes until light golden brown on top. Set the pan on a baking rack and let the tarts cool for 5-10 minutes. While they are still warm, sift powdered sugar over them. The tarts will keep, stored in a closed container, for several days.


    Happy January to you all!

    Thursday, December 30, 2021

    Cheers!!

     What’s cooking? Holiday Sparkler Cocktail


    The Kitchen Goddess is celebrating the new year. Yes, in spite of the fairly grim forecasts for the next few months, we can all celebrate something, if not more than a few somethings. After all, the past two years have brought Covid marriages, Covid babies born, and not a few who’ve taken the Covid wake-up call to reassess their careers and goals and move their lives in new and exciting directions. So there’s sure to be good coming out of 2022.

    And what better way to celebrate this new year than with a bit of alcohol? Anything that bubbles, anything that sparkles – the goal is to be festive. Long ago, in the early days of this blog, I posted a drink called a Champagne Cosmopolitan, the recipe for which I found in a long-forgotten issue of Gourmet magazine. When we lived in New Jersey, for our annual Soup Party, my hubby and I frequently met guests at the door with a tray of these lovely drinks. They were always welcomed. (Click here for the recipe.)


    More recently, I hosted a holiday luncheon for a small group of women friends, and my friend Gail, the one in charge of the drinks – you know you can’t have a holiday luncheon without a special drink – brought an over-the-top cocktail that was simultaneously fun, beautiful, and delicious. And light enough on the alcohol that we could have two if we wanted.

    The pièce de résistance was a tiny spoonful of edible silver dust (also known as Luster Dust), which you can find on amazon or at your local baking supply store. As it swirls around in the liquid, it creates an effect that I can only describe as magic. (And here I’ve been using it only on cookies!)


    Gail introduced another element that made the cocktail special: fresh cranberries frozen in ice cubes. So, of course, the Kitchen Goddess did likewise when serving them to her family on Christmas. It’s a bit of a pain getting them to freeze in the middle of the cubes because the berries have a tendency to float. But if you fill the tray half-way, add the berries, then freeze them, then add water on top and freeze again, you can get just the effect. I know... it’s a Kitchen Goddess sort of obsession, but you must admit they look special.


    If you can’t find fresh cranberries, I think you could do the same trick with raspberries or pomegranate seeds. And if you have a hard time finding white cranberry juice, try your local mega-liquor store 


    Holiday Sparkler Cocktail

    Adapted from Breckenridge Distillery


    Makes 1 drink.


    Ingredients

    1½ ounces vodka
    5 ounces white cranberry juice
    Splash of Prosecco
    ¼ teaspoon silver pearl dust

    Special equipment: a lowball glass (also called a rocks glass or an old-fashioned glass), which holds 6-10 fluid ounces.

    In a lowball glass, stir together the vodka and the cranberry juice. Add ice and pour in the splash of Prosecco. Slowly stir in the silver dust and serve.

    Kitchen Goddess note: If you are going to be making more than one of these – and who would not make more than one? – it's easiest to mix together a batch of the vodka and the white cranberry juice. Then for each drink, all you have to add is the ice, the splash of Prosecco, and the silver dust.


    So here’s to you and yours, to better times, to your health and happiness, and to whatever manner of blessings that come your way. Happy New Year!


    Thursday, December 9, 2021

    ’Tis the Season – A Holiday Gift List for Foodie Fun and Kitchen Cheer

     What’s cooking? Are you crazy? Who has time to cook when we have shopping to do?!


    Who is more deserving than the person who, every night during the COVID lockdown, still figured out what to have for dinner? When life was one long Zoom call in your sweatpants, who made the effort to put something new and different in front of you to eat? That person deserves a little nod, and maybe a little something under the tree. Besides, it’s that time of year when it’s way more satisfying to give than to receive.

    With all this in mind, the Kitchen Goddess has had her eye out for little bits of specialness all year long. Some of these are just fun, and some are outright helpful.

    Kitchen Goddess note: The KG, being a paragon of commercial virtue, has not received so much as a coupon for $1 off in exchange for these recommendations.


    Stocking Stuffers

    In a random moment of wandering around my office, I recently discovered a copy of Gear for Your Kitchen, by Alton Brown. I already have all I need, I said to myself, so I was about to put it in the donation pile when I realized I’d never actually read it. Leafing through a few pages, I found all sorts of fun information, much of it overly geeky – like why certain materials are better for certain types of dishes and pots and pans – but then that’s also who I am, so I liked that. But Mr. Brown also coughed up several items not normally found in the kitchen, but that actually make great kitchen tools. So surprise the foodie in your life with one of these.


    Tailor’s Sewing Gauge
    – This little gizmo, used by tailors for measuring hems, is ideal for measuring the thickness of roll-out dough, or for revealing when the sauce in a pan has been reduced by one-third. You can get this package of two for $7.49 from amazon.com. Or the Dritz sewing gauge (like the one on the right) – the one I remember from 8th grade Homemaking class – is $5.78 for just the one.


    Box Cutter/Utility Knife (this one $6.79 at Staples) – Yes, it’s excellent at opening packages, but because it can be set at a specific depth, it’s also great for scoring a ham, cutting puff pastry dough, and scoring bread dough before baking or – according to the author – scoring calamari so it won’t curl while cooking. The KG has never cooked calamari, but now that I have my utility knife, who knows?


    Mortar Trowel ($7.98 at Lowe’s) – When you’ve finished spackling the bathroom, this is just the tool you need for serving pie. The offset hilt makes it much easier to dig down into that pie tin, and the blade itself is thin and flexible enough to slide right under a slice. Yet it’s strong enough to lift the pie out of the tin. The word according to Alton Brown...


    Rubber No-skid Shelf Liner (rolls range from $9.99 to $18.00 at Bed Bath & Beyond or your local hardware or kitchen store) – Does it drive you crazy when your cutting boards slide around on your kitchen counter? It’s also dangerous when you have a knife in your hand. A piece of this shelf liner can stabilize those boards and be put into the dishwasher when you’re done. And you can cut it to be just the right size for your boards. I have both the mesh style, shown here, and the clear solid style. Both work for this task.


    Zyliss Pizza Cutter ($14.99 at Bed Bath & Beyond) – This one was an eye-opener for the Kitchen Goddess. Safer than your run-of-the-mill pizza wheel, and easier to control – no more of those off-shape slices, unless you want them that way. And it comes apart for the dishwasher.


    Not Cheap, but Less Than $30


    You may have forgotten the Kitchen Goddess’s paean to her Honing Steel last year. After all, the COVID-19 virus was raising its ugly head, so who could think about keeping your knives in shape? But judicious use of a honing steel will actually prolong the lives of your knives, and reduce the need to get them sharpened. Look for a steel that’s at least 1 inch longer than your longest knife. (Not good for serrated knives, but I can’t solve all your problems.) The one shown here is a 9-inch Honing Steel by Wüsthof, who also makes excellent knives. It’s $20 at Faraday’s Kitchen Store or amazon.com or Crate and Barrel.


    The Kitchen Goddess thinks salt shakers are so 20th century. Instead, she keeps a small white dish of salt near the stove top, where she can grab a pinch or a teaspoon of salt to toss into whatever soup or other dish she’s making. She recently spotted a darling glass-and-steel salt server that may actually go on her wish list to Santa. It’s the RSVP Endurance Salt Server, and it’s $25.18 at amazon.com, $23.99 at Bed Bath & Beyond. (KG uses the pinch method, so she’ll probably ditch the tiny spoon.)


    If you’re sufficiently intrigued by the suggestions I gleaned from Alton Jones’s book, you might just make a gift of the book itself. Alton Brown’s Gear for Your Kitchen is actually a fun read, as it gives Mr. Brown’s quirky, slightly snarky sense of humor free rein. Lots of good, practical information about which tools work and which don’t, small bites of culinary history and manufacturing history, and the occasional recipe. ($19.67 in hardcover from amazon.com, $16.11 in paperback)


    Real Food

    Who spends crazy money on special salt and pepper? I do. And I recognize that not many people will buy these sorts of ingredients for themselves. But if you got them as a gift,... Well, let’s just say that there’s something exciting about sprinkling an exotic ingredient into your food. Here are three of the Kitchen Goddess’s favorites:


    ■ Wynad Peppercorns – 

    Wynad peppercorns are grown using organic methods in the Wynad district of Kerala, India, an area known for the some of the best peppercorns in the world.  If you can manage a side-by-side comparison, you’ll notice that these peppercorns are significantly larger than your standard grocery peppercorns. That’s because they are left on the vine to fully ripen and turn red, before being hand-harvested and sun-dried. Most peppercorns are harvested when green, so Wynad berries are larger and spicier because of this extended ripening time. The fragrance is rich and floral with a mounting full heat. The package is vacuum-sealed to preserve flavor and aroma. (75 grams are $16.99 from amazon.com)


    ■ Amabito No Moshio (Seaweed Salt) ($14.00 on amazon.com) – 

    If you have ever watched the Salt segment from the Netflix series based on Samin Nosrat’s best seller, Salt Fat Acid Heat, you will likely find yourself mesmerized by the author’s journey to Japan, where she explores the ancient and laborious hands-on method of harvesting this sea salt, from seaweed. According to the company’s website (oishisojapan.com), “Amabito no Moshio is made using the best local ingredients and a thoughtful process combining old and new methods. The seawater comes from Kenmin no Hama Beach next to the salt house. Facing out to a broad open expanse of the Seto Inland Sea, the beach is one of the purest sources of the sea's famously rich brine.” 

    If Samin Nosrat and the reviewers on amazon are to be believed, the seaweed imparts a big umami hit, and lots of minerals. The grain is fairly small, and because there’s a moistness to it, it’s better used from a salt server like the one listed earlier in this post. 

    The Kitchen Goddess will confess that she has not yet opened hers, having fallen in love with the darling linen bag it comes in, that just radiates “special.” And she spends a lot of time saying, “Amabito No Moshio,” in case she ever gets to Japan. Whatever. Amazon reviewers claim that it’s fabulous on all sorts of foods, but especially cooked fish and sushi. Having watched the Netflix segment, I believe them.


    ■ Truffle & Salt by Casina Rossa (3.5 ounces for $20.95 on amazon.com, although I got mine at Murray’s Cheeses in NYC) --

    Yes, it’s expensive for such a small jar, but you don’t put it on everything and you don’t need a lot.  The heady, aromatic blend of Italian black truffle and sea salt is amazing on many pasta dishes, and anything with mushrooms or anything to which you might add mushrooms. I have kept mine well closed and in the dark, and the flavor has lasted two years. Amazon reviewers say it’s the most concentrated of the truffle salts they’ve tasted, using words like “transformative,” “divine,” and “addictive.” Would the KG lie to you?

    * * *

    While you are shopping, you might also consider the enormous number of people who are suffering – from a lack of food, housing, warm clothing... I’m especially fond of Feed America, the Central Texas Food Bank, and José Andrés’s World Central Kitchen. But there are so many others doing good work, and all could use your help.


    And a happy and healthy holiday season to you all!


    Thursday, November 18, 2021

    Not Your Mother’s Chicken Soup

    What’s cooking? Asian Chicken Soup with Lettuce, Rice, & Ginger


    This is the week when you really don’t want to have to work at putting food on the table. Between the menu planning and the ordering and the shopping and the decisions on how to decorate the table, there’s not really much energy left for the meals leading up to Turkey Day. But we all have to eat, even on those other days.

    Ta-da! Kitchen Goddess to the rescue. Today’s recipe relies on the simplest of ingredients, tastes amazing, and comes together in less than 30 minutes, including the prep work. Really. Would the KG lie to you?

    The back story started with a recipe hunt – something I do way too often. Frankly, any random occurrence can send me off wandering around the internet, looking up food. This time, it was for tempura green beans. I’d had a marvelous plate of them at a restaurant, and as I thought about them a couple of days later in my kitchen, I turned instinctively to my iPad, where I cruised the web for a good half hour to find a way to cook them. I’m still looking for one that doesn’t involve a large of amount of boiling oil, and I’ll let you know when I find one.

    But while I was looking, I noticed a tiny window down in a corner of my screen. Some chef was throwing a bunch of ingredients into a pot, and it looked really good, but there was no sound because I wasn’t really on that page looking for what that chef was making.

    Just as I went in for a closer look, the video changed, and I found myself watching a YouTube of Colin Josts’s best moments on Saturday Night Live. Now I think Colin Jost is hilarious, but I experienced a mild panic because I didn’t know where that first clip came from. Grrrr... 

    Several frenetic back arrows and google searches later, I did find that clip, because – and you’ll love this – I recognized the chef! The dish was a chicken soup, using ingredients I had on hand, so I made it. And ate the whole thing myself. Then I made it again and served it to my hubby, who turned to me mid-bowl and said, “This is delicious! What is it?”

    I’ve now made it several more times, finally managing to take photos in the process, because we normally scarf it down so fast there’s nothing left to point the camera at.

    So..., chicken soup, eh? You are probably asking yourself what could possibly make chicken soup new and exciting. Well, unless your mother is (or was) Asian, this chicken soup will be a completely new experience – and maybe even then.

    The chef was J. Kenji López-Alt, author of The Food Lab and the principal food scientist for the Serious Eats (seriouseats.com) website. He’s the son of a German-American father and a Japanese mother, and the López is from his wife, who is Colombian. So he’s got serious multinational food creds. This soup is decidedly Asian in flavor.

    What I love most about it is that it uses a handful of ingredients that often sit in my fridge until I decide it’s too late: leftover rice (mostly from Chinese takeout), leftover rotisserie chicken, and an extra head of lettuce from one of those bags with three small heads of romaine. That will no longer be a problem, because I’ll just make the soup.

    The rice here is a brown/white combo, and note the jar of Better Than Bouillon, my new fave.

    Almost forgot 
    about the fish sauce
    Beyond those three, there’s really just the ginger and Thai fish sauce, both of which I try to always have on hand. (The Kitchen Goddess keeps a ziplock bag of ginger root in the freezer.) And I’m just hoping you have Thai fish sauce in the fridge. If not, you should get some, because it’s very umami and lasts forever.

    Anyway, this recipe requires dedicated mis en place, because once you have the ingredients together, the “cooking” part takes literally less than 10 minutes.


    So about the lettuce. I know, it was a surprise even to the Kitchen Goddess that you can cook lettuce and end up with something good. As it happens, cooked lettuce has long been part of French and Chinese cuisine. And despite its mild flavor, the lettuce in this soup is sort of the secret ingredient, texture-wise. If you cook it just until the leaves wilt, the lightly cooked stalks still have a bit of crunch that’s quite fresh-tasting and delicious.

    Also, if you have any soup left over for the next day, just heat it and throw in more lettuce. The flavor doesn’t really change from the additional lettuce, and you revive that light crunch as well.


    Asian Chicken Soup with Lettuce, Rice and Ginger

    Adapted from J. Kenji López-Alt at seriouseats.com


    This recipe is a doubling of the original, because I am always happy to have some in the fridge, so I make extra. You can make half if you’d like, but in the end, you’ll wish you’d made more.

    Serves 5-6.

    Ingredients

    2 quarts good chicken stock (or use Better Than Bouillon with water)
    2 mounded cups rotisserie chicken (or other leftover chicken), without skin, cut in 1-inch dice
    1½ -2 cups leftover rice (white or brown, like Chinese takeout, or whatever plain rice is in the fridge)
    6 slices raw ginger, ⅛-inch thick (peeled or not – I prefer peeled)
    4 teaspoons Thai fish sauce
    ½ teaspoon ground white pepper*
    Kosher salt to taste
    1 small head romaine lettuce, sliced 1 inch-wide


    Garnishes:
    7-8 scallions, white and light green parts, thinly sliced
    ½ cup (loosely packed) cilantro, chopped

    *Kitchen Goddess note on white pepper vs black: In a test run by Cook’s Illustrated, they made two pots of a soup that traditionally calls for white pepper, using a teaspoon of black pepper in one batch and a teaspoon of white pepper in the other. Tasters reported that the one with black pepper was more aromatic and had more spicy heat, but they preferred the soup with white pepper for its floral, earthy flavor and greater complexity. So you can use either in this soup, but the taste may not be quite the same.


    Directions
    In a large saucepan, heat the stock with the chicken, the rice, the ginger, and the fish sauce, until it comes to a boil. Reduce heat to a simmer for about 5 minutes.

    Add the lettuce. Let the soup simmer until the lettuce leaves are wilted. Add salt to taste. (Depending on the saltiness of your broth, it’ll need a lot, a little, or none, so taste carefully.)


    Add the garnishes. If you like the flavor of raw scallions, serve the soup in a cup or bowl and sprinkle the scallions and cilantro on top. The Kitchen Goddess prefers her scallion flavor to be a little milder, so she adds her scallions to the soup while it is still simmering, then immediately turns off the heat. Serve the soup in a cup or bowl and sprinkle the cilantro on top.


    One final note: If you are serving the soup to guests, you may want to remove the ginger slices, as they don’t really taste good. For yourself or your family, just tell them to pick the ginger out.

    Now, how easy was that?!